11033 字
14 分钟
20 次
- 2026-04-13
1 前言
前几天我在 b 站,看到了一个关于 Web 后端框架对比的视频,发现了一个集开发效率、性能、低资源占用的一个后端技术,也就是 ASP.NET,是由 C# 编写的。
然后我去官网稍微看了下教程,没想到 C# 的很多语法和 Java 完全一样,不一样的地方也很容易理解。
为了减轻我的博客的资源占用负担,我打算将博客从 SpringBoot 迁移到 ASP.NET 中。所以来记录一下我初次学习和使用 ASP.NET 的过程。
2 安装
C # 环境安装很简单,在官网下载安装包: 下载 .NET (Linux、macOS 和 Windows) | .NET 然后双击安装即可
然后打开终端,输入命令
shelldotnet --version
如果出现版本信息,那就说明安装好了。
接下来就是在 VS Code 中配置开发环境。
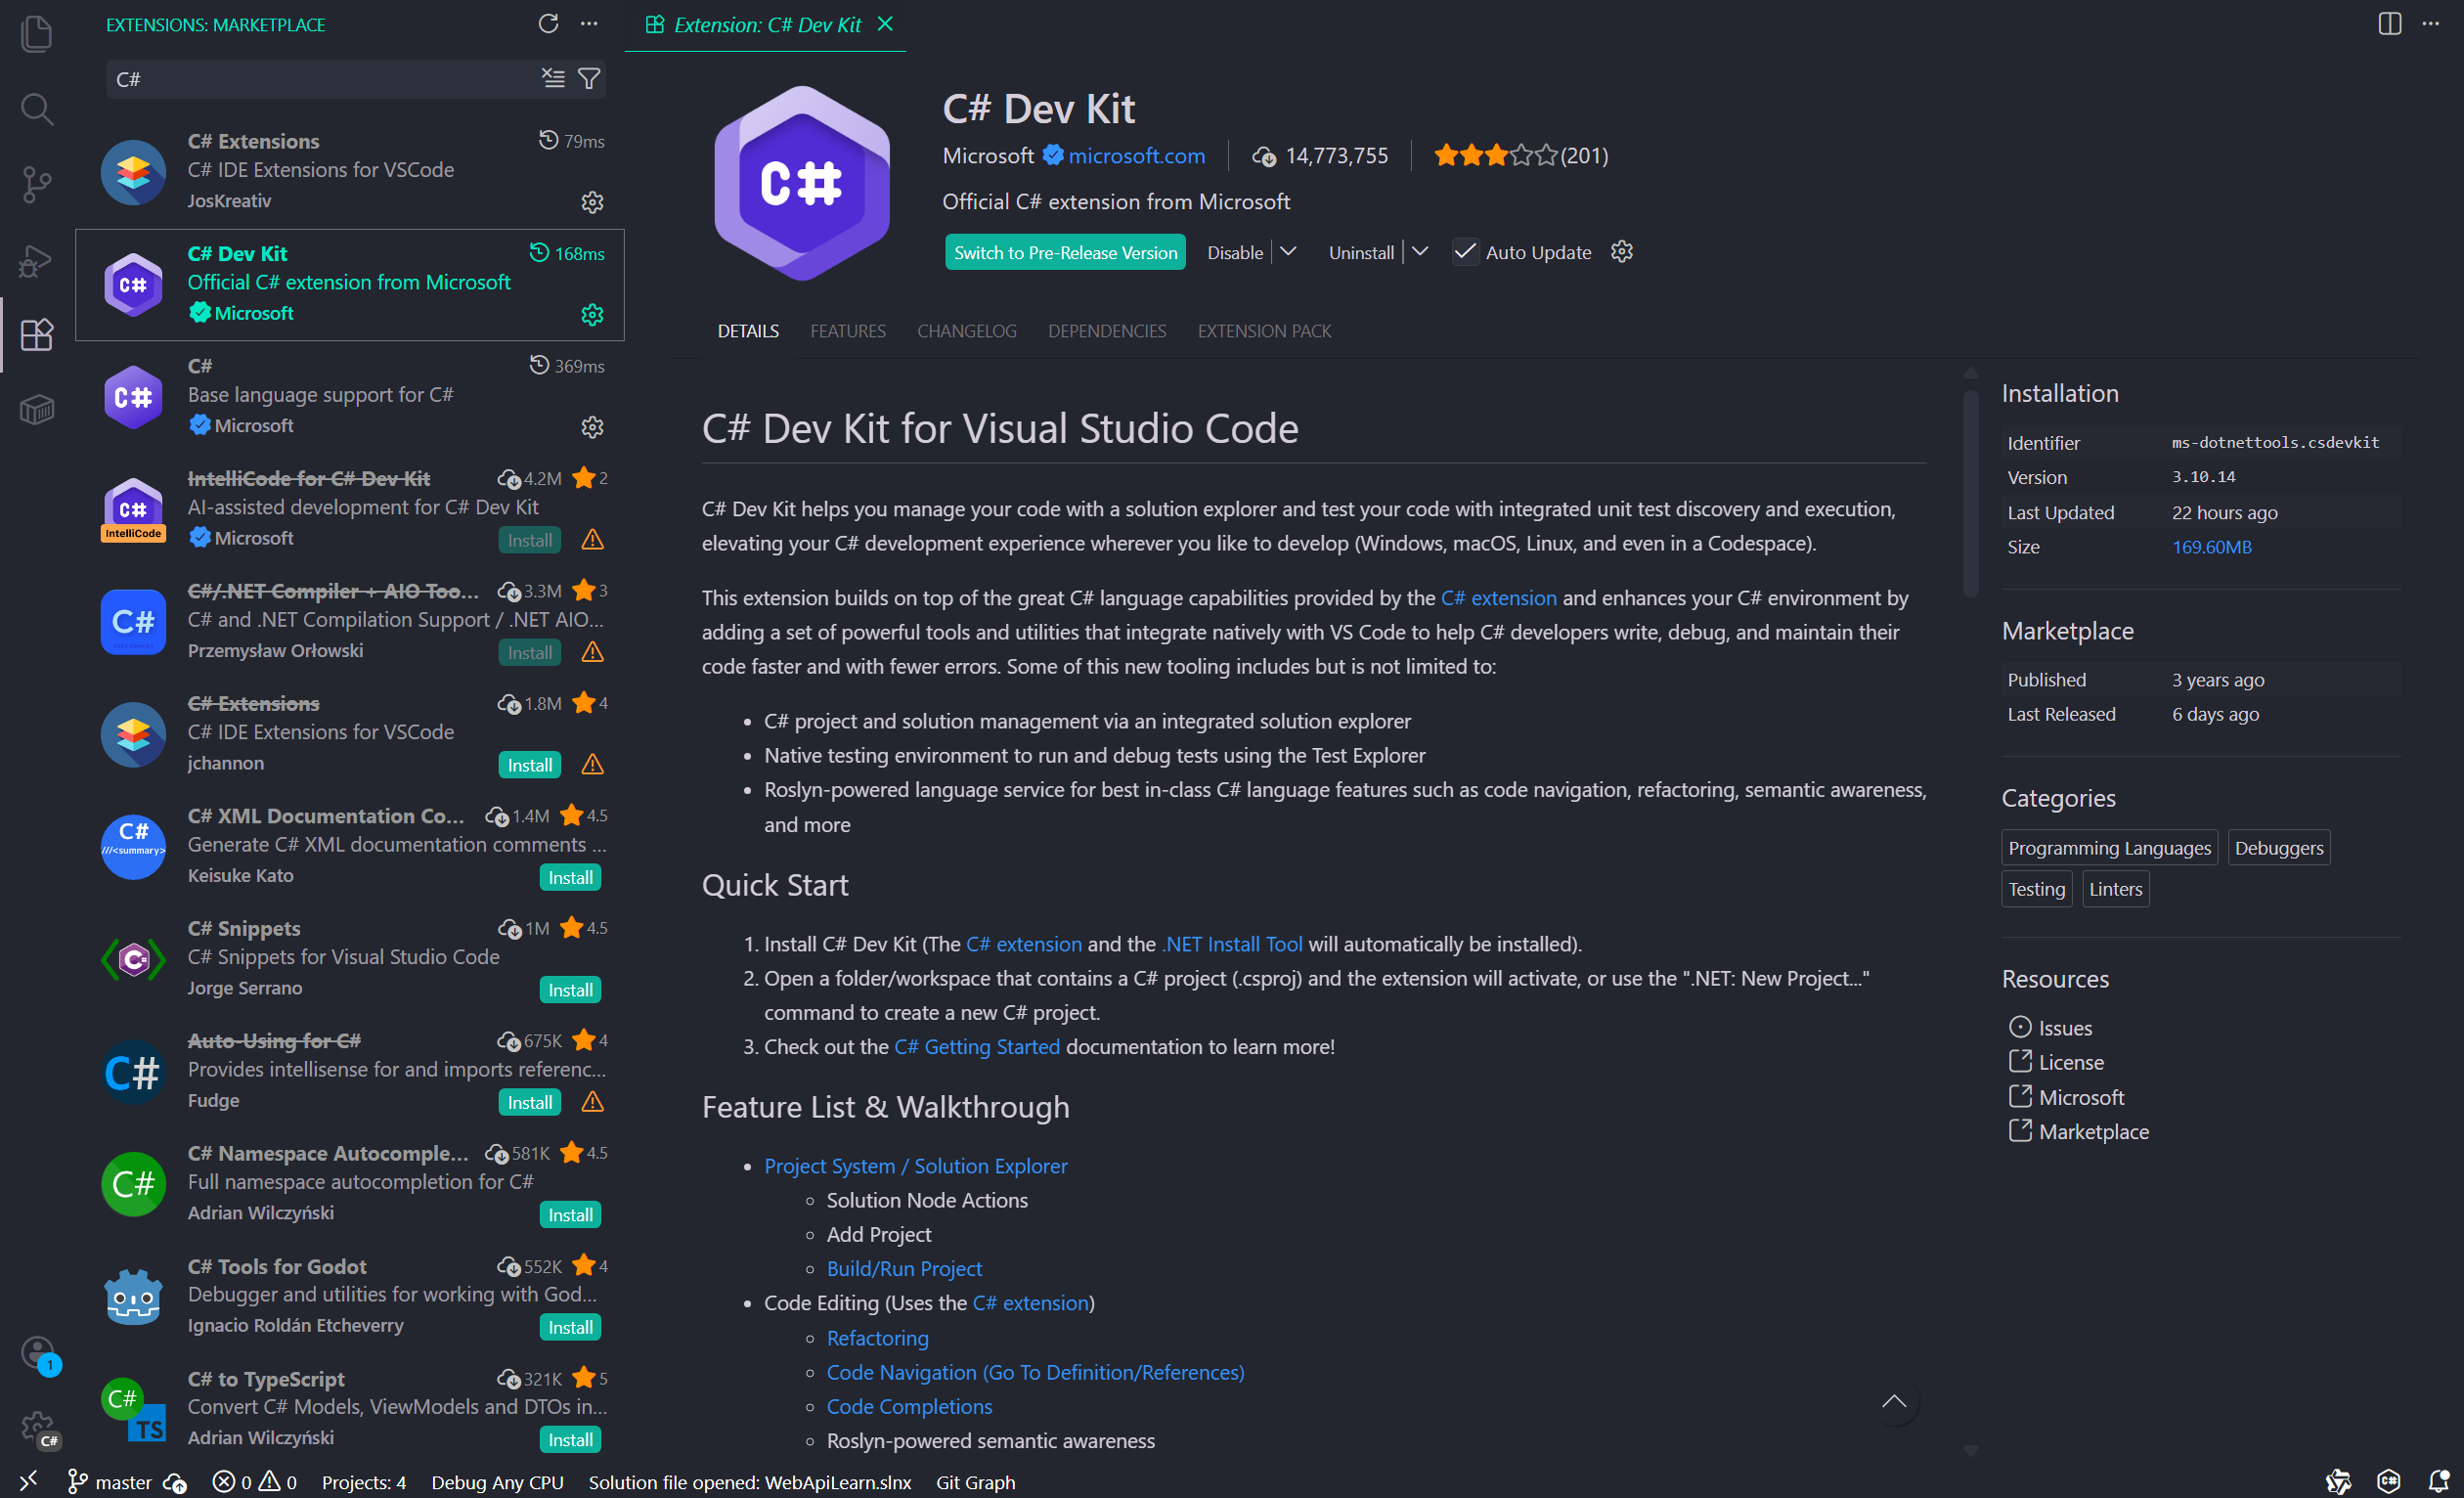
首先在VS Code 扩展中,搜索 C#,找到 C# Dev Kit,点击安装,安装完成后,开发环境就配置好了,非常方便。只能说 C# 和 VS Code 不愧都是微软的产品,相互集成真方便。
3 项目框架搭建
3.1 项目结构介绍
我在 skill.sh 中找到了一个 dotNET Web 后端框架的项目模板 Skill: dotnet-backend-patterns by wshobson/agents
我在 codex 让 gpt 按照这个 skill 搭建出项目,然后编写一个简单的关于用户表的 CURD 代码,并且让它成功跑起来。
搭建完成后,我就按照这个项目来学习。PS:有 AI 学习起来是真方便啊。
项目结构大概是这样的:
txtsrc/
├── Domain/                    # 领域层:核心业务逻辑,零外部依赖
│   ├── Entities/              # 领域实体(如User、Order),包含业务规则和行为
│   ├── Interfaces/            # 领域层接口定义(如IRepository),由外层实现
│   ├── Exceptions/            # 领域特定异常类
│   └── ValueObjects/          # 值对象(如Money、Address),不可变,属性相等判断
├── Application/               # 应用层:编排业务用例,协调领域对象
│   ├── Services/              # 应用服务,实现具体业务用例流程
│   ├── DTOs/                  # 数据传输对象,定义API输入/输出结构
│   ├── Validators/            # 输入验证逻辑(如FluentValidation规则)
│   └── Interfaces/            # 应用层接口定义(如IEmailService)
├── Infrastructure/            # 基础设施层:技术实现细节
│   ├── Data/                  # 数据访问实现(EF Core、Repository具体实现)
│   ├── Caching/               # 缓存实现(Redis、内存缓存等)
│   ├── External/              # 外部服务集成(支付、邮件、第三方API)
│   └── DependencyInjection/   # DI容器配置、服务注册扩展方法
├── Api/                       # 表现层:HTTP接口适配,最外层技术细节
│   ├── Controllers/           # API控制器,接收HTTP请求,调用应用层
│   ├── Middleware/            # HTTP管道中间件(认证、日志、异常处理)
│   ├── Filters/               # MVC过滤器(模型验证、异常转换)
│   └── Program.cs             # 应用入口,配置中间件和服务
└── Project.slnx               # 解决方案文件
- 用 SpringBoot 的思路理解,Domain 类比 Model 层、Application 类比 Service 层、Infrastructure 类比 Repository / Mapper 层、Api 类比 Controller 层。
- ValueObjects 是一个新概念,我具体不太理解是什么意思。类似于 MongoDB 的那种嵌入文档。它是复杂类型,但不是真正的实体类,可以与其他类组合,可以有自己的逻辑方法。
上述的注解是 AI 给的,AI 还说,这是一个叫 洋葱架构(Onion Architecture) / 整洁架构(Clean Architecture) 的项目结构,介绍文章:Clean Architecture in ASP.NET Core - NDepend Blog Clean Architecture 的核心思想可以用一张同心圆图来理解:
txt┌─────────────────┐ │ Api/ │ ← 最外层:框架、UI、外部接口 │ Controllers │ │ Middleware │ └────────┬────────┘ │ 依赖向内 ┌────────▼────────┐ │ Application/ │ ← 应用层:用例、流程编排 │ Services │ │ DTOs │ └────────┬────────┘ │ 依赖向内 ┌────────▼────────┐ │ Domain/ │ ← 核心层:业务规则、领域模型 │ Entities │ 不依赖任何外部框架! │ ValueObjects │ └─────────────────┘
关键原则:依赖方向只能向内,Domain 层不依赖任何外部框架、数据库或 UI 技术。它通过严格的向内依赖规则,将技术细节(数据库、框架、UI)与业务核心解耦。这种架构特别适合长期维护的企业级应用。
这种项目搭建思维有点像 SpringBoot 的分层思维,理解起来比较容易。
3.2 项目搭建
搭建的话,只需要按照如下的命令流程,执行相关的命令就行
shell# 进入工作目录
cd "./Project"

# 1 创建解决方案
dotnet new sln -n AspWebApiDemo

# 2 创建 src 目录
mkdir src

# 3 创建 4 个项目
dotnet new webapi -n Api -o src/Api --use-controllers --no-openapi # webapi 项目
dotnet new classlib -n Domain -o src/Domain # 类库
dotnet new classlib -n Application -o src/Application # 类库
dotnet new classlib -n Infrastructure -o src/Infrastructure # 类库

# 4 将项目加入解决方案
dotnet sln AspWebApiDemo.slnx add src/Api/Api.csproj src/Domain/Domain.csproj src/Application/Application.csproj src/Infrastructure/Infrastructure.csproj

# 5 配置项目之间的引用关系
# Application -> Domain
dotnet add src/Application/Application.csproj reference src/Domain/Domain.csproj

# Infrastructure -> Domain
dotnet add src/Infrastructure/Infrastructure.csproj reference src/Domain/Domain.csproj

# Api -> Application + Infrastructure
dotnet add src/Api/Api.csproj reference src/Application/Application.csproj src/Infrastructure/Infrastructure.csproj

# 6 还原、构建
dotnet restore src/Api/Api.csproj
dotnet build src/Api/Api.csproj

# 7 运行
dotnet run --project src/Api/Api.csproj
解决方案,是指 Solution ,是 VS 用来组织和管理一个或者多个项目的容器,基于 slnx 文件 :
xml<Solution>
  <Folder Name="/src/">
    <Project Path="src/Api/Api.csproj" />
    <Project Path="src/Application/Application.csproj" />
    <Project Path="src/Domain/Domain.csproj" />
    <Project Path="src/Infrastructure/Infrastructure.csproj" />
  </Folder>
</Solution>
csproj,是指 Project,是具体的项目的配置文件。
xml<Project Sdk="Microsoft.NET.Sdk">

  <PropertyGroup>
    <TargetFramework>net10.0</TargetFramework>
    <ImplicitUsings>enable</ImplicitUsings>
    <Nullable>enable</Nullable>
  </PropertyGroup>

</Project>
总结来说,解决方案类比 Maven,slnx 文件类比 Maven 的父级 pom.xml 文件,负责组织子模块(dotNET 是项目),csproj 类比具体模块的 pom.xml 文件,定义具体模块(dotNET 是项目)的配置。
restore 还原,指的是从远程仓库下载项目定义的 Nuget 包。例如:
xml<Project Sdk="Microsoft.NET.Sdk">

  <ItemGroup>
    <ProjectReference Include="..\Domain\Domain.csproj" />
  </ItemGroup>

  <ItemGroup>
    <PackageReference Include="Microsoft.EntityFrameworkCore" />
    <PackageReference Include="Npgsql.EntityFrameworkCore.PostgreSQL" />
  </ItemGroup>

  <PropertyGroup>
    <TargetFramework>net10.0</TargetFramework>
    <ImplicitUsings>enable</ImplicitUsings>
    <Nullable>enable</Nullable>
  </PropertyGroup>

</Project>
这里定义了 Microsoft.EntityFrameworkCore 和 Npgsql.EntityFrameworkCore.PostgreSQL 两个包,那执行 dotnet restore 时,就会从远程仓库(Nuget 仓库)下载这些包到指定位置。很像 Maven 的库下载。
Build 构建,就不用说了,就是将项目编译并打包成可执行文件。 执行 Build 后,项目文件夹(指的是具体的子项目),会有 bin 、 obj 这两个文件夹,这两个文件夹类比的是 Maven 项目的 target 文件夹。
bin 文件夹存放的是编译后的最终产物,可以直接用于运行和部署;obj 文件夹存放的是编译时的中间产物、临时文件,用于支持代码提示等等。
从上面可以看出,虽然很想 Maven 但是总感觉缺了什么。如果你实际运行了 dotnet restore 和 dotnet build ,你就会明白,对于项目管理来说,现在少了两个关键的问题:依赖库下载在哪?依赖版本怎么统一?
很巧的是,slnx 文件不像 Maven 的 pom.xml 文件,slnx 更加注重于项目的组织,所以不能在这统一定义依赖的版本。
我们需要在项目的根目录,或者说是 slnx 同级目录下,创建两个文件:
第一个,nuget.config 文件,用于定义依赖库的下载位置。
xml<?xml version="1.0" encoding="utf-8"?>
<configuration>
  <config>
    <add key="globalPackagesFolder" value=".nuget/packages" />
  </config>
</configuration>
我定义在了本项目的 .nuget/packages 文件夹中。其实应该定义在统一的位置,不然每个项目都要下一遍(我被 Python 荼毒了,悲)。
第二个,Directory.Packages.props 文件夹,用于统一依赖版本:
xml<Project>
  <PropertyGroup>
    <ManagePackageVersionsCentrally>true</ManagePackageVersionsCentrally>
  </PropertyGroup>

  <ItemGroup>
    <PackageVersion Include="Microsoft.EntityFrameworkCore" Version="10.0.5" />
    <PackageVersion Include="Microsoft.EntityFrameworkCore.Relational" Version="10.0.5" />
    <PackageVersion Include="Microsoft.EntityFrameworkCore.SqlServer" Version="10.0.5" />
    <PackageVersion Include="Microsoft.EntityFrameworkCore.Design" Version="10.0.5" />
    <PackageVersion Include="Microsoft.EntityFrameworkCore.Tools" Version="10.0.5" />
    <PackageVersion Include="Npgsql.EntityFrameworkCore.PostgreSQL" Version="10.0.1" />
  </ItemGroup>
</Project>
Microsoft.EntityFrameworkCore系列,是 .NET 的 ORM 框架库。Npgsql.EntityFrameworkCore.PostgreSQL是 .NET 中 EntityFrameworkCore (EF Core) 用于 PostgreSQL 数据库提供程序(包含 Npgsql 提供的驱动和 ORM 适配)。
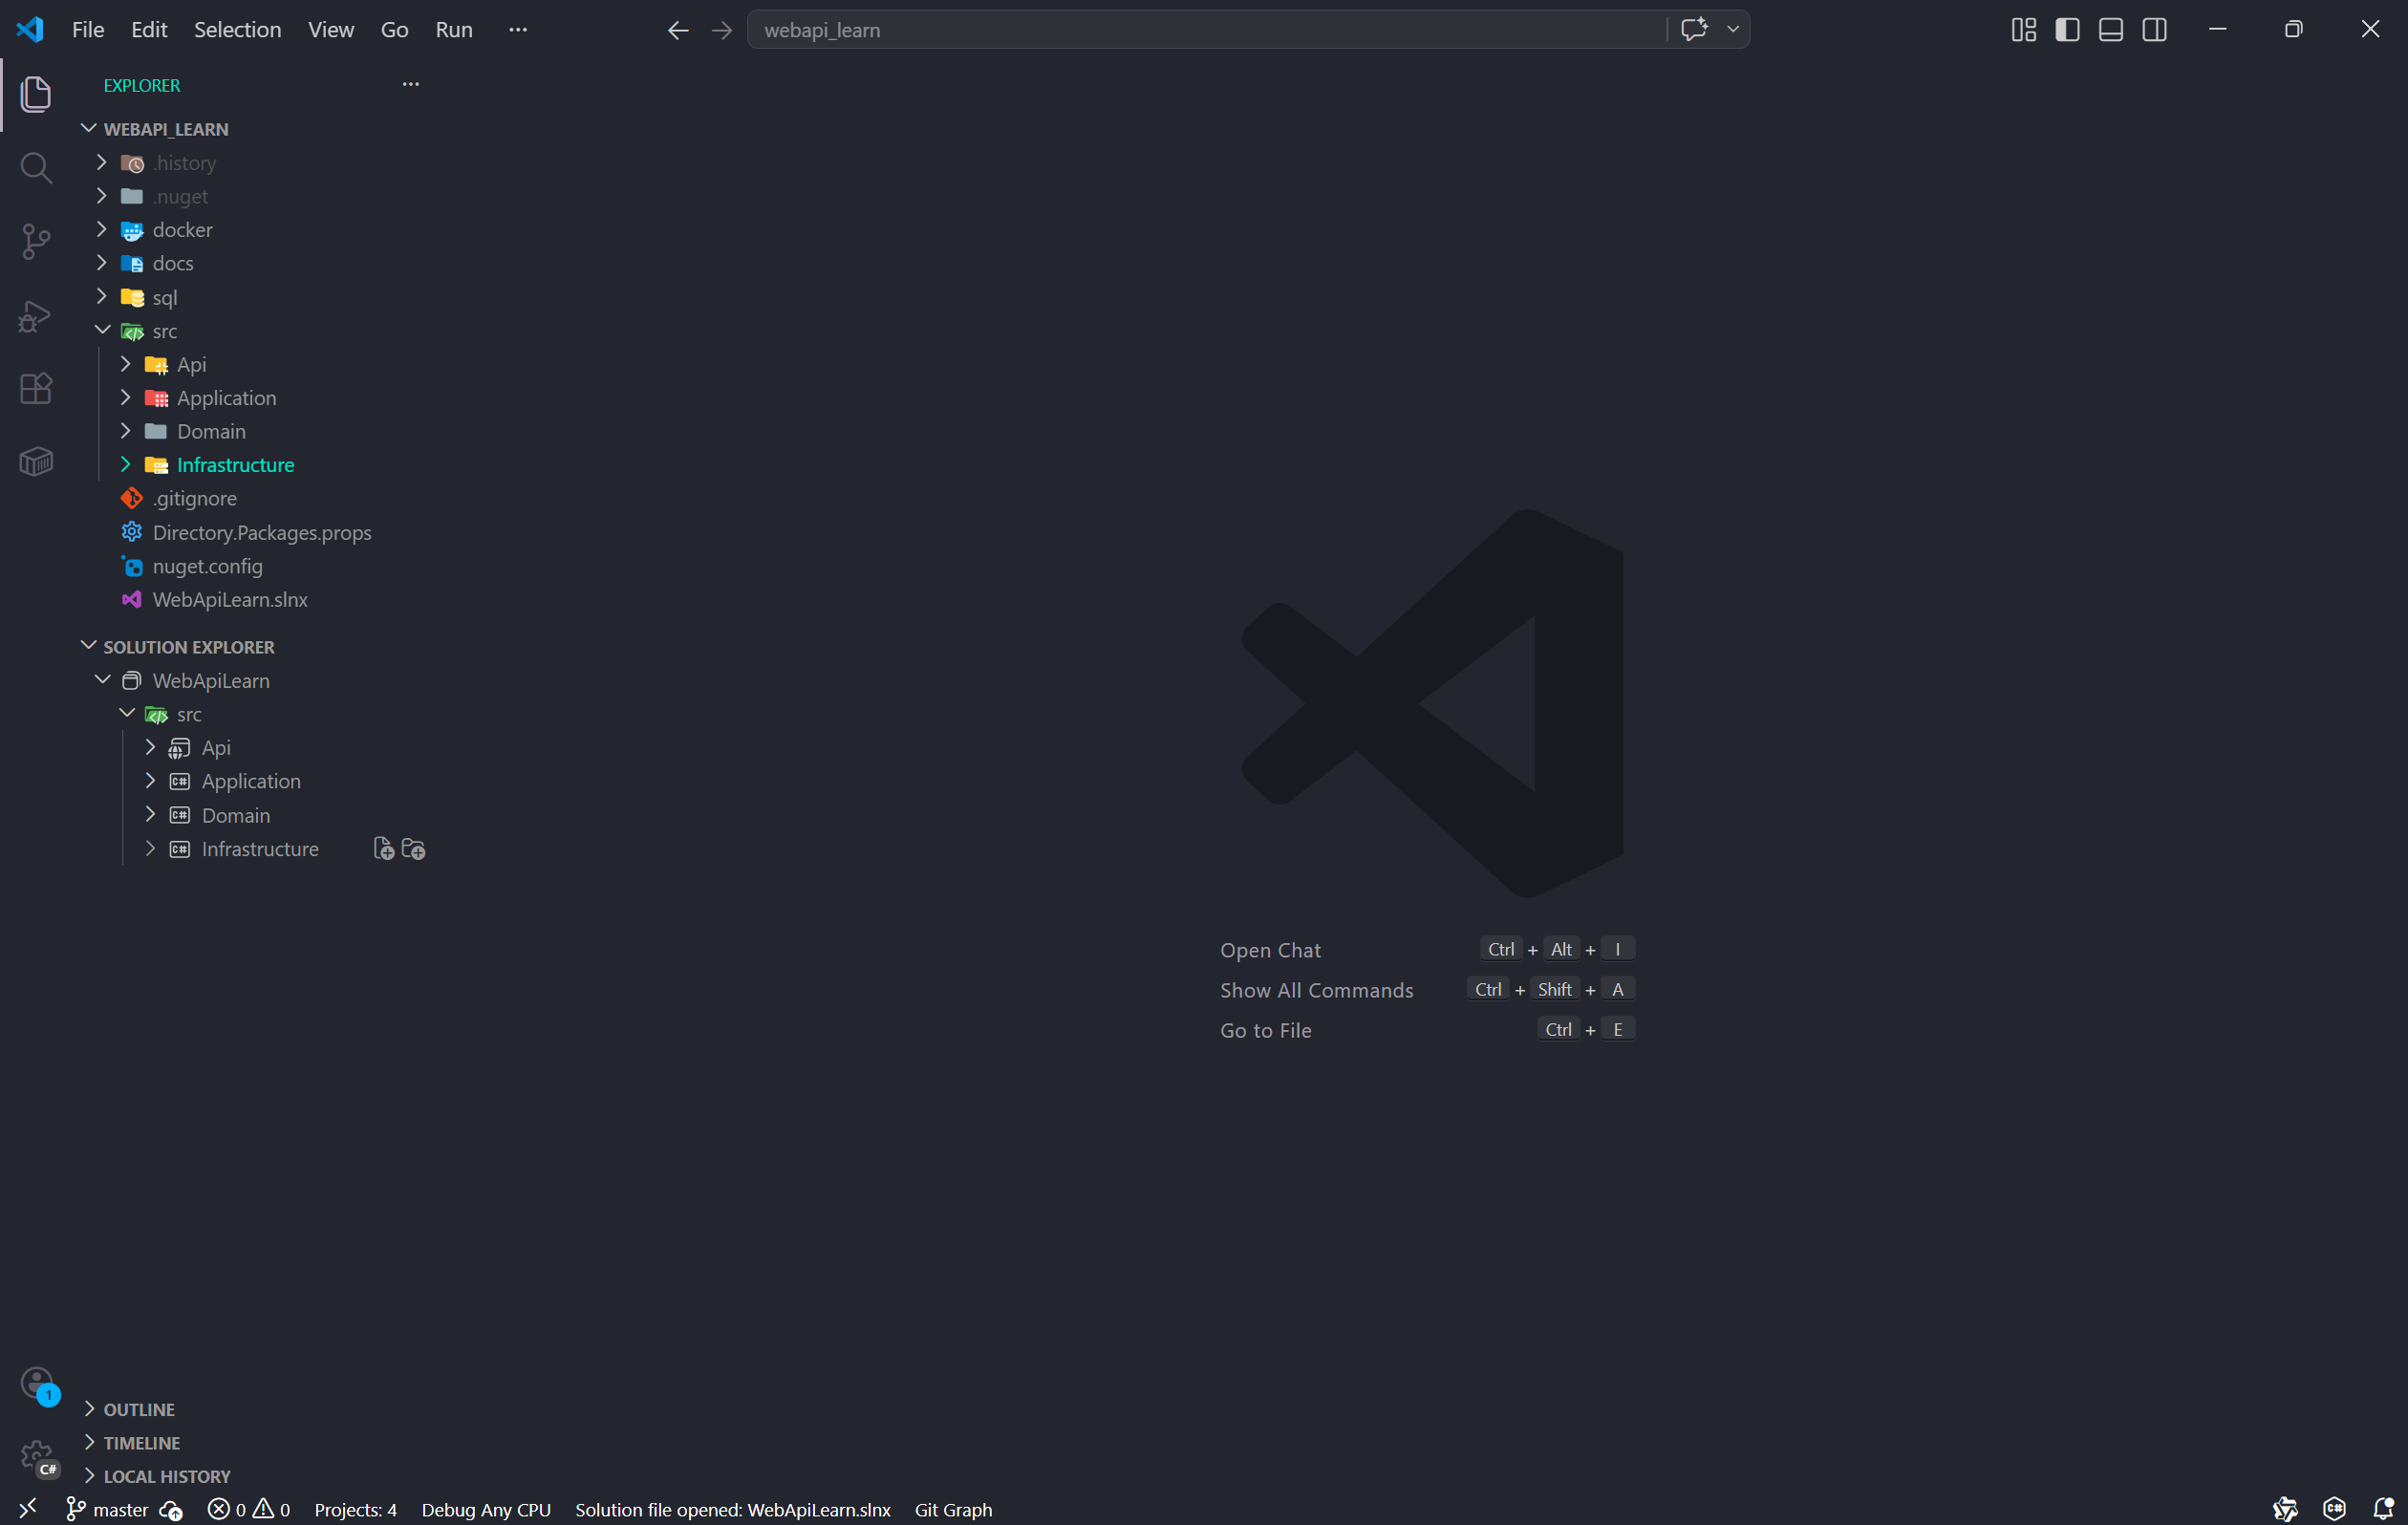
当前项目结构:
4 业务逻辑编写
4.1 前置处理
我们写一个简单的用户管理模块,用户表包含:ID、用户名、密码、角色、状态、创建时间、更新时间,业务逻辑就是简单的 CURD。
由于 Skill 要求项目必须使用异步来编写实际业务逻辑,我们入乡随俗,也统一用异步的方式编写。
首先,当然是安装库了,在 Api 模块的 Api.csproj 文件和 Infrastructure 模块的 Infrastructure.csproj 文件中,定义需要使用库。
Api.csproj:
xml<Project Sdk="Microsoft.NET.Sdk.Web">

  <ItemGroup>
    <ProjectReference Include="..\Application\Application.csproj" />
    <ProjectReference Include="..\Infrastructure\Infrastructure.csproj" />
    <PackageReference Include="Microsoft.EntityFrameworkCore.Design">
      <PrivateAssets>all</PrivateAssets>
      <IncludeAssets>runtime; build; native; contentfiles; analyzers; buildtransitive</IncludeAssets>
    </PackageReference>
  </ItemGroup>

  <PropertyGroup>
    <TargetFramework>net10.0</TargetFramework>
    <Nullable>enable</Nullable>
    <ImplicitUsings>enable</ImplicitUsings>
  </PropertyGroup>

</Project>
Infrastructure.csproj :
xml<Project Sdk="Microsoft.NET.Sdk">

  <ItemGroup>
    <ProjectReference Include="..\Domain\Domain.csproj" />
  </ItemGroup>

  <ItemGroup>
    <PackageReference Include="Microsoft.EntityFrameworkCore" />
    <PackageReference Include="Microsoft.EntityFrameworkCore.Design">
      <IncludeAssets>runtime; build; native; contentfiles; analyzers; buildtransitive</IncludeAssets>
      <PrivateAssets>all</PrivateAssets>
    </PackageReference>
    <PackageReference Include="Microsoft.EntityFrameworkCore.SqlServer" />
    <PackageReference Include="Microsoft.EntityFrameworkCore.Tools">
      <IncludeAssets>runtime; build; native; contentfiles; analyzers; buildtransitive</IncludeAssets>
      <PrivateAssets>all</PrivateAssets>
    </PackageReference>
    <PackageReference Include="Npgsql.EntityFrameworkCore.PostgreSQL" />
  </ItemGroup>

  <PropertyGroup>
    <TargetFramework>net10.0</TargetFramework>
    <ImplicitUsings>enable</ImplicitUsings>
    <Nullable>enable</Nullable>
  </PropertyGroup>

</Project>
因为需要连接数据库,所以需要在 Api 模块中的 appsettings.Development.json 中,定义一下连接字符串:
json{
  "Logging": {
    "LogLevel": {
      "Default": "Information",
      "Microsoft.AspNetCore": "Warning"
    }
  },
  "ConnectionStrings": {
    "Default": "Host=127.0.0.1;Port=5432;Database=postgres;Username=webapi_admin;Password=12345678..Postgres%"
  }
}
接下,就是定义实体类和基础设施了。
4.2 基础设施和实体类
在 Domain 项目中,Enums 包,定义如下枚举类:
csusing Domain.Entities;

namespace Domain.Enums;

public enum UserRole
{
    User = 1,
    Admin = 2
}
csnamespace Domain.Enums;

public enum UserStatus
{
    Enabled = 1,
    Disabled = 2,
    Pending = 3
}
创建 Entites 包,定义如下实体类:
csnamespace Domain.Entities;

public class BaseEntity
{
    public Guid Id { get; set;} = Guid.NewGuid();
    public DateTime CreatedAt { get; set; }
    public DateTime UpdatedAt { get; set; }
}
csusing Domain.Enums;

namespace Domain.Entities;

public sealed class User : BaseEntity
{
    public string Username { get; set; } = string.Empty;
    public string Password { get; set; } = string.Empty;
    public UserRole Role { get; set; }
    public UserStatus Status { get; set; }

    public User() { }

    public User(string username, string password, UserRole role, UserStatus status)
    {
        Username = username;
        Password = password;
        Role = role;
        Status = status;

    }
}
{ get; set; }是 C# 的自动实现属性,在编译时会自动生成相关的 get、set 依法。- get、set 前面还可以加权限:public、private 等。
- 构造方法还要自己写,如果能简化就好了。
然后到 Infrastructure 项目,创建 Data 文件夹,定义数据库连接上下文。
csusing Domain.Entities;
using Microsoft.EntityFrameworkCore;

namespace Infrastructure.Data;

public class AppDbContext : DbContext
{
    public AppDbContext(DbContextOptions<AppDbContext> options) : base(options){ }
    public DbSet<User> Users => Set<User>();
}
- 定义这个类的目的是,用于读取前面定义的连接字符串,用于连接数据库,并且提供 SQL 翻译、事务、并发控制等功能,就是数据库连接配置类。
public DbSet<User> Users => Set<User>();定义这个成员变量的目的是提供数据访问的入口,用于操作这个数据表。
4.3 Repository 层和 Service 层
然后在 Infrastructure 项目中,创建 Interfaces 目录,创建 IUserRepository
csusing Domain.Entities;

namespace Domain.Interfaces.Repository;

public interface IUserRepository
{
    Task<User?> GetByIdAsync(Guid id, CancellationToken ct = default);
    Task<IReadOnlyList<User>> GetAllAsync(CancellationToken ct = default);
    Task AddAsync(User user, CancellationToken ct = default);
    Task UpdateAsync(User user, CancellationToken ct = default);
    Task DeleteAsync(User user, CancellationToken ct = default);
}
- Task 类似 Future。在实际实现方法时,需要使用 async 、 await
- CancellationToken 取消令牌,用于支持请求取消,如果用户中断请求,会立即释放资源,停止执行。
- IReadOnlyList 只读集合,只读保护,确保数据安全。
- 这三个均是 .NET 异步编程的实践。
继续创建 Repository 目录,创建 UserRepository 类
csusing Domain.Entities;
using Domain.Interfaces.Repository;
using Infrastructure.Data;
using Microsoft.EntityFrameworkCore;

namespace Infrastructure.Repository;

public class UserRepository : IUserRepository
{
    private readonly AppDbContext _db;
    public UserRepository(AppDbContext db)
    {
        _db = db;
    }


    public async Task AddAsync(User user, CancellationToken ct = default)
    {
        await _db.Users.AddAsync(user, ct);
        await _db.SaveChangesAsync(ct);
    }

    public async Task UpdateAsync(User user, CancellationToken ct = default)
    {
        _db.Users.Update(user);
        await _db.SaveChangesAsync(ct);
    }

    public async Task DeleteAsync(User user, CancellationToken ct = default)
    {
        _db.Users.Remove(user);
        await _db.SaveChangesAsync(ct);
    }

    public async Task<IReadOnlyList<User>> GetAllAsync(CancellationToken ct = default)
    {
        return await _db.Users.AsNoTracking().OrderByDescending(x => x.CreatedAt).ToListAsync(ct);
    }

    public Task<User?> GetByIdAsync(Guid id, CancellationToken ct = default)
    {
        return _db.Users.FirstOrDefaultAsync(x => x.Id == id, ct);
    }
}
SaveChangesAsync 方法,是实际执行数据库操作的方法,只有 Insert/Update/Delete 操作需要,是事务控制的核心操作。在执行
SaveChangesAsync前,前面可以写很多 Insert/Update/Delete 操作,这些操作会在最后的SaveChangesAsync一并执行,并且是在同一个事务中执行,确保原子性。
接下来,实现 Service 层,在 Application 项目中,创建 DTOs 目录,添加 UserDtos 相关类:
csusing System.ComponentModel.DataAnnotations;
using Domain.Enums;

namespace Application.DTOs;

public sealed record CreateUserRequest
{
    [Required]
    [StringLength(32, MinimumLength = 3)]
    public string Username { get; init; } = string.Empty;

    [Required]
    [StringLength(256, MinimumLength = 3)]
    public string Password { get; init; } = string.Empty;

    public UserRole Role { get; init; } = UserRole.User;
    public UserStatus Status { get; init; } = UserStatus.Pending;
}


public sealed record UpdateUserRequest
{
    [Required]
    public Guid Id { get; init; }

    [Required]
    [StringLength(32, MinimumLength = 3)]
    public string Username { get; init; } = string.Empty;

    [Required]
    [StringLength(256, MinimumLength = 3)]
    public string Password { get; init; } = string.Empty;

    public UserRole Role { get; init; }
    public UserStatus Status { get; init; }

}
继续创建 Interfaces 目录,添加 IUserService 接口:
csusing Application.DTOs;
using Domain.Entities;

namespace Application.Interfaces;

public interface IUserService
{
    Task<User?> GetByIdAsync(Guid id, CancellationToken ct = default);
    Task<IReadOnlyList<User>> GetAllAsync(CancellationToken ct = default);
    Task AddAsync(CreateUserRequest request, CancellationToken ct = default);
    Task UpdateAsync(UpdateUserRequest request, CancellationToken ct = default);
    Task DeleteAsync(Guid id, CancellationToken ct = default);
}
继续创建 Services 包,添加 UserService 类:
csusing Application.DTOs; using Application.Interfaces; using Domain.Entities; using Domain.Interfaces.Repository; namespace Application.Services; public class UserService : IUserService { private readonly IUserRepository _userRepository; public UserService(IUserRepository userRepository) { _userRepository = userRepository; } public async Task AddAsync(CreateUserRequest request, CancellationToken ct = default) { if (string.IsNullOrWhiteSpace(request.Username)) throw new ArgumentException("Username is required"); if (string.IsNullOrWhiteSpace(request.Password)) throw new ArgumentException("Password is required"); var entity = new User { Id = Guid.NewGuid(), Username = request.Username, Password = request.Password, Role = request.Role, Status = request.Status, CreatedAt = DateTime.UtcNow, UpdatedAt = DateTime.UtcNow }; await _userRepository.AddAsync(entity, ct); } public async Task UpdateAsync(UpdateUserRequest request, CancellationToken ct = default) { var entity = await _userRepository.GetByIdAsync(request.Id, ct); if (entity is null) throw new ArgumentException("User not found"); if (string.IsNullOrWhiteSpace(request.Username)) throw new ArgumentException("Username is required"); if (string.IsNullOrWhiteSpace(request.Password)) throw new ArgumentException("Password is required"); entity.Username = request.Username; entity.Password = request.Password; entity.Role = request.Role; entity.Status = request.Status; entity.UpdatedAt = DateTime.UtcNow; await _userRepository.UpdateAsync(entity, ct); } public async Task DeleteAsync(Guid id, CancellationToken ct = default) { var entity = await _userRepository.GetByIdAsync(id, ct); if (entity is null) throw new ArgumentException("User not found"); await _userRepository.DeleteAsync(entity, ct); } public async Task<IReadOnlyList<User>> GetAllAsync(CancellationToken ct = default) { var entities = await _userRepository.GetAllAsync(ct); return entities.Select(x => new User { Id = x.Id, Username = x.Username, Password = x.Password, Role = x.Role, Status = x.Status, CreatedAt = x.CreatedAt, UpdatedAt = x.UpdatedAt }).ToList(); } public async Task<User?> GetByIdAsync(Guid id, CancellationToken ct = default) { var entity = await _userRepository.GetByIdAsync(id, ct); return entity is null ? null : new User { Id = entity.Id, Username = entity.Username, Password = entity.Password, Role = entity.Role, Status = entity.Status, CreatedAt = entity.CreatedAt, UpdatedAt = entity.UpdatedAt }; } }
- 可以看到,new 一个对象时,后面跟着大括号加上各个属性的赋值语句,这不是 C# 的创建的对象的方式, C# 创建对象的方式和 Java 一样,使用构造函数。这个花括号的语句叫做:对象初始化器语法。类似于 Java 的 Builder 写法,只不过这个对象初始化器语法是 C# 特性。
- 还有一点,就是 .NET 原生只有构造器注入,没有字段注入和 Setter 注入。
4.3 Controller 层与服务注册
然后,就是编写控制器了,在 Api 项目的 Controllers 目录中,添加 UserController 类:
csusing Application.DTOs;
using Application.Interfaces;
using Domain.Entities;
using Microsoft.AspNetCore.Mvc;

namespace Api.Controllers;

[ApiController]
[Route("api/[controller]")]
public class UserController : ControllerBase
{
    private readonly IUserService _userService;
    public UserController(IUserService userService)
    {
        _userService = userService;
    }

    [HttpGet("{id:guid}")]
    public async Task<ActionResult<User>> GetById(Guid id, CancellationToken ct)
    {
        var result = await _userService.GetByIdAsync(id, ct);
        return result is null ? NotFound() : Ok(result);
    }

    [HttpGet]
    public async Task<ActionResult<IReadOnlyList<User>>> GetAll(CancellationToken ct)
    {
        var result = await _userService.GetAllAsync(ct);
        return Ok(result);
    }

    [HttpPost]
    public async Task<ActionResult> Create([FromBody] CreateUserRequest request, CancellationToken ct)
    {
        await _userService.AddAsync(request, ct);
        return Ok();
    }

    [HttpPut]
    public async Task<ActionResult> Update([FromBody] UpdateUserRequest request, CancellationToken ct)
    {
        await _userService.UpdateAsync(request, ct);
        return Ok();
    }

    [HttpDelete("{id:guid}")]
    public async Task<ActionResult> Delete(Guid id, CancellationToken ct)
    {
        await _userService.DeleteAsync(id, ct);
        return Ok();
    }

}
- ApiController、Route、HttpGet,类比 SpringBoot 的 RestController、RequestMapping 和 GetMapping 这些。
- 这种
[xxxxx]的语法是 C# 的特性(Attribute)语法,用于元数据标记,本质其实是调用括号内部的类的构造函数:[HttpGet(xxx)]等价于new HttpGetAttribute(xxx)Ok()、NotFound()是快捷方法,用于生成标准 HTTP 响应。
这样,各个分层的代码就定义完了。但是,还没完,从各个分层的代码中,能看出漏了什么吗?熟悉 SpringBoot 的可能一开始发现不了,因为这个问题其实在 SpringBoot 是理所当然的。
其实问题就是,.NET 没有 Bean 这个概念。所以,之前的代码中只有 DI (依赖注入),而没有注册的过程。
问题也就是这个,没有注册,框架自然无法帮你管理生命周期,以及进行 IoC。
那怎么注册呢?由于当前的项目很简单, 所以我们只需要在主入口中进行注册即可。
在 Api 项目中,找到 Program.cs 文件,这是程序主入口,类似 SpringBoot 的 Application 类,修改这个类,在注释 // Add services to the container. 下方添加代码:
csusing Application.Interfaces;
using Application.Services;
using Domain.Interfaces.Repository;
using Infrastructure.Data;
using Infrastructure.Repository;
using Microsoft.EntityFrameworkCore;

var builder = WebApplication.CreateBuilder(args);

// Add services to the container.

builder.Services.AddControllers();
builder.Services.AddDbContext<AppDbContext>(options =>
{
    options.UseNpgsql(builder.Configuration.GetConnectionString("Default"));
});
builder.Services.AddScoped<IUserRepository, UserRepository>();
builder.Services.AddScoped<IUserService, UserService>();

var app = builder.Build();

// Configure the HTTP request pipeline.

app.UseHttpsRedirection();

app.UseAuthorization();

app.MapControllers();

app.Run();
这样就完成了类的注册,而 .NET 称这个为 Service 服务注册。
和 Spring Bean 的区别其实很明显,熟悉的 Spring 基础的应该明白,Spring 的 Bean 是运行时扫描,通过配置、注解来进行,是动态扫描注册的;而 .NET 是纯代码注册,或者说叫做显式代码注册,编译时直接确定需要注册什么类,不会通过反射扫描注册,而是运行时执行注册代码来注册。
5 运行
接下来,就可以开始运行了,开始之前,需要进行一些准备操作,在这些执行操作时,可以发现 dotnet 的 EF Core 这个框架一个非常厉害的地方。
首先,需要给 dotnet 安装 EF Core 工具:
shelldotnet tool install --global dotnet-ef
然后运行下面的命令:
shell# 创建迁移
dotnet ef migrations add InitUser --project src/Infrastructure/Infrastructure.csproj --startup-project src/Api/Api.csproj

# 更新数据库
dotnet ef database update --project src/Infrastructure/Infrastructure.csproj --startup-project src/Api/Api.csproj
这是这个工具的厉害之处。创建迁移的代码,可以根据你当前项目,也就是在 Infrastructure 中,AppDbContext 配置数据访问入口,也就是前面的
public DbSet<User> Users => Set<User>();自动生成变更脚本,然后在更新数据库操作时,自动将这些变更同步到数据库。 没错,直接将代码中的实体类结构,直接和数据表进行同步!没有表就帮你创建,字段变了就帮你修改。
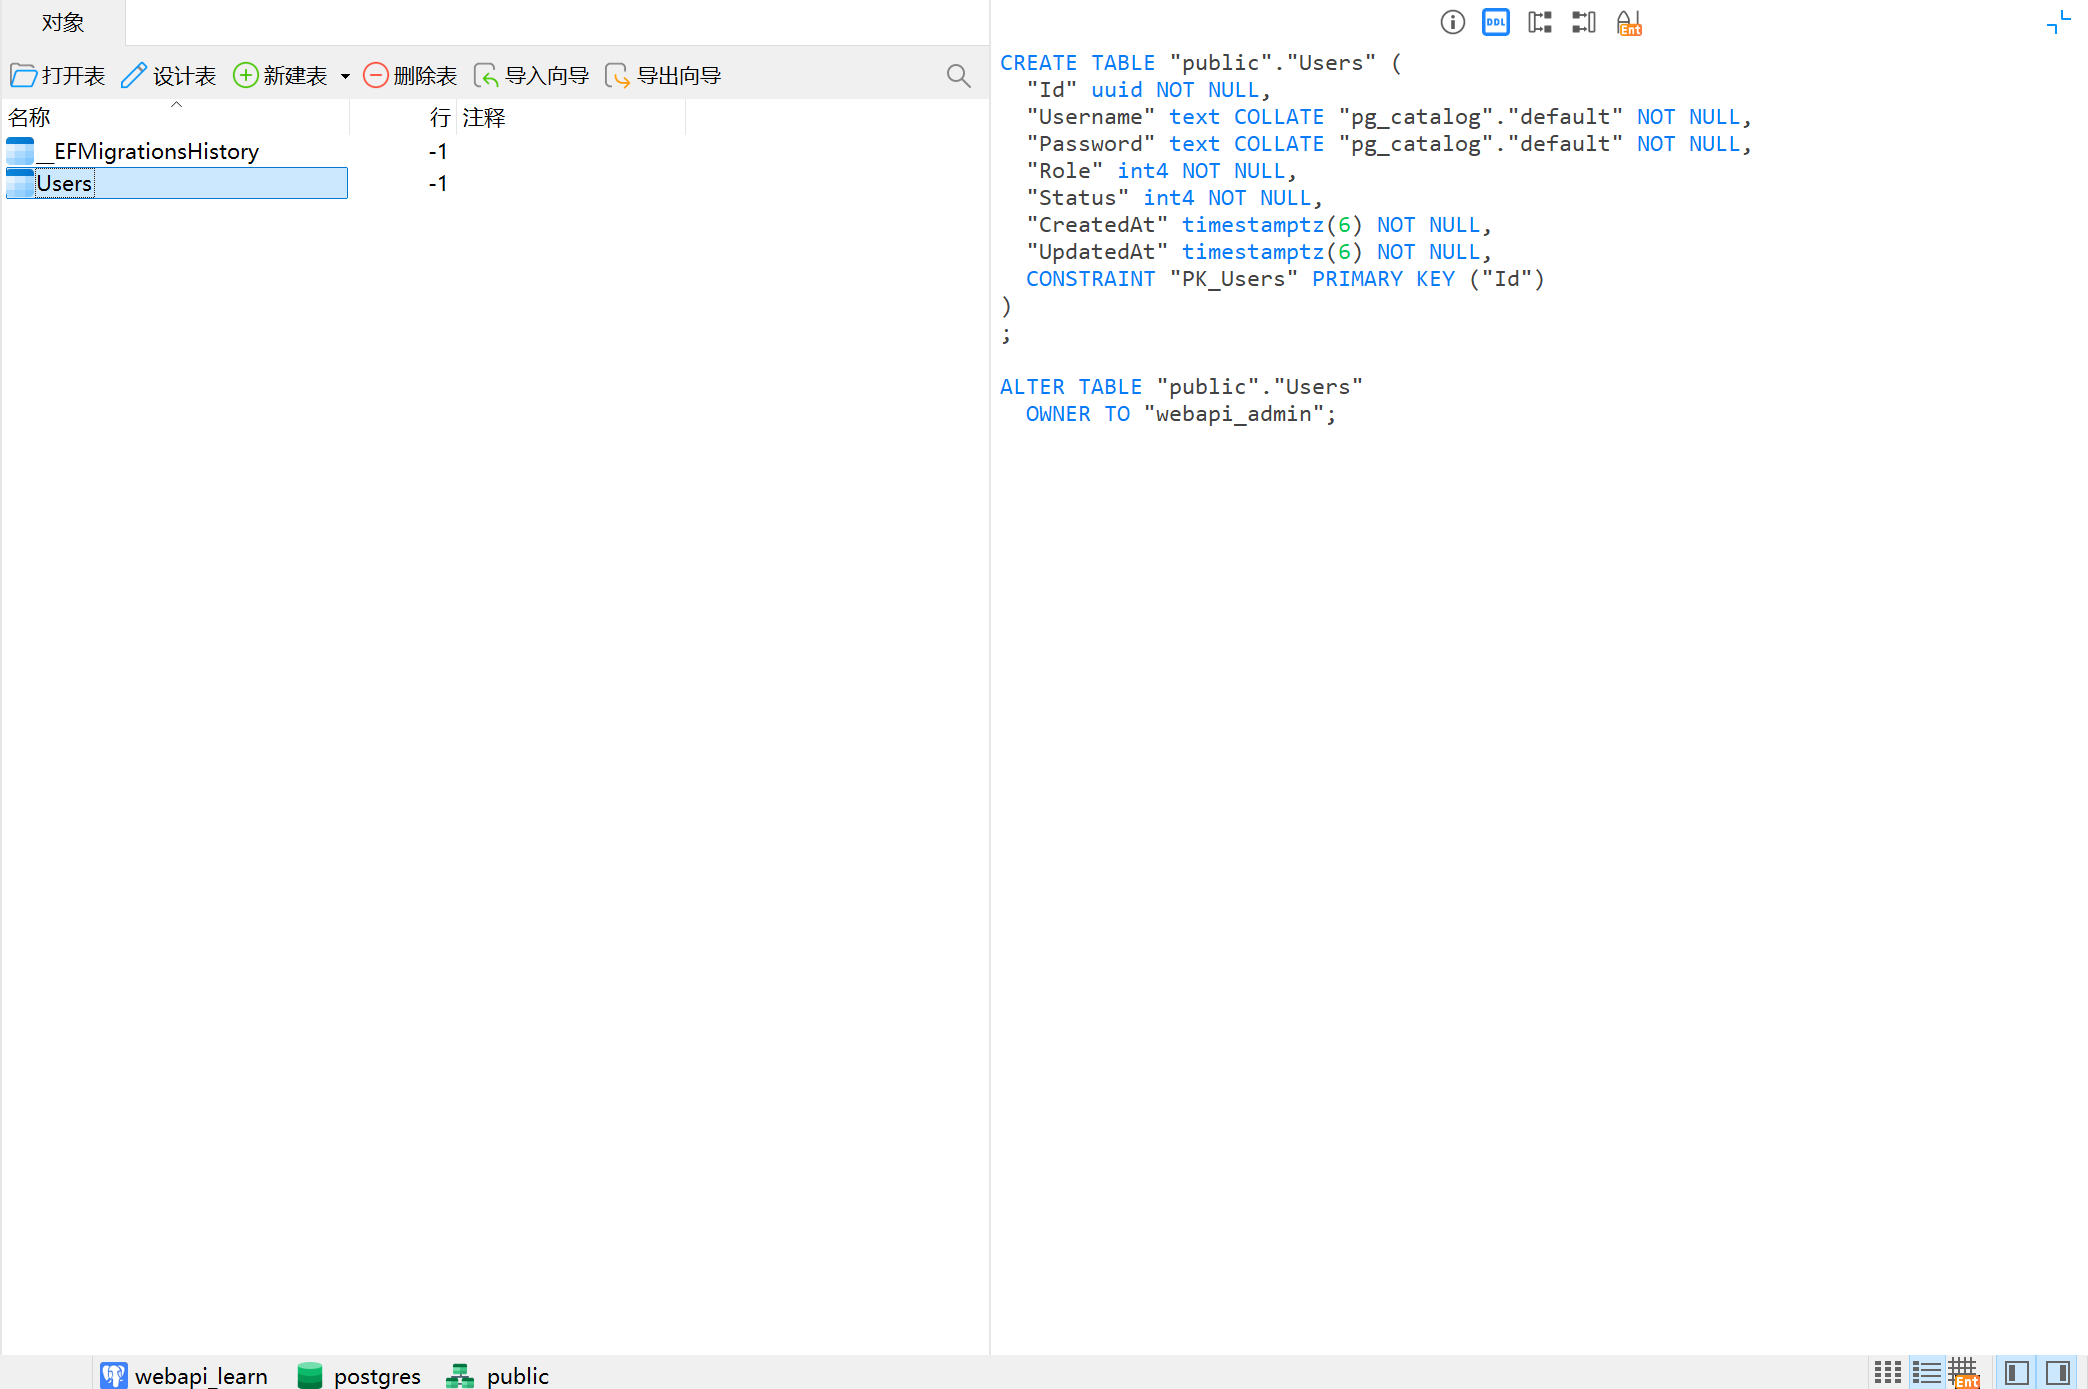
运行后,数据库会出现如下两个表
最后运行下面三个命令,就可以运行启动了
shelldotnet restore src/Api/Api.csproj
dotnet build src/Api/Api.csproj
dotnet run --project src/Api/Api.csproj
如果要修改端口和地址,在 Api 项目的 Properties / launchSettings.json 文件也可以改:
json{
  "$schema": "https://json.schemastore.org/launchsettings.json",
  "profiles": {
    "http": {
      "commandName": "Project",
      "dotnetRunMessages": true,
      "launchBrowser": false,
      "applicationUrl": "http://localhost:5001",
      "environmentVariables": {
        "ASPNETCORE_ENVIRONMENT": "Development"
      }
    },
    "https": {
      "commandName": "Project",
      "dotnetRunMessages": true,
      "launchBrowser": false,
      "applicationUrl": "https://localhost:7258;http://localhost:5001",
      "environmentVariables": {
        "ASPNETCORE_ENVIRONMENT": "Development"
      }
    }
  }
}
依次执行下面的命令,来测试接口:
shellcurl -X POST "http://localhost:5001/api/User" -H "Content-Type: application/json" -d '{ "username":"alice","password":"Pass@123","role":1,"status":3}'

curl -X GET "http://localhost:5001/api/User"

# 下面几条命令,记得将 {id} 换成上面查出来的实际 id
curl -X PUT "http://localhost:5001/api/User" -H "Content-Type: application/json" -d '{"id":"{id}","username":"alice_updated","password":"Pass@456","role":2,"status":1}'

curl -X GET "http://localhost:5001/api/User/{id}"

curl -X DELETE "http://localhost:5001/api/User/{id}"
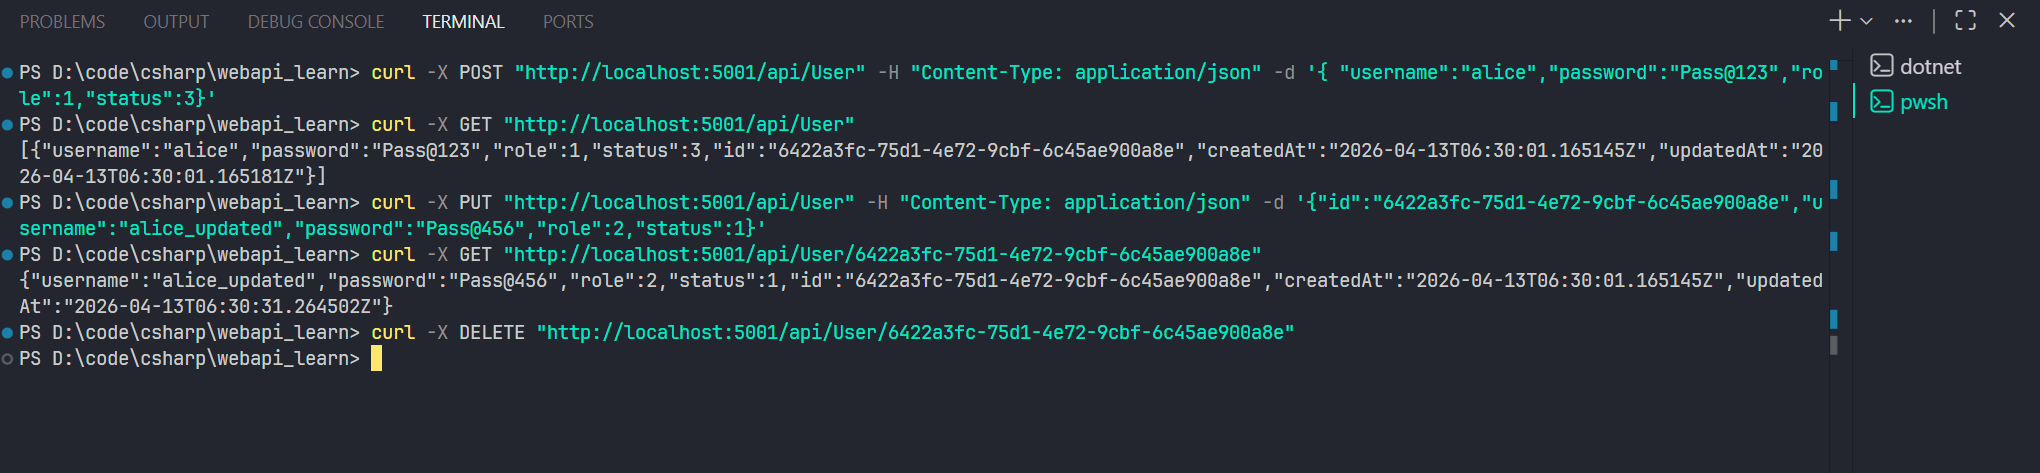
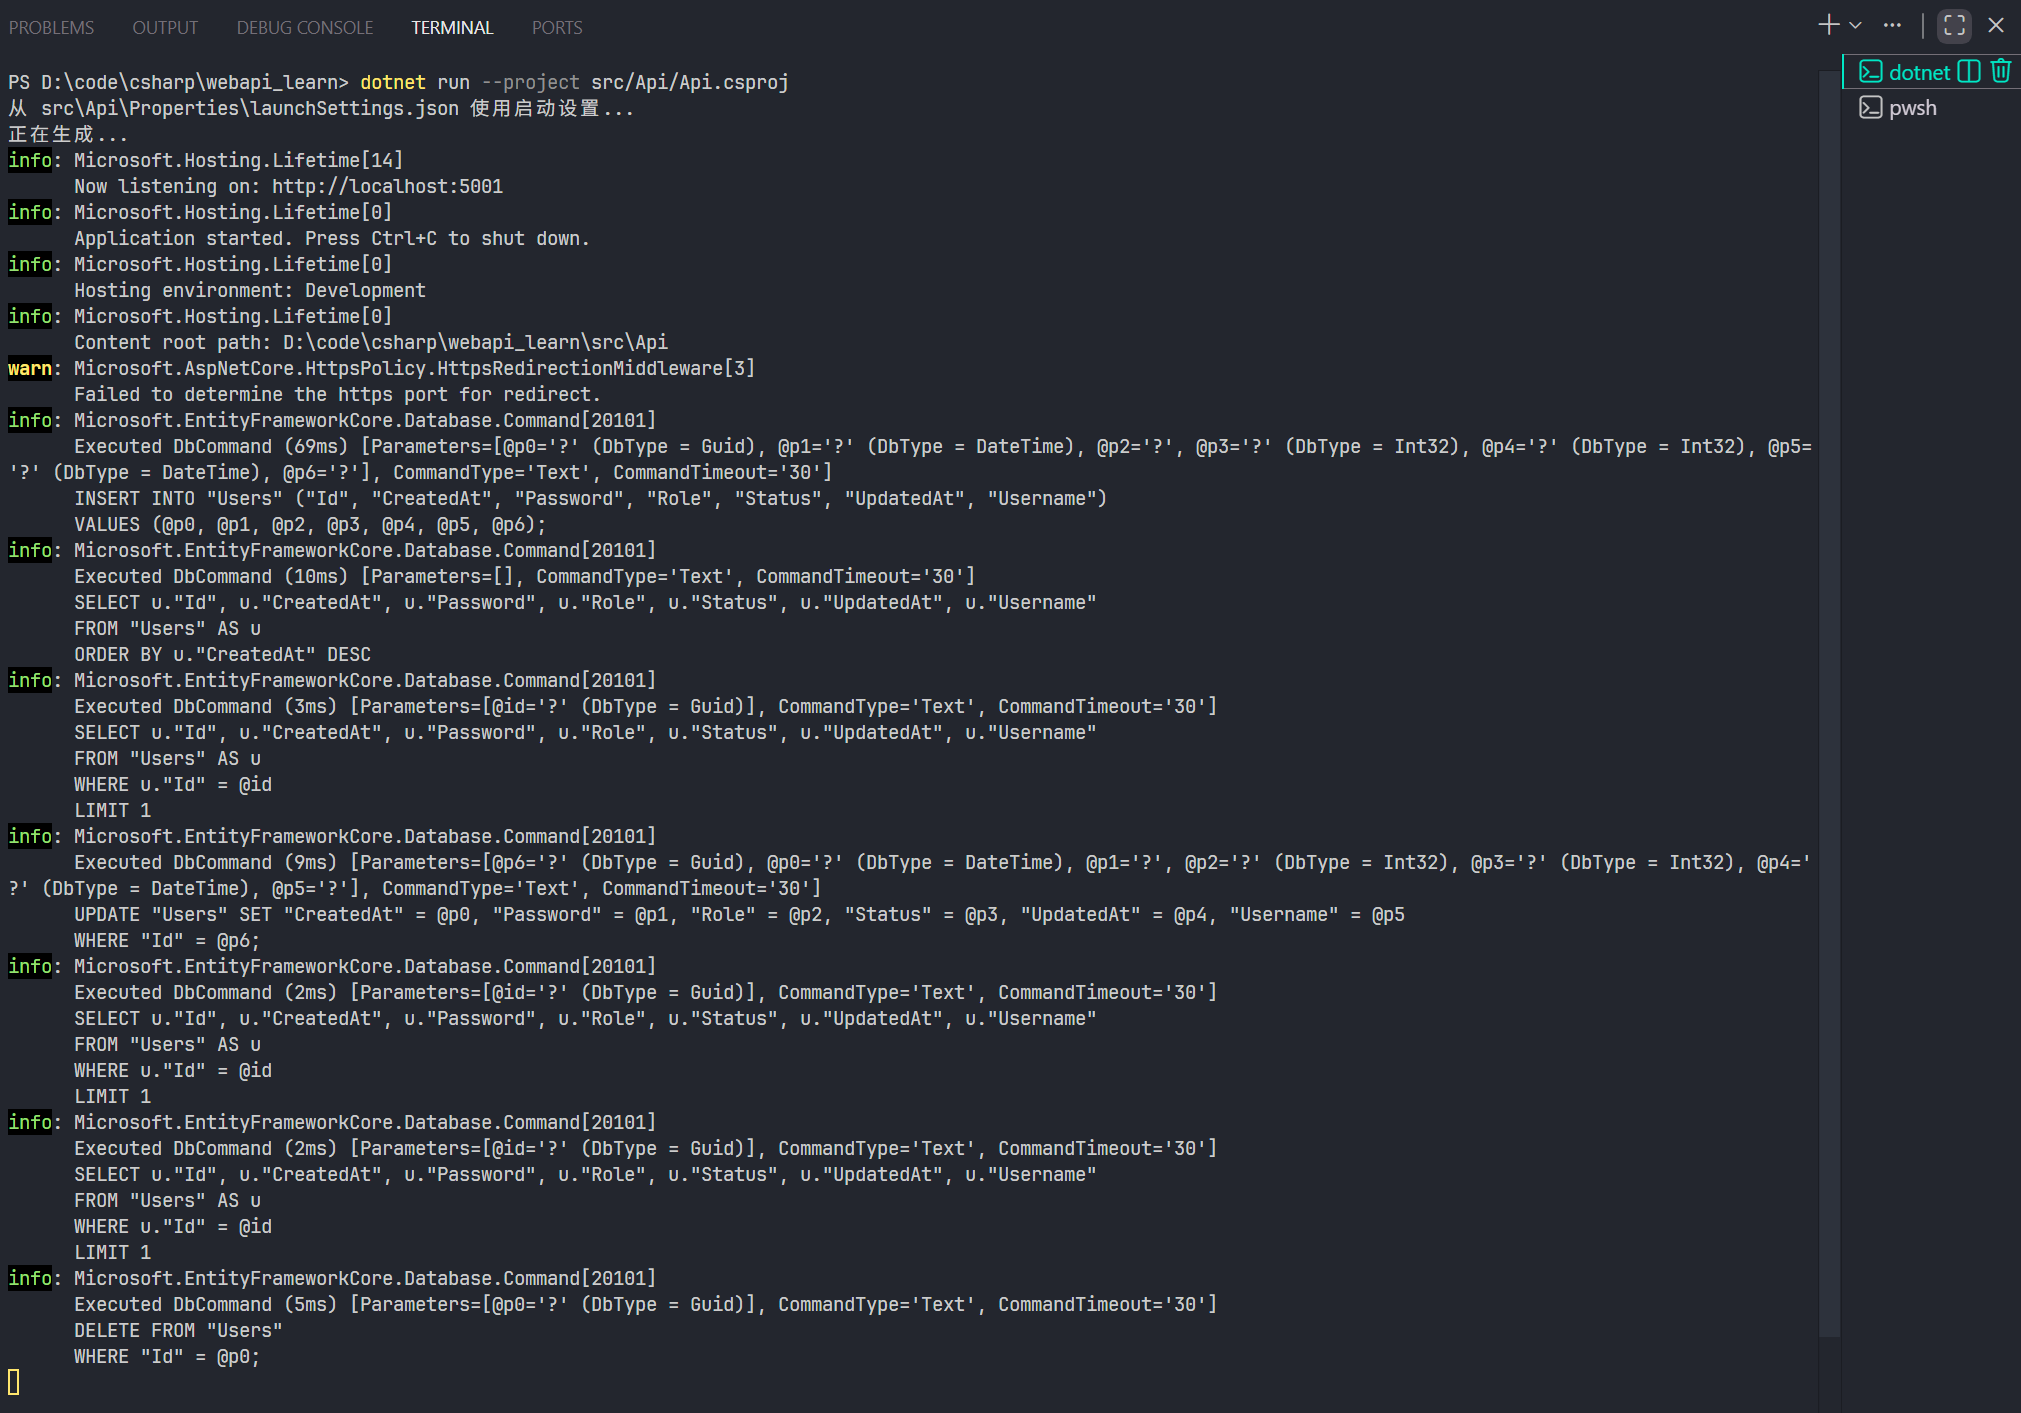
日志:
6 优化
上面的代码中,有两个问题。
第一,就是 Service 的注册位置,如果项目做大,Service 变多,全部都放在 Program.cs 中注册,那会大大增加 Program.cs 代码量,使其变得臃肿。
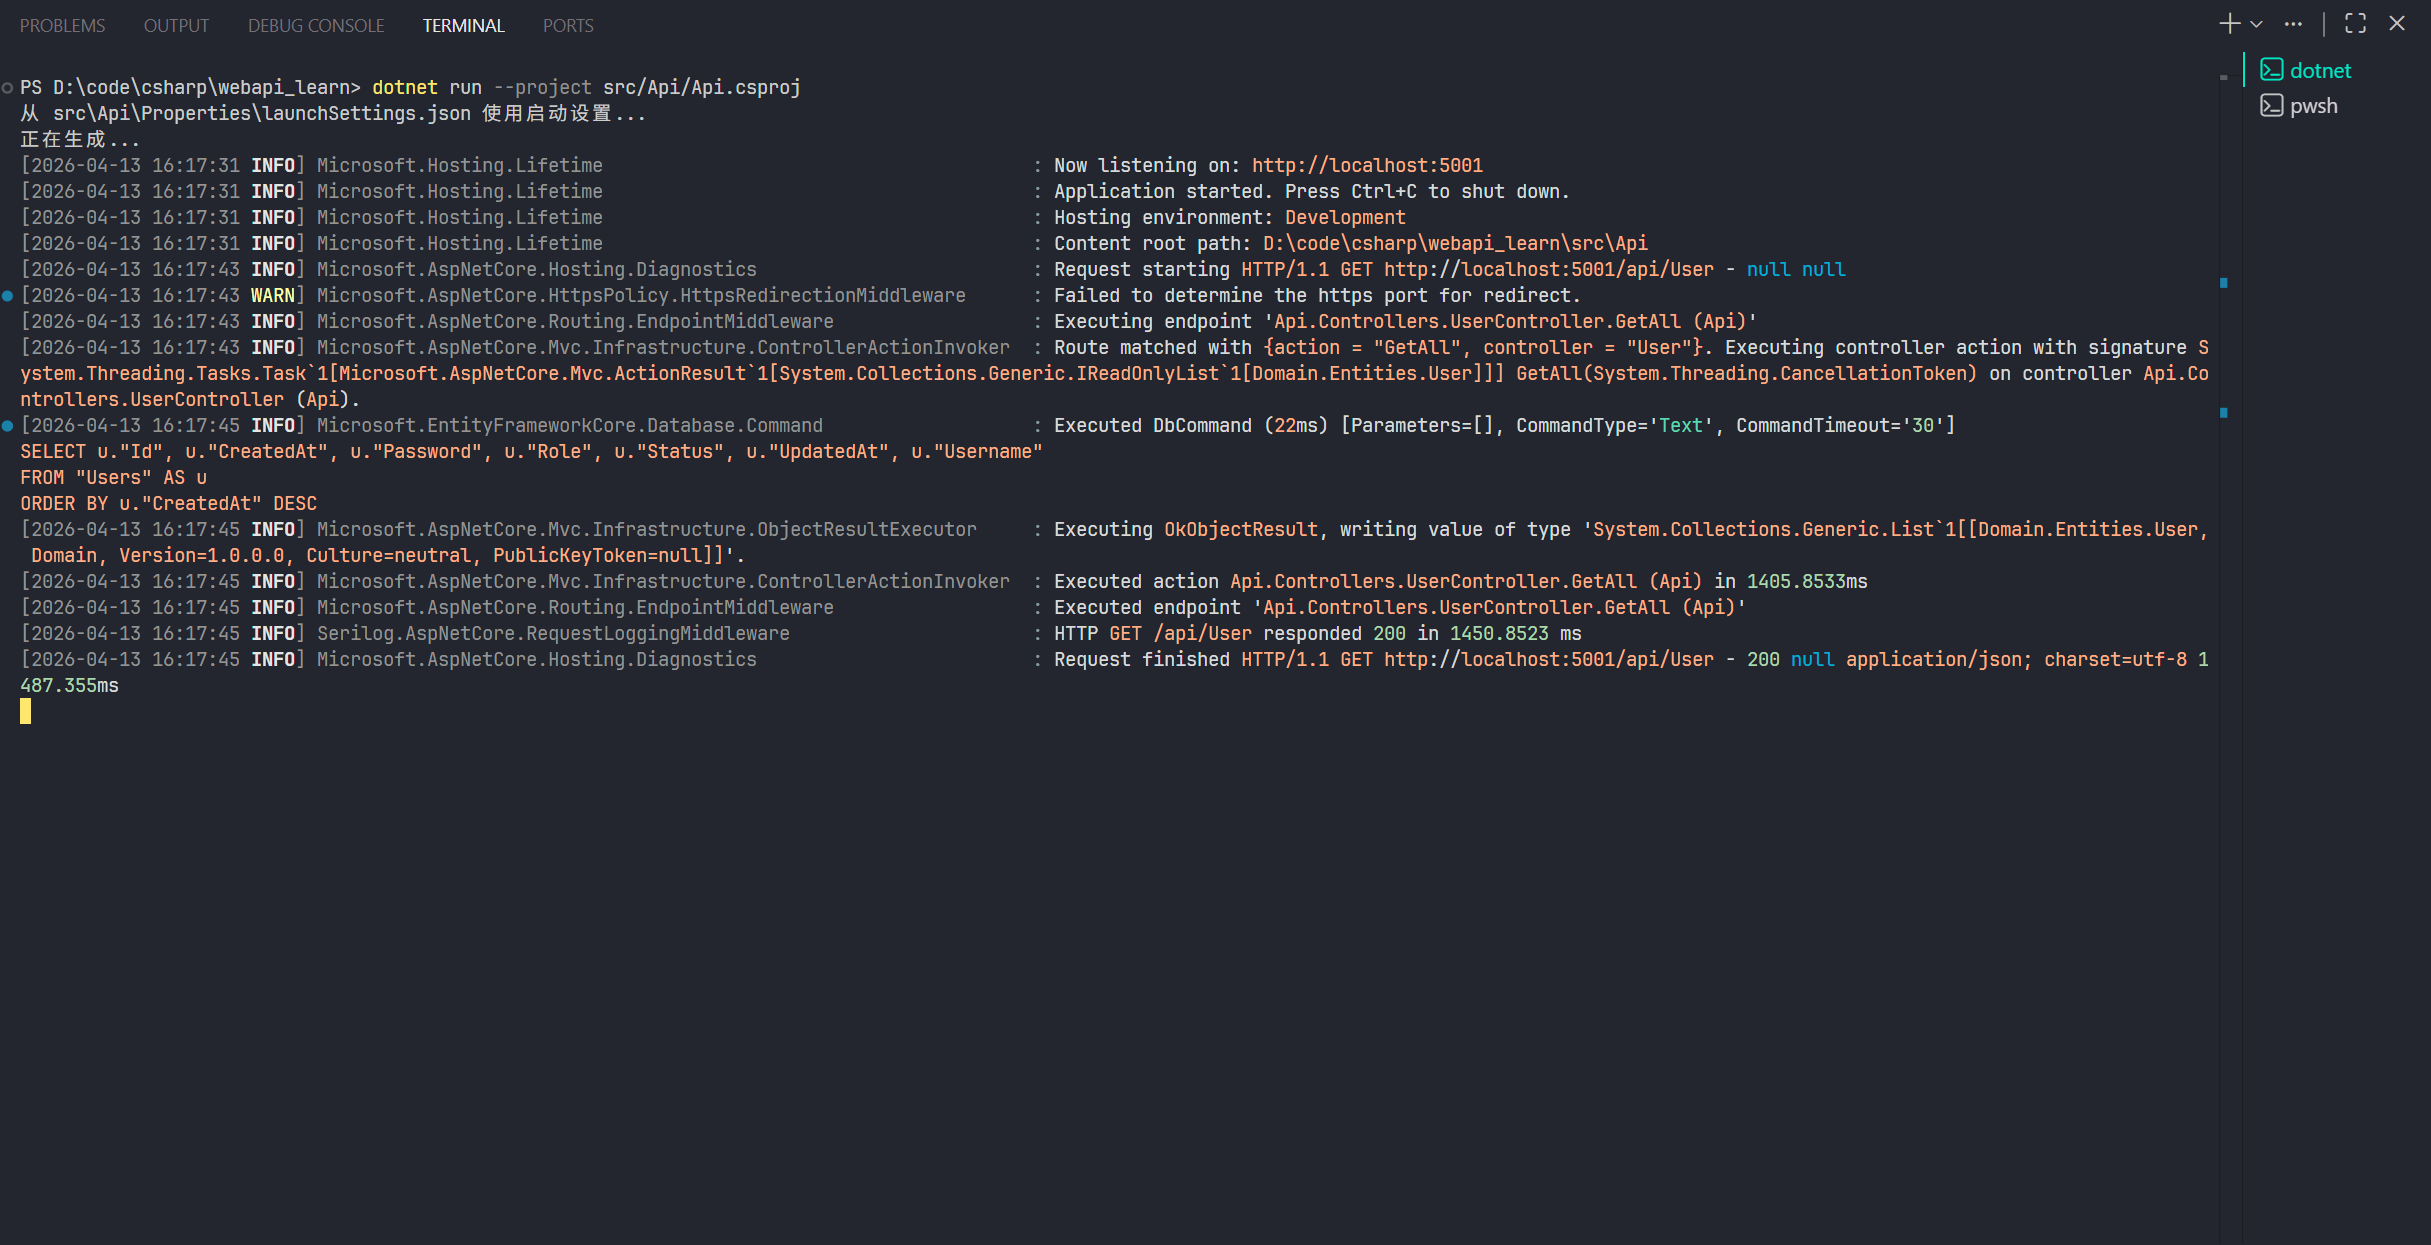
第二,就是控制台的日志太难读了。
接下来,我们就一个一个解决两个问题。
6.1 日志库集成
首先是日志。我选择使用 Serilog 这个日志库。
SpringBoot 用的比较多的 Log4j 日志库在 dotNET 中也有,叫做 Log4net。
首先在 Directory.Packages.props 文件中,添加相关的版本依赖。
xml<ItemGroup> ...... <PackageVersion Include="Serilog.AspNetCore" Version="10.0.0" /> <PackageVersion Include="Serilog.Settings.Configuration" Version="10.0.0" /> <PackageVersion Include="Serilog.Sinks.Console" Version="6.1.1" /> </ItemGroup>
然后依次执行下面的命令:
shelldotnet add .\src\Api\Api.csproj package Serilog.AspNetCore
dotnet add .\src\Api\Api.csproj package Serilog.Settings.Configuration
dotnet add .\src\Api\Api.csproj package Serilog.Sinks.Console

dotnet restore .\src\Api\Api.csproj
库就安装好了。
然后在 Api 项目的 appsettings.Development.json 文件中,删除原本的 Logging 配置,添加如下配置:
json"Serilog": { "Using": [ "Serilog.Sinks.Console" ], "MinimumLevel": { "Default": "Debug", "Override": { "Microsoft": "Information", "Microsoft.AspNetCore": "Information", "Microsoft.EntityFrameworkCore.Database.Command": "Information" } }, "WriteTo": [ { "Name": "Console", "Args": { "theme": "Serilog.Sinks.SystemConsole.Themes.AnsiConsoleTheme::Code, Serilog.Sinks.Console", "outputTemplate": "[{Timestamp:yyyy-MM-dd HH:mm:ss} {Level:u4}] {SourceContext,-64} : {Message:lj}{NewLine}{Exception}" } } ] },
- Using:会用到的扩展库
- MinimumLevel.Default:全局最低日志级别
- MinimumLevel.Override.Microsoft:覆盖以 Microsoft 开头的日志的日志级别(下面几个同理)。只有这个级别以上的才能被记录。
- WriteTo中的第一个对象:指的是为 Console ,也就是控制台输出的日志,添加参数。参数 theme 的值表示使用彩色输出;outputTemplate 的值表示日志输出格式。
然后在 Program.cs 中,注册 Serilog 日志服务,并在 Http 请求管道中启动。
csusing Application.Interfaces;
using Application.Services;
using Domain.Interfaces.Repository;
using Infrastructure.Data;
using Infrastructure.Repository;
using Microsoft.EntityFrameworkCore;
using Serilog;

var builder = WebApplication.CreateBuilder(args);

// Add services to the container.

// 注册日志库
builder.Host.UseSerilog((ctx, services, lc) => lc
    .ReadFrom.Configuration(ctx.Configuration)
    .ReadFrom.Services(services)
    .Enrich.FromLogContext());

builder.Services.AddControllers();
builder.Services.AddDbContext<AppDbContext>(options =>
{
    options.UseNpgsql(builder.Configuration.GetConnectionString("Default"));
});
builder.Services.AddScoped<IUserRepository, UserRepository>();
builder.Services.AddScoped<IUserService, UserService>();

var app = builder.Build();

// Configure the HTTP request pipeline.

// 在请求管道中启用
app.UseSerilogRequestLogging();

app.UseHttpsRedirection();

app.UseAuthorization();

app.MapControllers();

app.Run();
构建并运行
6.2 分层注册服务
然后是解决 Service 注册问题。在 dotnet-backend-patterns 这个 skill 中的解决办法是,Application 层 和 Infrastructure 层分别创建专门的 Service 注册组件,在该组件注册本层的 Service,然后再由 Program.cs 来应用这些组件,完成分离。
为了实现这个功能,我们需要给 Application 层 和 Infrastructure 添加相关库。首先在 Directory.Packages.props 中,添加两个库的版本管理。
xml<ItemGroup> <PackageVersion Include="Microsoft.Extensions.DependencyInjection" Version="10.0.5" /> <PackageVersion Include="Microsoft.Extensions.Configuration" Version="10.0.5" /> ...... </ItemGroup>
然后在 Application 项目 和 Infrastructure 项目中的 csproj 文件,添加这两个库的依赖。 Infrastructure 项目:
xml<Project Sdk="Microsoft.NET.Sdk">

  <ItemGroup>
    <ProjectReference Include="..\Domain\Domain.csproj" />
  </ItemGroup>

  <ItemGroup>
    <PackageReference Include="Microsoft.Extensions.DependencyInjection" />
    <PackageReference Include="Microsoft.Extensions.Configuration" />
    <PackageReference Include="Microsoft.EntityFrameworkCore" />
    <PackageReference Include="Microsoft.EntityFrameworkCore.Design">
      <IncludeAssets>runtime; build; native; contentfiles; analyzers; buildtransitive</IncludeAssets>
      <PrivateAssets>all</PrivateAssets>
    </PackageReference>
    <PackageReference Include="Microsoft.EntityFrameworkCore.SqlServer" />
    <PackageReference Include="Microsoft.EntityFrameworkCore.Tools">
      <IncludeAssets>runtime; build; native; contentfiles; analyzers; buildtransitive</IncludeAssets>
      <PrivateAssets>all</PrivateAssets>
    </PackageReference>
    <PackageReference Include="Npgsql.EntityFrameworkCore.PostgreSQL" />
  </ItemGroup>

  <PropertyGroup>
    <TargetFramework>net10.0</TargetFramework>
    <ImplicitUsings>enable</ImplicitUsings>
    <Nullable>enable</Nullable>
  </PropertyGroup>

</Project>
Application 项目:
xml<Project Sdk="Microsoft.NET.Sdk">

  <ItemGroup>
    <ProjectReference Include="..\Domain\Domain.csproj" />
  </ItemGroup>

  <ItemGroup>
    <PackageReference Include="Microsoft.Extensions.DependencyInjection" />
    <PackageReference Include="Microsoft.Extensions.Configuration" />
  </ItemGroup>

  <PropertyGroup>
    <TargetFramework>net10.0</TargetFramework>
    <ImplicitUsings>enable</ImplicitUsings>
    <Nullable>enable</Nullable>
  </PropertyGroup>

</Project>
在 Infrastructure 项目和 Application 项目中,分别创建 DependencyInjection 目录,添加 ServiceCollectionExtensions.cs 类:
Infrastructure 项目:
csusing Domain.Interfaces.Repository; using Infrastructure.Data; using Infrastructure.Repository; using Microsoft.EntityFrameworkCore; using Microsoft.Extensions.Configuration; using Microsoft.Extensions.DependencyInjection; namespace Infrastructure.DependencyInjection; public static class ServiceCollectionExtensions { public static IServiceCollection AddInfrastructure( this IServiceCollection services, IConfiguration configuration ) { services.AddDbContext<AppDbContext>(options => { options.UseNpgsql(configuration.GetConnectionString("Default")); }); services.AddScoped<IUserRepository, UserRepository>(); return services; } }
Application 项目:
xmlusing Microsoft.Extensions.DependencyInjection;
using Microsoft.Extensions.Configuration;
using Application.Interfaces;
using Application.Services;

namespace Application.DependencyInjection;

public static class ServiceCollectionExtensions
{
    public static IServiceCollection AddApplication(
        this IServiceCollection services,
        IConfiguration configuration
    )
    {

        services.AddScoped<IUserService, UserService>();
        return services;
    }
}
最后,在 Program.cs 中,删除原有的 Service 注册逻辑,转而调用上述定义的两个静态方法。
csusing Application.DependencyInjection;
using Infrastructure.DependencyInjection;
using Serilog;

var builder = WebApplication.CreateBuilder(args);

// Add services to the container.

builder.Host.UseSerilog((ctx, services, lc) => lc
    .ReadFrom.Configuration(ctx.Configuration)
    .ReadFrom.Services(services)
    .Enrich.FromLogContext());

// 调用定义 Service 注册的方法,
builder.Services.AddInfrastructure(builder.Configuration);
builder.Services.AddApplication(builder.Configuration);
builder.Services.AddControllers();


var app = builder.Build();

// Configure the HTTP request pipeline.

app.UseSerilogRequestLogging();

app.UseHttpsRedirection();

app.UseAuthorization();

app.MapControllers();

app.Run();
注意,Service 的注册方法必须按照各个项目的依赖顺序来,这里 Controllers 依赖 Application ,Application 依赖 Infrastructure,所以要按照 Infrastructure -> Application -> Controllers 的顺序注册 Service ,否则会报错说某些 Service 找不到。
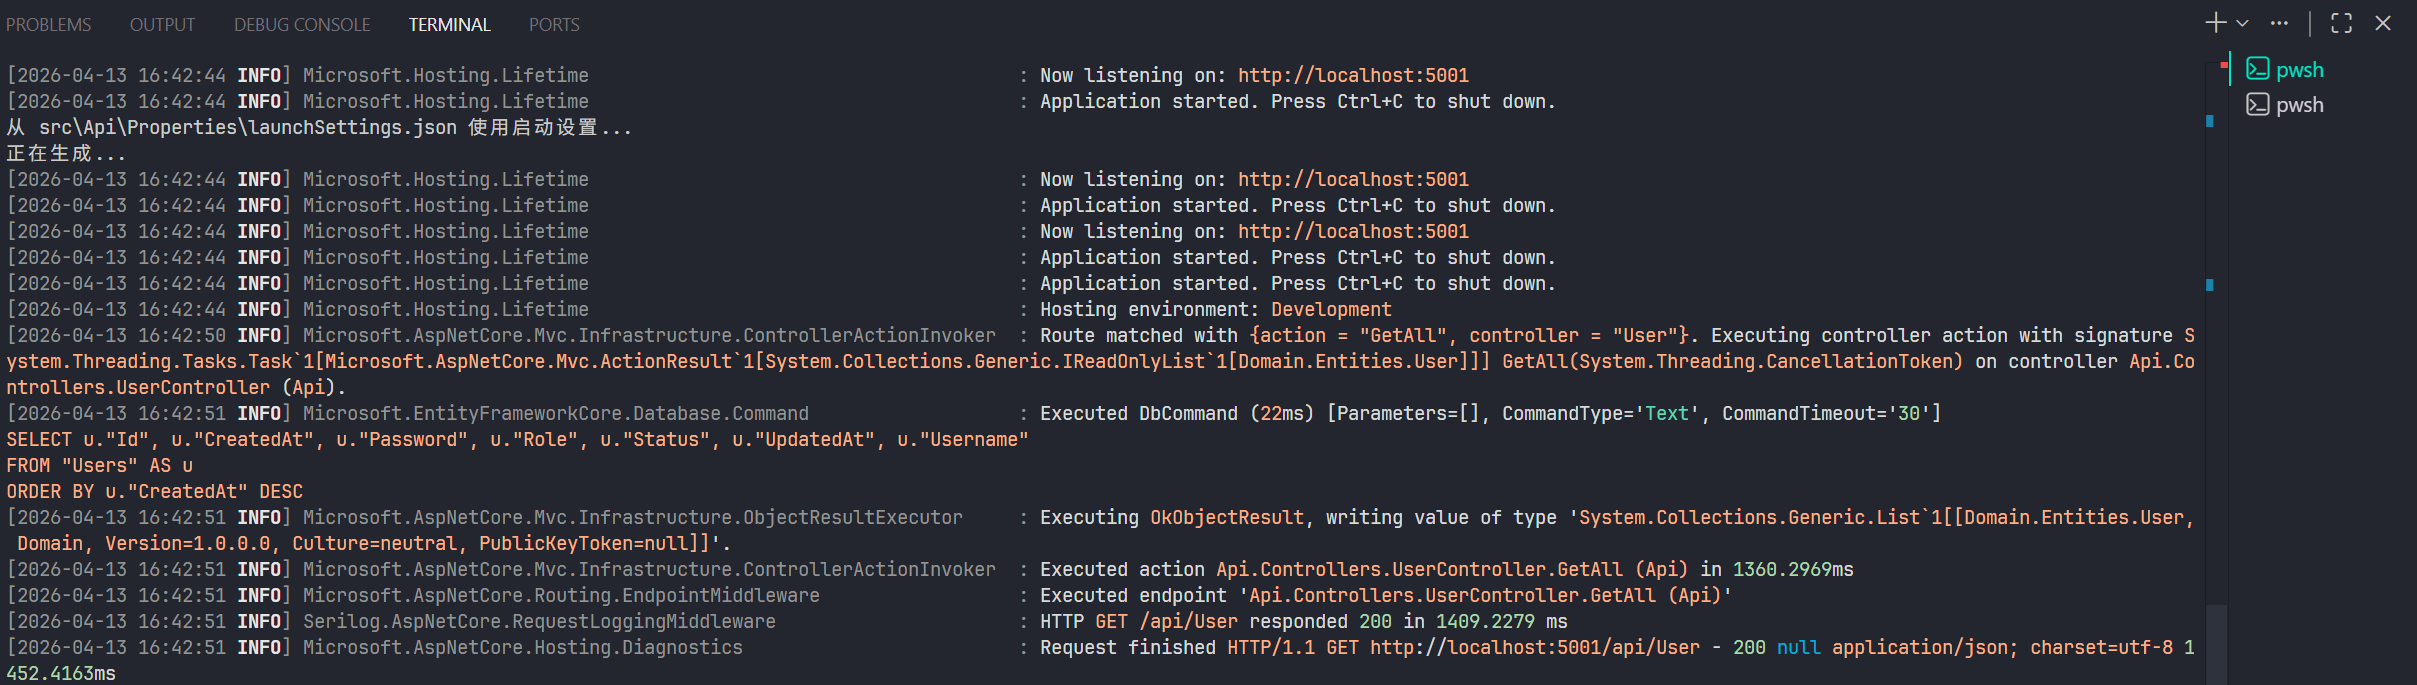
然后继续,还原、构建、运行。运行不出错,调用接口没问题,就完成了。
7 集成 Redis
7.1 安装与集成
ASP.NET 中使用比较多的,集成 Redis 的库的是 Microsoft.Extensions.Caching.StackExchangeRedis ,所以我也打算使用这个库。
首先,在 Directory.Packages.props 中,添加如下库:
xml<ItemGroup> <PackageVersion Include="Microsoft.Extensions.Caching.StackExchangeRedis" Version="10.0.5" /> </ItemGroup>
在 Infrastructure 项目添加这个包:
shelldotnet add src/Infrastructure/Infrastructure.csproj package Microsoft.Extensions.Caching.StackExchangeRedis --version 10.0.5

dotnet restore src/Api/Api.csproj

dotnet build src/Api/Api.csproj
然后就是编写连接逻辑,和集成 PostgreSQL 一致,只不过不用编写 DbContext。
首先在 Api 模块的 appsettings.Development.json 中,在 ConnectionStrings 字段添加一个新的字段:
json"ConnectionStrings": { "Postgres": "Host=127.0.0.1;Port=5432;Database=postgres;Username=webapi_admin;Password=12345678..Postgres%", "Redis": "127.0.0.1:6379,password=12345678..Redis%,defaultDatabase=0,abortConnect=false,connectTimeout=5000" }
PostgreSQL 的字段键我改成了
"Postgres",记得在 Infrastructure 层的ServiceCollectionExtensions中修改。
然后,在 Infrastructure 层的 ServiceCollectionExtensions ,添加 Service 注册逻辑:
cspublic static class ServiceCollectionExtensions
{
    public static IServiceCollection AddInfrastructure(
        this IServiceCollection services,
        IConfiguration configuration
    )
    {
        // PostgreSQL DbContext
        services.AddDbContext<AppDbContext>(options =>
        {
            options.UseNpgsql(configuration.GetConnectionString("Postgres"));
        });

        // Redis Cache
        services.AddStackExchangeRedisCache(options =>
        {
	        // 获取连接字符串
            options.Configuration = configuration.GetConnectionString("Redis");
            // 这里会给通过这个添加的缓存 key,加一个顶层的 webapi_learn_cache: 前缀
            options.InstanceName = "webapi_learn_cache";
        });

        services.AddSingleton<ICacheService, RedisCacheService>();

        // Repository
        services.AddScoped<IUserRepository, UserRepository>();

        return services;
    }
}
7.2 基础封装使用
来编写使用逻辑。
要说明的是,ASP.NET 官方没有推荐使用类似 Spring Cache 那样的,基于注解式的缓存构建和清除方式。官方的推荐的集成 Redis 的缓存库是 StackExchangeRedis。
既然没有注解,那就说明:请求 -> 查询缓存 -> 命中则返回 -> 否则查询数据库 -> 构建缓存 -> 返回这段流程,得自己手动写。
这是非常麻烦的,如果你有很多业务逻辑,都有重复的流程,那么你每个业务逻辑代码都得写相似的逻辑。
我查了几个文章,找到了两种比较好用的,简化这个流程实现的方式:
- Distributed Caching in ASP.NET Core with Redis .NET 10 - Complete Guide - codewithmukesh
- How to add an in-memory and a Redis-powered cache layer with ASP.NET Core 3 - DEV Community
第一个方法,核心就是将:请求 -> 查询缓存 -> 命中则返回 和 构建缓存 -> 返回 这两段流程,封装起来,而实际的业务逻辑,也就是查询数据库这一原业务逻辑方法,通过参数转入来调用。
我们首先在 Domain 模块中,在 Interfaces 中,新建 Service 包,再新建一个接口 ICacheServcie:
csnamespace Domain.Interfaces.Service;

public interface ICacheService
{
    Task<T?> GetOrCreateAsync<T>(
        string cacheKey,
        Func<Task<T?>> factory, // 关键,让原业务逻辑方法通过参数传入
        TimeSpan? expiration = null
    ) where T : class;
}
然后回到 Infrastructure 模块,在 Caching 包中,新建 RedisCacheService 类,继承上面的接口:
csusing System.Text.Json;
using Domain.Interfaces.Service;
using Microsoft.Extensions.Caching.Distributed;
using Microsoft.Extensions.Logging;

namespace Infrastructure.Caching;

public class RedisCacheService : ICacheService
{
    private readonly IDistributedCache _cache;
    public ILogger<RedisCacheService> _logger = default!;

    public RedisCacheService(IDistributedCache cache, ILogger<RedisCacheService> logger)
    {
        _cache = cache;
        _logger = logger;
    }

    public async Task<T?> GetOrCreateAsync<T>(string cacheKey, Func<Task<T?>> factory, TimeSpan? expiration = null) where T : class
    {
        // 查询缓存
        var cached = await _cache.GetStringAsync(cacheKey);
        if (!string.IsNullOrWhiteSpace(cached))
        {
            // 缓存命中,直接返回
            _logger.LogDebug("缓存命中, key={CacheKey}", cacheKey);
            return JsonSerializer.Deserialize<T>(cached);
        }

        // 否则,现在调用原来的方法
        var result = await factory();
        // 空值判断
        if (result is null)
            return null;

        // 创建缓存设置
        var options = new DistributedCacheEntryOptions
        {
            AbsoluteExpirationRelativeToNow = expiration ?? TimeSpan.FromMinutes(10)
        };

        // 构建缓存
        await _cache.SetStringAsync(cacheKey, JsonSerializer.Serialize(result), options);
        _logger.LogDebug("缓存建立, key={CacheKey}", cacheKey);
        // 返回结果
        return result;
    }
}
然后在 DependencyInjection 包的 ServiceCollectionExtensions 中,添加这个 RedisCacheService 服务的注册:
csusing Domain.Interfaces.Repository;
using Domain.Interfaces.Service;
using Infrastructure.Caching;
using Infrastructure.Data;
using Infrastructure.Repository;
using Microsoft.EntityFrameworkCore;
using Microsoft.Extensions.Configuration;
using Microsoft.Extensions.DependencyInjection;

namespace Infrastructure.DependencyInjection;

public static class ServiceCollectionExtensions
{
    public static IServiceCollection AddInfrastructure(
        this IServiceCollection services,
        IConfiguration configuration
    )
    {
        // PostgreSQL DbContext
        services.AddDbContext<AppDbContext>(options =>
        {
            options.UseNpgsql(configuration.GetConnectionString("Postgres"));
        });

        // Redis Cache
        services.AddStackExchangeRedisCache(options =>
        {
            options.Configuration = configuration.GetConnectionString("Redis");
            options.InstanceName = "webapi_learn_cache";
        });
		// 注册 RedisCacheService
        services.AddSingleton<ICacheService, RedisCacheService>();

        // Repository
        services.AddScoped<IUserRepository, UserRepository>();

        return services;
    }
}
然后回到 Application 模块,在 UserService 中应用:
cs#x22;user:getById:{id}",
            // 原本的业务逻辑写在这
            async () =>
            {
                var entity = await _userRepository.GetByIdAsync(id, ct);
                return entity is null ? null : new User
                {
                    Id = entity.Id,
                    Username = entity.Username,
                    Password = entity.Password,
                    Role = entity.Role,
                    Status = entity.Status,
                    CreatedAt = entity.CreatedAt,
                    UpdatedAt = entity.UpdatedAt
                };
            },
            TimeSpan.FromMinutes(10)
        );
    }
}" aria-label="Copy code">
using Application.DTOs;
using Application.Interfaces;
using Domain.Entities;
using Domain.Interfaces.Repository;
using Domain.Interfaces.Service;

namespace Application.Services;

public class UserService : IUserService
{
    private readonly IUserRepository _userRepository;
    private readonly ICacheService _cacheService;

    public UserService(IUserRepository userRepository, ICacheService cacheService)
    {
        _userRepository = userRepository;
        _cacheService = cacheService;
    }

    public async Task<User?> GetByIdAsync(Guid id, CancellationToken ct = default)
    {
	    // 嵌套一层
        return await _cacheService.GetOrCreateAsync<User>(
            $"user:getById:{id}",
            // 原本的业务逻辑写在这
            async () =>
            {
                var entity = await _userRepository.GetByIdAsync(id, ct);
                return entity is null ? null : new User
                {
                    Id = entity.Id,
                    Username = entity.Username,
                    Password = entity.Password,
                    Role = entity.Role,
                    Status = entity.Status,
                    CreatedAt = entity.CreatedAt,
                    UpdatedAt = entity.UpdatedAt
                };
            },
            TimeSpan.FromMinutes(10)
        );
    }
}
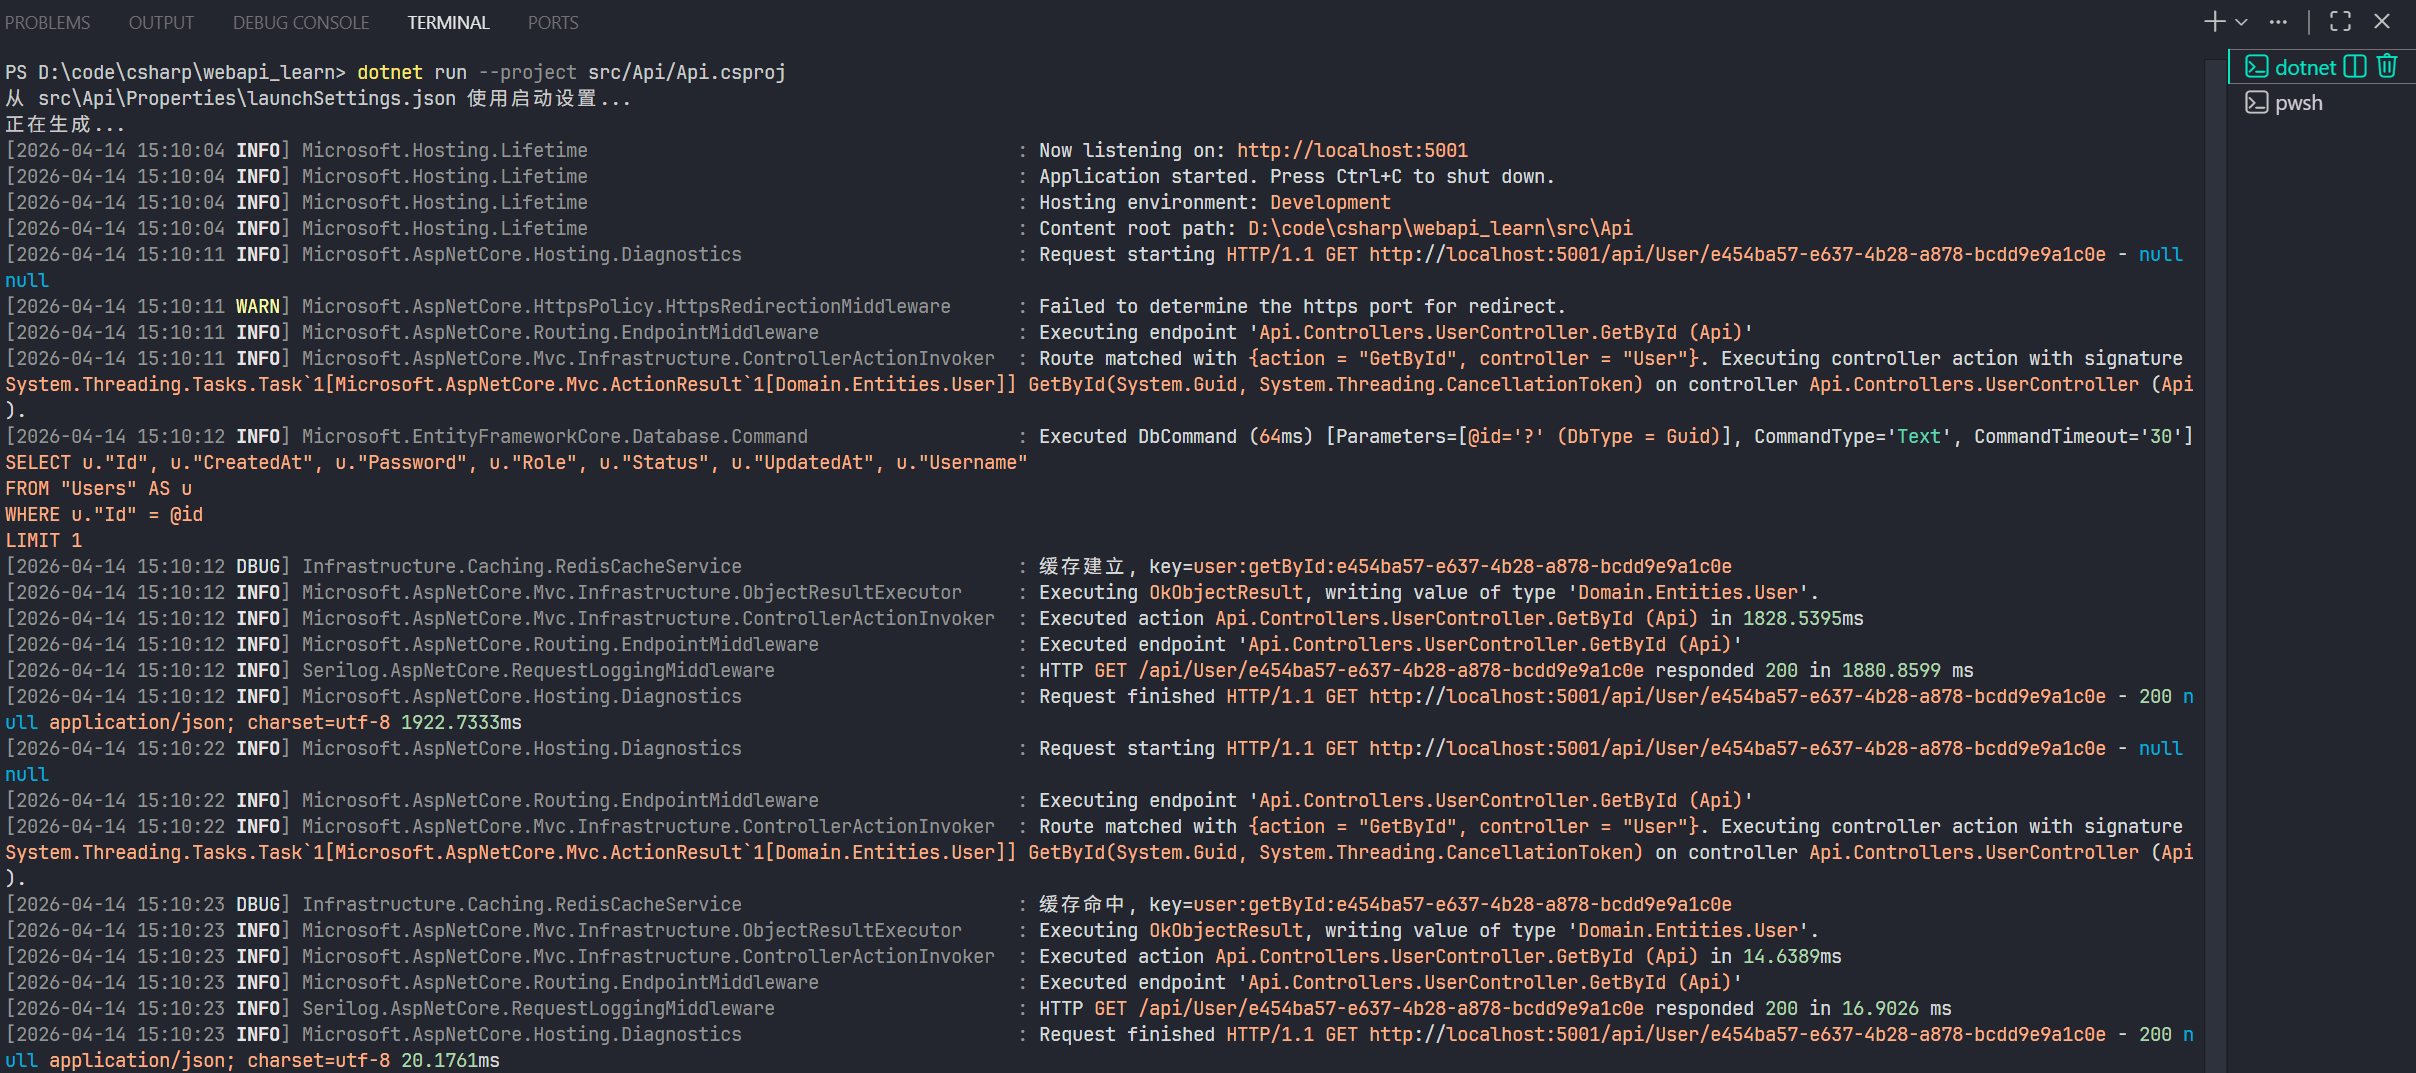
运行一下:
7.2 装饰器模式使用
第二个文章介绍的方法,是基于装饰器的,这个方法的优点是:完全不入侵业务逻辑代码。
说起来可能不好理解,我一边写代码一边说。
首先,在 Application 模块,在 Service 包添加一个 Caching 包,然后添加一个 CacheUserService 类:
csusing Application.DTOs;
using Application.Interfaces;
using Domain.Entities;
using Domain.Interfaces.Service;

namespace Application.Services.Caching;

public class CacheUserService : IUserService
{
	// 核心依赖 Cache 服务
    private readonly ICacheService _cacheService;
    // 核心依赖,原业务逻辑服务
    private readonly IUserService _userService;

    public CacheUserService(ICacheService cacheService, IUserService userService)
    {
        _cacheService = cacheService;
        _userService = userService;
    }

    public Task<IReadOnlyList<User>> GetAllAsync(CancellationToken ct = default)
    {
        return _userService.GetAllAsync(ct);
    }

    public Task AddAsync(CreateUserRequest request, CancellationToken ct = default)
    {
        return _userService.AddAsync(request, ct);
    }

    public Task DeleteAsync(Guid id, CancellationToken ct = default)
    {
        return _userService.DeleteAsync(id, ct);
    }

    public Task UpdateAsync(UpdateUserRequest request, CancellationToken ct = default)
    {
        return _userService.UpdateAsync(request, ct);
    }

    public Task<User?> GetByIdAsync(Guid id, CancellationToken ct = default)
    {
        return _userService.GetByIdAsync(id, ct);
    }
}
不需要缓存的接口,直接调用原业务逻辑方法。
由于第一个方法是使用 GetByIdAsync,这个方法写缓存逻辑,这里我们换一个,使用 GetAllAsync 方法来写第二中方法的逻辑。
csusing Application.DTOs;
using Application.Interfaces;
using Domain.Entities;
using Domain.Interfaces.Service;

namespace Application.Services.Caching;

public class CacheUserService : IUserService
{
    private readonly ICacheService _cacheService;
    private readonly IUserService _userService;

    public CacheUserService(ICacheService cacheService, IUserService userService)
    {
        _cacheService = cacheService;
        _userService = userService;
    }

    public async Task<IReadOnlyList<User>> GetAllAsync(CancellationToken ct = default)
    {
	    // 设置缓存键
        var key = "users:GetAll";

		// 通过调用原 Service 层服务,构建缓存
        return await _cacheService.GetOrCreateAsync(
            key,
            async () => await _userService.GetAllAsync(ct),
            TimeSpan.FromMinutes(10)) ?? new List<User>();
    }
}
还没完,既然叫装饰,那就得让程序知道,这个服务被装饰了。就像 Java 的代理一样,你得让 Spring 容器知道要拿这个类的代理类,才能执行代理方法。
所以在注册 Service 时,有个关键技巧,我们在 Application 模块的 DependencyInjection 包中 的 ServiceCollectionExtensions ,修改 UserService 这个服务的注册方式:
csusing Microsoft.Extensions.DependencyInjection;
using Microsoft.Extensions.Configuration;
using Application.Interfaces;
using Application.Services;
using Domain.Interfaces.Service;
using Application.Services.Caching;

namespace Application.DependencyInjection;

public static class ServiceCollectionExtensions
{
    public static IServiceCollection AddApplication(
        this IServiceCollection services,
        IConfiguration configuration
    )
    {
	    // 先注册原服务
        services.AddTransient<UserService>();

		// 再注册接口依赖,让接口的实例使用装饰器类 CacheUserService
        services.AddTransient<IUserService>(provider =>
        {
            var cacheService = provider.GetRequiredService<ICacheService>();
            var userService = provider.GetRequiredService<UserService>();
            return new CacheUserService(cacheService, userService);
        });
        return services;
    }
}
这一巧妙的实现了“装饰”,完全不入侵原 Service 逻辑,并且还实现了缓存逻辑。
运行一下:
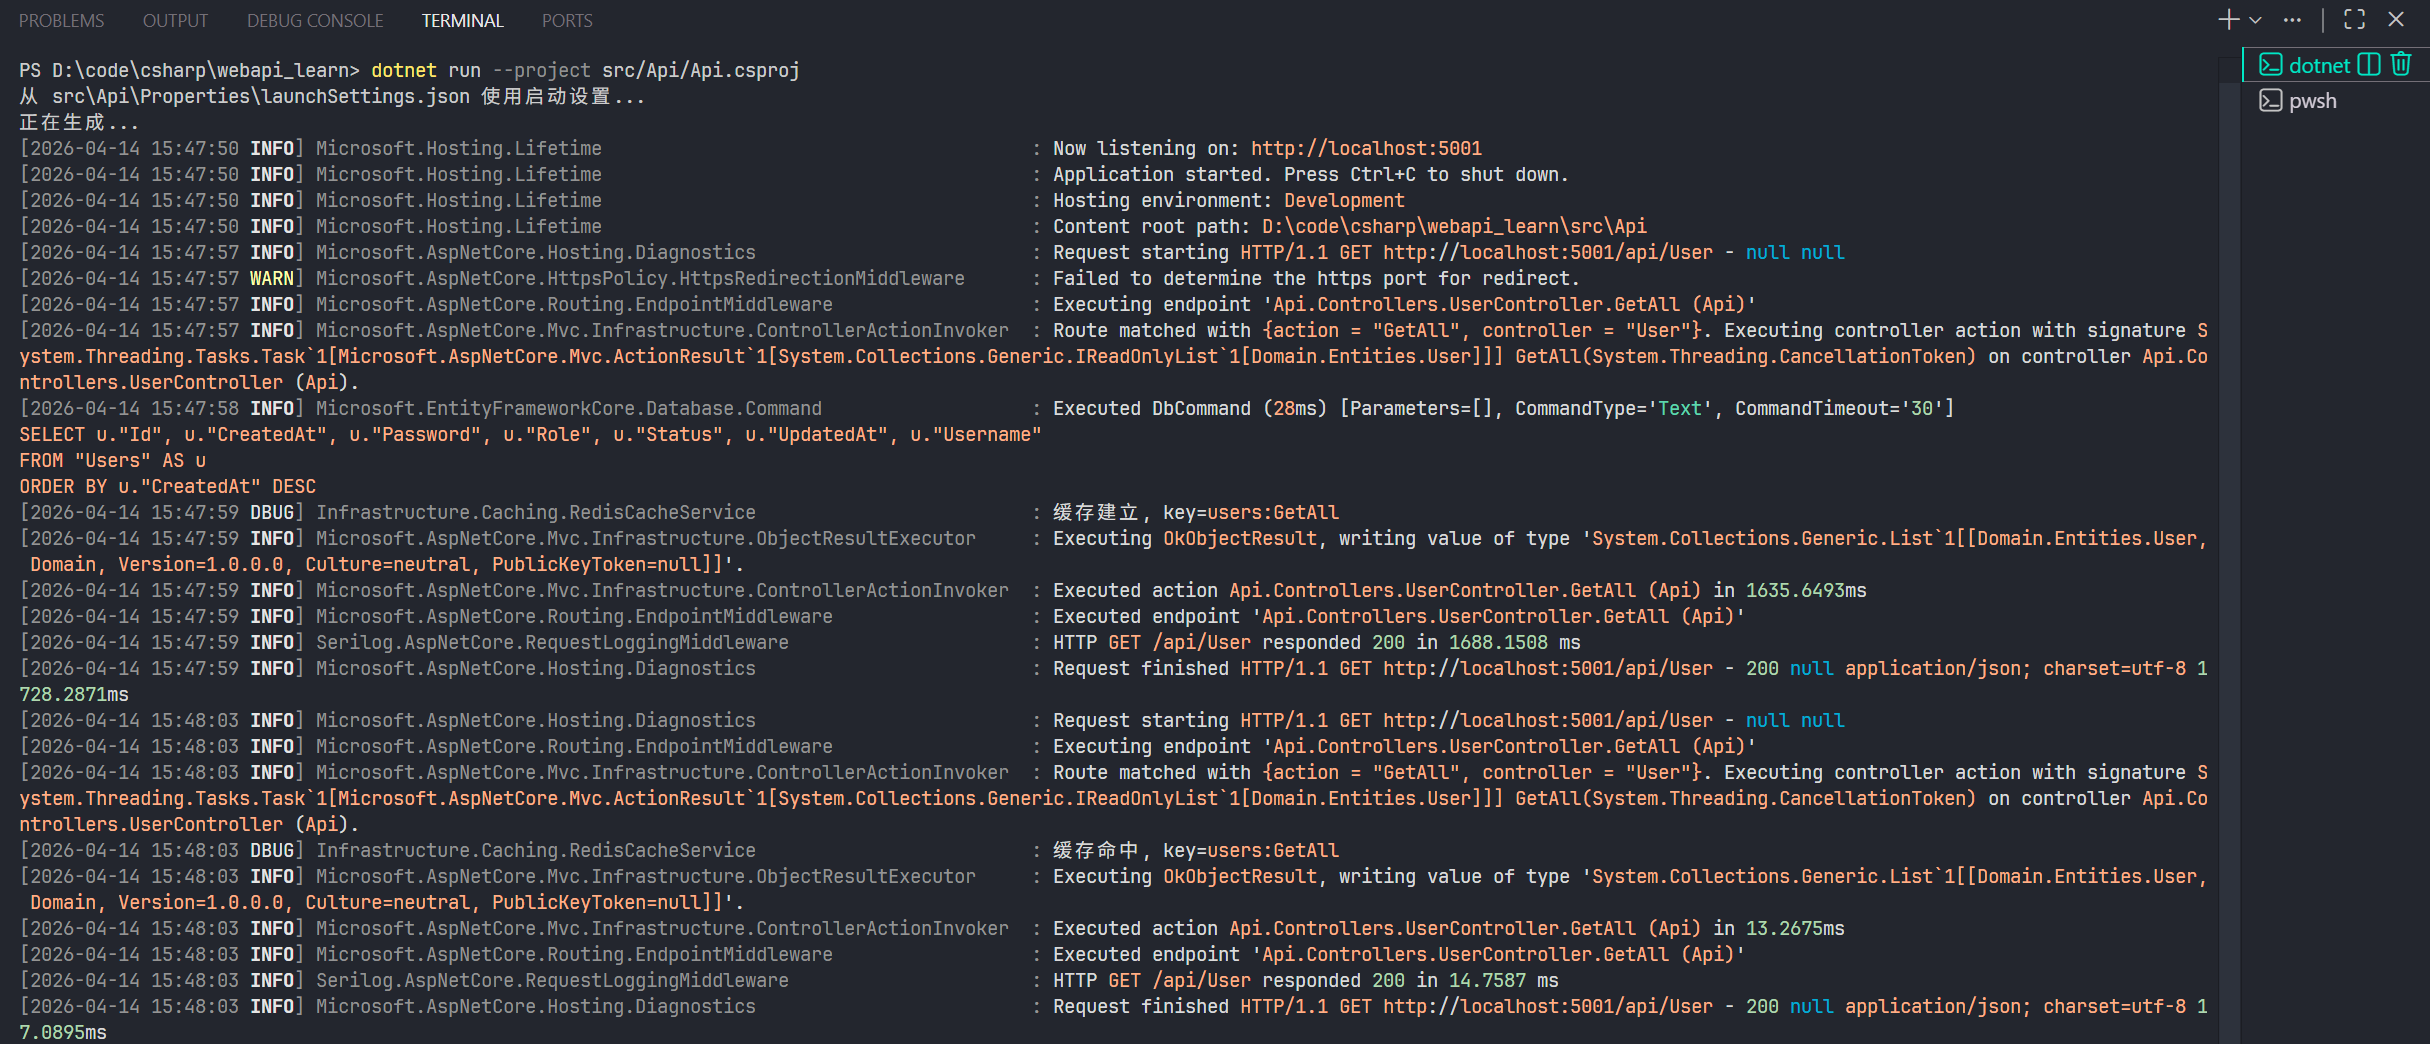
从两者的实现来看,两个方式各有优缺点,第一种方式实现简单,但是会入侵 Service 层代码;第二种方式不入侵代码,但是给 Service 层增加了一层逻辑,代码量偏多。
总体而言,我个人还是喜欢第二种实现,虽然多了一层逻辑,但胜在不入侵代码,让 Service 层的代码保持干净。
8 登录认证
简单说一下我的登录认证逻辑,我的登录认证主要是参考 Sa-Token 框架的思路,并且进行简单实现。
用户登录成功后,服务端签发 Token 给用户,同时将 Token 存入 Redis。此后的登录状态均以 Redis 的为主,如果 Redis 中的 Token 过期或者被删除了,用户登录状态失效。
而登录认证,就是需要用户在请求头携带 Token 请求,后端根据请求头中的 Token 在 Redis 中查找,找到就放行,否则拦截。
这部分我在 ASP.NET 中的实现比较简单,因为我本身只是试试能不能行,考虑不是很周到,见谅一下。
8.1 数据模型、Token 生成器、Redis 操作仓库
首先,定义实体类,主要是定义 Session 类,也就是在 Redis 中存储认证信息的格式。
在 Domain 模块,添加 Record 包,添加 TokenSession 类:
csnamespace Domain.Entities;

public sealed record TokenSession(
    Guid userId,
    string username,
    string role,
    // token 值
    string token,
    // 失效时间
    DateTime expiresAt,
    // 签发时间
    DateTime issuedAt
);
然后在 Interfaces 包中,添加 Security 包,添加两个接口:
csnamespace Domain.Interfaces.Security;

public interface ITokenGenerator
{
    public string GenerateToken(int byteLength = 64);
}
这个接口主要用于生成 Token
csusing Domain.Entities;

namespace Domain.Interfaces.Security;

public interface ITokenSessionStore
{
    Task SetAsync(string token, TokenSession session, TimeSpan ttl, CancellationToken ct = default);
    Task<TokenSession?> GetAsync(string token, CancellationToken ct = default);
    Task RemoveAsync(string token, CancellationToken ct = default);
}
这个接口主要用于操作 Redis,将 Token 存入、获取、删除。
到 Infrastructure 模块,添加一个 Security 包,添加两个类,分别实现上面两个接口:
csusing System.Security.Cryptography;
using Domain.Interfaces.Security;

namespace Infrastructure.Security;

public class RamdomStringTokenGenerator : ITokenGenerator
{
	// 生成 byteLength 位随机字符串
    public string GenerateToken(int byteLength = 64)
    {
        var bytes = RandomNumberGenerator.GetBytes(byteLength);
        return Convert.ToHexString(bytes).ToLowerInvariant();
    }
}
csusing System.Text.Json;
using Domain.Entities;
using Domain.Interfaces.Security;
using Microsoft.Extensions.Caching.Distributed;
using Microsoft.Extensions.Logging;

namespace Infrastructure.Security;

public class RedisTokenSessionStore : ITokenSessionStore
{
    private const string PREFIX = "auth:token:";
    private static readonly JsonSerializerOptions JsonOptions = new(JsonSerializerDefaults.Web);
    private readonly IDistributedCache _cache;
    private readonly ILogger<RedisTokenSessionStore> _logger;

    public RedisTokenSessionStore(IDistributedCache cache, ILogger<RedisTokenSessionStore> logger)
    {
        _cache = cache;
        _logger = logger;
    }
    public async Task SetAsync(string token, TokenSession session, TimeSpan ttl, CancellationToken ct = default)
    {
        var key = PREFIX + token;
        var val = JsonSerializer.Serialize(session, JsonOptions);
        var options = new DistributedCacheEntryOptions
        {
            AbsoluteExpirationRelativeToNow = ttl
        };
        await _cache.SetStringAsync(key, val, options, ct);
    }

    public async Task<TokenSession?> GetAsync(string token, CancellationToken ct = default)
    {
        var key = PREFIX + token;
        var val = await _cache.GetStringAsync(key);
        if (string.IsNullOrWhiteSpace(val))
            return null;
        return JsonSerializer.Deserialize<TokenSession>(val);
    }

    public Task RemoveAsync(string token, CancellationToken ct = default)
    {
        return _cache.RemoveAsync(PREFIX + token, ct);
    }

}
记得在依赖注入容器里注册:
csusing Domain.Interfaces.Repository;
using Domain.Interfaces.Security;
using Domain.Interfaces.Service;
using Infrastructure.Caching;
using Infrastructure.Data;
using Infrastructure.Repository;
using Infrastructure.Security;
using Microsoft.EntityFrameworkCore;
using Microsoft.Extensions.Configuration;
using Microsoft.Extensions.DependencyInjection;

namespace Infrastructure.DependencyInjection;

public static class ServiceCollectionExtensions
{
    public static IServiceCollection AddInfrastructure(
        this IServiceCollection services,
        IConfiguration configuration
    )
    {
	    ......

        // Security
        services.AddScoped<ITokenGenerator, RamdomStringTokenGenerator>();
        services.AddScoped<ITokenSessionStore, RedisTokenSessionStore>();

        return services;
    }
}
这部分就完成了。
8.2 认证服务层、控制层
回到 Application 模块,在 DTOs 包添加 AuthDtos,定义登录和响应需要的传输模型:
csusing System.ComponentModel.DataAnnotations;

namespace Application.DTOs;

public sealed record LoginRequest
{
    [Required]
    public Guid UserId { get; init; }

    [Required]
    public string Password { get; init; } = string.Empty;
}

public sealed record LoginResponse(
    string AccessToken,
    DateTime ExpiresAt
);
我数据库中忘记对 Username 做唯一约束,这里就用 UserId 替代一下,实际开发不要这么用。
然后,在 Interfaces 包中添加接口:
csusing Application.DTOs;

namespace Application.Interfaces;

public interface IAuthService
{
    Task<LoginResponse> LoginAsync(LoginRequest request, CancellationToken ct = default);
    Task LogoutAsync(string token, CancellationToken ct = default);
}
最后在 Services 包实现:
csusing Application.DTOs;
using Application.Interfaces;
using Domain.Entities;
using Domain.Interfaces.Security;

namespace Application.Services;

public class AuthService : IAuthService
{
    private readonly IUserService _userService;
    private readonly ITokenGenerator _tokenGenerator;
    private readonly ITokenSessionStore _tokenSessionStore;

    public AuthService(
        IUserService userService,
        ITokenGenerator tokenGenerator,
        ITokenSessionStore tokenSessionStore
    )
    {
        _userService = userService;
        _tokenGenerator = tokenGenerator;
        _tokenSessionStore = tokenSessionStore;
    }

    public async Task<LoginResponse> LoginAsync(LoginRequest request, CancellationToken ct = default)
    {
	    // 获取用户信息
        var user = await _userService.GetByIdAsync(request.UserId, ct);
        if (user is null)
            throw new UnauthorizedAccessException("用户名不存在");

        if (user.Password != request.Password)
            throw new UnauthorizedAccessException("密码错误");

		// 生成 Token
        var token = _tokenGenerator.GenerateToken();
        // 创建 Session 模型
        var expriesAt = DateTime.Now.AddHours(1);
        var session = new TokenSession(
            userId: user.Id,
            username: user.Username,
            role: user.Role.ToString(),
            token: token,
            expiresAt: expriesAt,
            issuedAt: DateTime.Now
        );
		// 存入 Redis
        await _tokenSessionStore.SetAsync(token, session, TimeSpan.FromHours(1), ct);
	    // 返回 Token
        return new LoginResponse(token, expriesAt);
    }

    public Task LogoutAsync(string token, CancellationToken ct = default)
    {
        return _tokenSessionStore.RemoveAsync(token, ct);
    }
}
认证的逻辑比较简单,密码没有加密,所以校验也很简单,漏洞很多,实际环境一定要严谨。
注册服务:
csusing Microsoft.Extensions.DependencyInjection;
using Microsoft.Extensions.Configuration;
using Application.Interfaces;
using Application.Services;
using Domain.Interfaces.Service;
using Application.Services.Caching;

namespace Application.DependencyInjection;

public static class ServiceCollectionExtensions
{
    public static IServiceCollection AddApplication(
        this IServiceCollection services,
        IConfiguration configuration
    )
    {
		......

        services.AddScoped<IAuthService, AuthService>();

        return services;
    }
}
然后是控制器,直接在 Api 模块的 Controllers 包中,添加控制器:
csusing Application.DTOs;
using Application.Interfaces;
using Microsoft.AspNetCore.Authorization;
using Microsoft.AspNetCore.Mvc;

namespace Api.Controllers;

[ApiController]
[Route("api/[controller]")]
public class AuthController : ControllerBase
{
    private readonly IAuthService _authService;

    public AuthController(IAuthService authService)
    {
        _authService = authService;
    }

    [AllowAnonymous]
    [HttpPost("login")]
    public async Task<ActionResult<LoginResponse>> Login([FromBody] LoginRequest request, CancellationToken ct)
    {
        var result = await _authService.LoginAsync(request, ct);
        return Ok(result);
    }

    [Authorize]
    [HttpPost("logout")]
    public async Task<IActionResult> Logout(CancellationToken ct)
    {
        var auth = Request.Headers.Authorization.ToString();
        if (!System.Net.Http.Headers.AuthenticationHeaderValue.TryParse(auth, out var parsed) ||
            !string.Equals(parsed.Scheme, "Bearer", StringComparison.OrdinalIgnoreCase) ||
            string.IsNullOrWhiteSpace(parsed.Parameter))
        {
            return Unauthorized("Authorization 头必须为 Bearer Token");
        }

        var token = parsed.Parameter.Trim();

        await _authService.LogoutAsync(token, ct);
        return Ok();
    }
}
[AllowAnonymous]是一个授权特性,用于显式允许匿名访问,即不用登录也能访问,可以作用在控制器类上,也可以作用在方法上。 上述代码中,从请求头提取 token 的逻辑没有封装,生产环境记得封装一下,方便调用。
8.3 认证处理器、运行测试
由于 ASP.NET 原生就集成了认证功能,不需要手写拦截器,只需要重写认证处理器即可。
在 Api 模块中,新建 Auth 包,创建认证处理器:
csusing System.Security.Claims;
using System.Text.Encodings.Web;
using Domain.Interfaces.Security;
using Microsoft.AspNetCore.Authentication;
using Microsoft.Extensions.Options;

namespace Api.Auth;

public sealed class RedisTokenAuthenticationHandler : AuthenticationHandler<AuthenticationSchemeOptions>
{
	// SCHEME 是框架用于区分不同认证方式的标识
    public const string SCHEME = "RedisToken";
    private readonly ITokenSessionStore _tokenSessionStore;

    public RedisTokenAuthenticationHandler(
        IOptionsMonitor<AuthenticationSchemeOptions> options,
        ILoggerFactory logger,
        UrlEncoder encoder,
        ITokenSessionStore tokenSessionStore
    ) : base(options, logger, encoder)
    {
        _tokenSessionStore = tokenSessionStore;
    }

    protected override async Task<AuthenticateResult> HandleAuthenticateAsync()
    {
	    // 提取请求头,这里比较简单,实际开发记得做严谨一点的提取验证
        if (!Request.Headers.TryGetValue("Authorization", out var authHeader))
            return AuthenticateResult.NoResult();

        var token = authHeader.ToString().Replace("Bearer ", string.Empty).Trim();

        if (string.IsNullOrWhiteSpace(token))
            return AuthenticateResult.Fail("Token 为空");

		// 从 Redis 中获取 Session
        var session = await _tokenSessionStore.GetAsync(token, Context.RequestAborted);
        if (session == null)
            return AuthenticateResult.Fail("Token 无效或已过期");

		// 这里是 ASP.NET 的认证机制实现步骤,必须返回有效的认证凭据,才能算完成认证
		// 将 Session 转化为框架可识别的 Claims 格式
        var claims = new[]
        {
            new Claim(ClaimTypes.NameIdentifier, session.userId.ToString()),
            new Claim(ClaimTypes.Name, session.username),
            new Claim(ClaimTypes.Role, session.role),
        };
        // 创建身份对象
        var identity = new ClaimsIdentity(claims, SCHEME);
        // 创建当前认证用户对象
        var principal = new ClaimsPrincipal(identity);
        // 创建凭据
        var ticket = new AuthenticationTicket(principal, SCHEME);
		// 认证成功
        return AuthenticateResult.Success(ticket);
    }
}
最后,就是注册这个认证处理器,在 Api 包下的 Program.cs 中,在 // Add services to the container. 部分 添加如下代码:
csusing Api.Auth;
using Application.DependencyInjection;
using Infrastructure.DependencyInjection;
using Microsoft.AspNetCore.Authentication;
using Microsoft.AspNetCore.Authorization;
using Serilog;

var builder = WebApplication.CreateBuilder(args);

// Add services to the container.

......

// 注册认证处理器
builder.Services.AddAuthentication(
    options =>
    {
	    // 指定默认认证方案
        options.DefaultAuthenticateScheme = RedisTokenAuthenticationHandler.SCHEME;
        options.DefaultChallengeScheme = RedisTokenAuthenticationHandler.SCHEME;
    }
).AddScheme<AuthenticationSchemeOptions, RedisTokenAuthenticationHandler>( // 添加认证方案
    RedisTokenAuthenticationHandler.SCHEME, _ => { }
);

// 添加授权配置
builder.Services.AddAuthorization(
    options =>
    {
	    // FallbackPolicy 是默认授权策略,为全局提供统一的默认行为
        options.FallbackPolicy = new AuthorizationPolicyBuilder()
	        // 使用Redis Token方案
            .AddAuthenticationSchemes(RedisTokenAuthenticationHandler.SCHEME)
            // 要求用户已认证,这里要求所有接口必须认证,除非加了 [AllowAnonymous] 特性
            .RequireAuthenticatedUser()
            .Build();
    }
);

......


var app = builder.Build();

// Configure the HTTP request pipeline.

.....

// 这两个记得加,默认就有
app.UseAuthorization();

app.MapControllers();

app.Run();
接下来就可以用了:
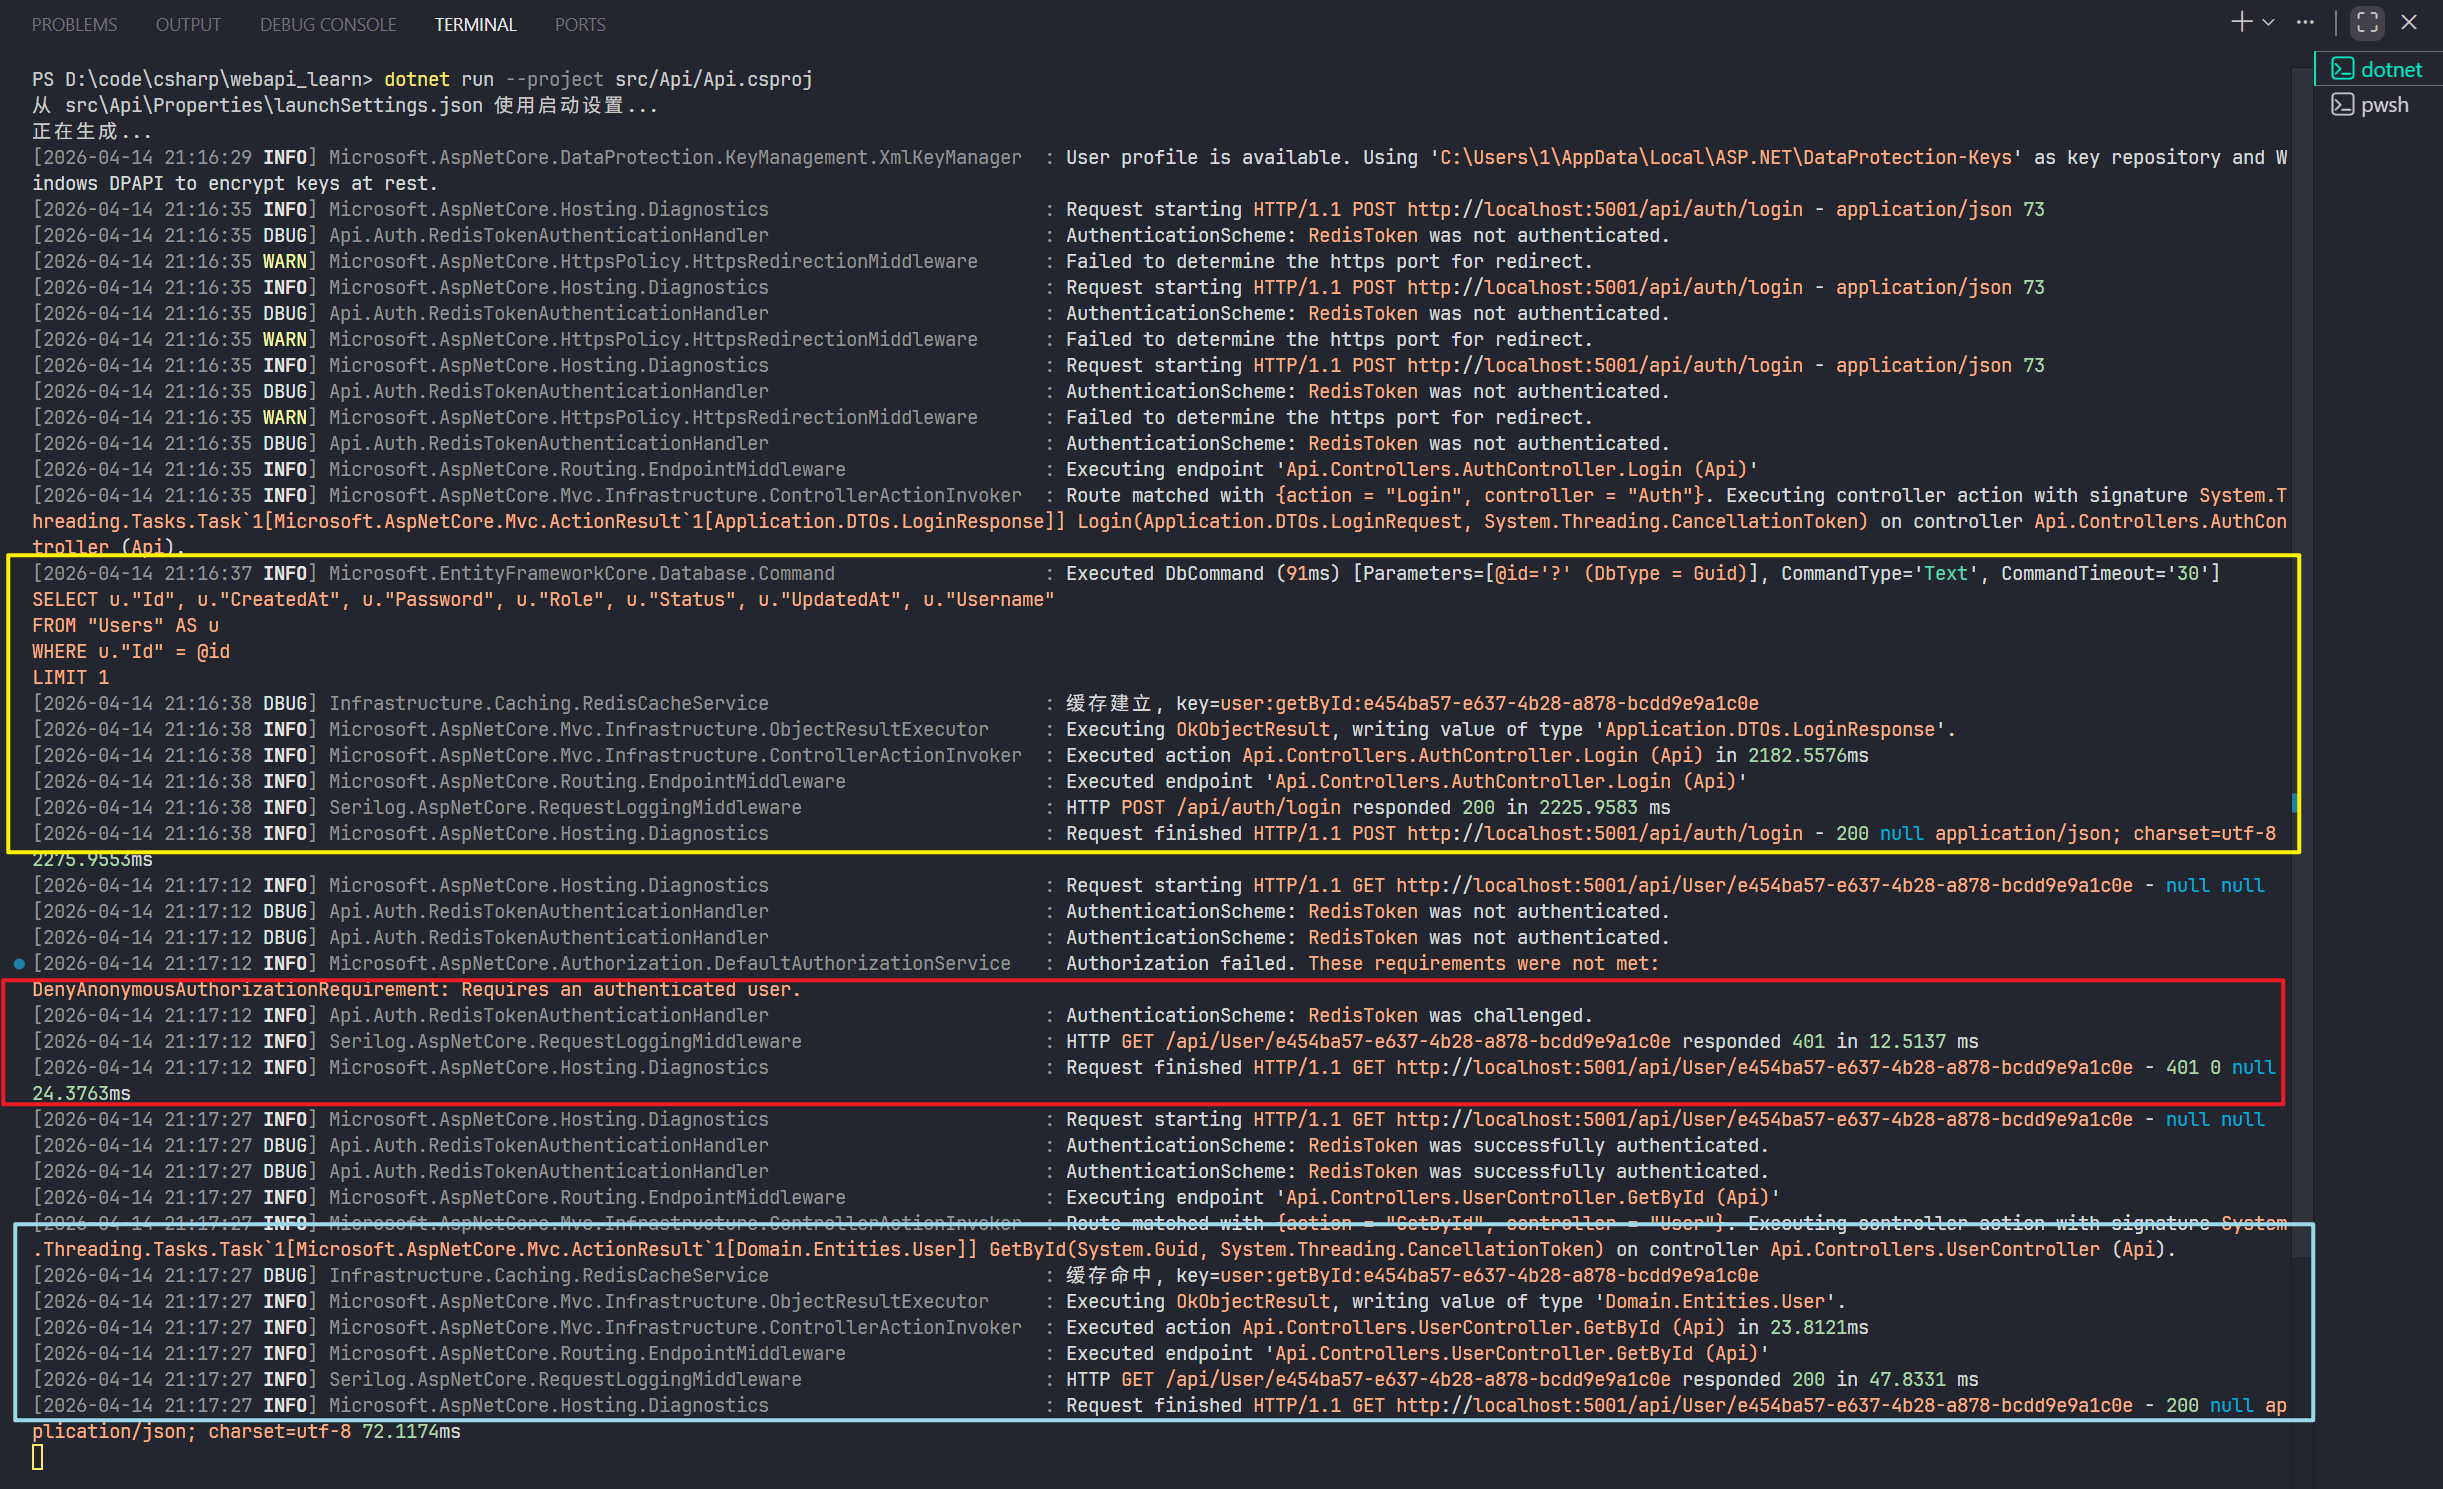
- 黄色框是登录接口,建了 token session 缓存。
- 红色框是没带 Token 访问 User 的 GetById 方法,返回 401 响应码。
- 蓝色框是带 Token 访问User 的 GetById 方法,成功返回。
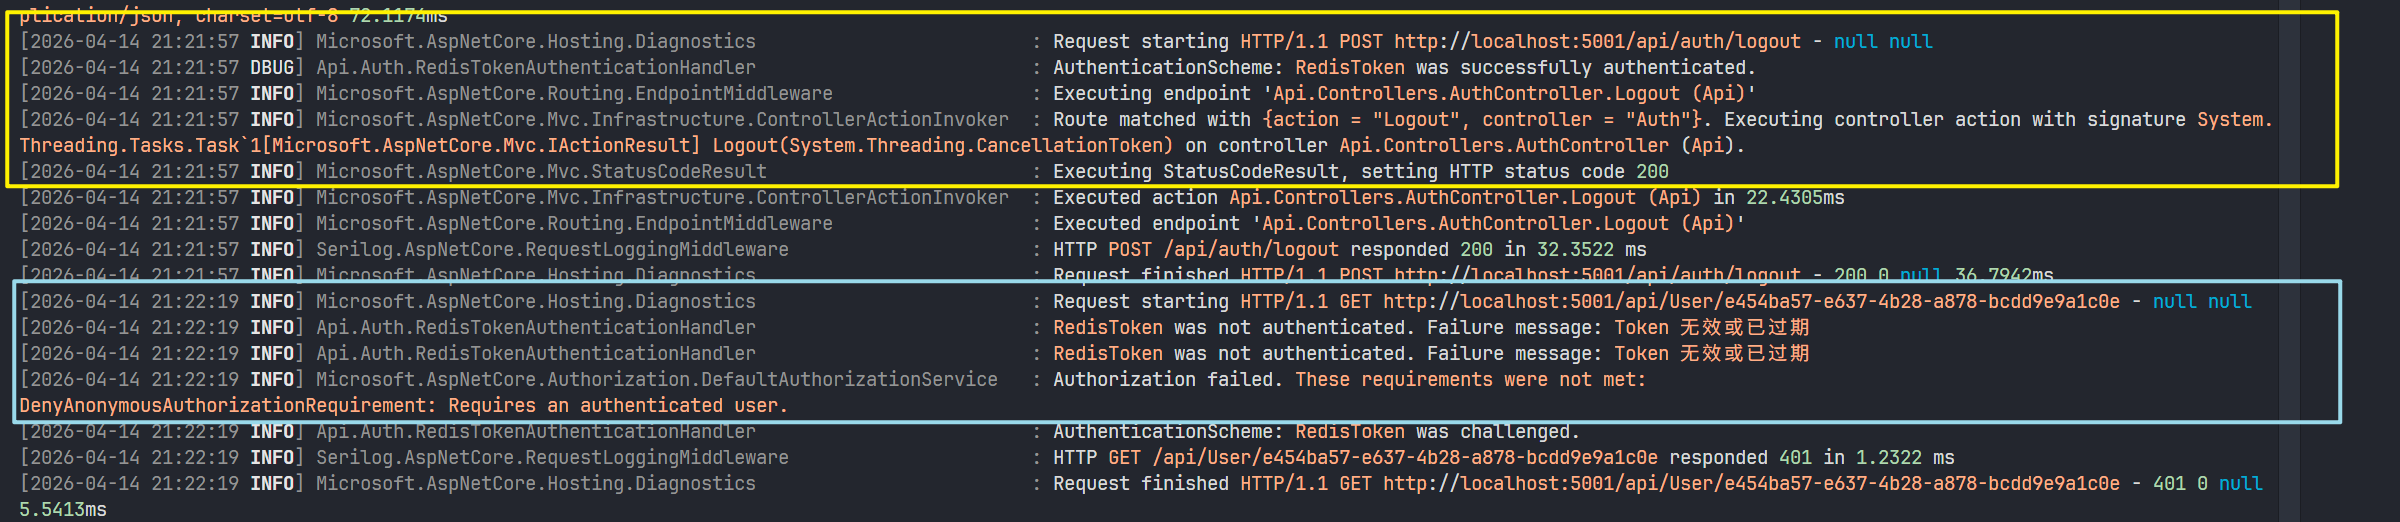
- 黄色框是登出接口。
- 蓝色框是带原来的 Token 访问,访问User 的 GetById 方法,提示 Token 过期。
9 基础知识补充
- C# 、.NET、ASP.NET 三者是什么关系? C# 是编程语言,.NET 是开发、运行平台、ASP.NET 是 Web 框架。 .NET 是一个跨语言、跨平台的开发平台,提供程序开发环境和运行环境,语言可以是 C#,f#,j#,vb.net 等等。 这三者的关系有点像 Java、JVM、Spring MVC,只不过 JVM 只是跨平台。 补充:
- .NET 的特性Attribute是什么? 特性是可以为类、方法、属性等添加声明式的元数据标签的机制。在编译后,这些信息会嵌入到程序集的元数据中,可以通过反射在运行时读取。和 Java 的注解类似,都是在源代码层面,给类、方法、属性等添加标签,然后在编译时写入元数据,告诉程序要做什么处理。
- 装饰器模式和代理模式的区别?
- 设计目标不同,装饰器模式的目的是增强功能,为对象添加/扩展出新功能;代理模式目的是控制访问,管理对原始对象的访问,或者叫做管理代码的执行(不止增强)。
- 实现方式不同,装饰器模式一般通过多层嵌套来装饰;代理模式一般是一对一代理。
- 各个依赖注入策略?
- Transient:每次注入都会创建一个新的实例。
- Scoped:每个 HTTP 请求内共享同一个实例。
- Singleton:整个应用生命周期只创建一个实例。
10 总结
- 学习了 C# 相关语法。
- 学习了 dotNET 相关命令。
- 学会如何使用 dotNET 命令搭建洋葱架构项目。
- 学习了 ASP.NET 洋葱架构项目以及使用方式。
- 学习了 ASP.NET 异步编程的简单实践。
- 学习了如何在 ASP.NET 中连接、操作数据库。
- 学习了 EF Core 库的使用方法。
- 学习了如何基于洋葱项目架构编写基本的 CURD 操作。
- 学习了如何在 ASP.NET 中集成 Serilog 日志库。
- 学习了如何进行简单的分层注册 Service。
- 学习了如何在 ASP.NET 下载三方库、构建项目、运行项目。
- 学习了如何在 ASP.NET 集成 Redis。
- 学习了在 ASP.NET 中编写缓存逻辑的两种方式。
- 学习了在 ASP.NET 中,编写登录认证的过程,了解了 ASP.NET 进行认证的流程。