6122 字
8 分钟
25 次
- 2025-12-31
1 前言
我很喜欢用 Obsidian,我的第一个笔记软件就是用的 Obsidian,在我还没开始写代码的时候,我就开始用 Obsidian 做笔记。
我现在也搭建了一个自己的博客网站,初版,也就是 v1 版的博客端的布局,特别是文章部分的布局,是参考 Obsidian 的。
然而,v1 版的后台系统,使用 Vue3 + Element Plus 搭建的,很简陋,而且超级无敌丑。
在 v1 版,上传笔记的主要方式是,先在 Obsidian 写好,然后复制粘贴到后台管理系统的 markdown 编辑器,最后把图片一一上传。很繁琐,对吧?
说实话,如果只是文字的话,复制粘贴过去就完事了,只是有些 Obsidian 特殊的语法,在 markdown 编辑器没法展示出来而已(博客端是可以的,因为我用了 markdown-it 插件)。
最麻烦的还是图片。如果我写了一篇很长的博客,有大量图片的话,一个个上传简直要我老命。
最开始,我解决该问题的想法是,在后台搭一个和 Obsidian 差不多体验的编辑器,这样写文章和上传图片两不误。这个想法后面放弃了,想想也知道,自己怎么可能搭建出媲美 Obsidian 的编辑体验的编辑器?
就算可以,那也得花超级多的时间,而且可能还会有众多 bug,对一个小博客网站来说,实在是杀鸡用牛刀。
后面,我了解到了图床这个东西。了解到 Obsidian 也可以利用插件连接图床,实现图片上传到图床,然后在笔记中使用。
可以说,这种方式完全解决了我的问题。
我的服务器使用 RustFS 作为对象存储服务,如果把其当作图床,利用插件,在 Obsidian 用到的图片就能直接上传到 RustFS,我的笔记图片就全是上传好的链接,我只需要将文档内容直接复制到后台的 md 编辑器,就移植好了,非常方便。
于是,我开始琢磨怎么在 Obsidian 集成图床。网上大部分都是使用 Picgo,我查了一下,Picgo 还支持 MinIO 。
下载完 Picgo 后,我查了一下插件市场,不出所料,没有 RustFS 的。
其实没有也无所谓,因为有 S3 的,RustFS 是完全遵循 S3 协议的,所以使用 S3 的插件也可以。
但是,我忘了一件事。我的博客系统上传文件是使用预签名上传的。更巧的是,我的博客是前后端分开服务器部署的,并且设置了反向代理,后端服务器完全是藏起来的,任何相关的端口都只开给前端服务器。预签名也是通过前端服务器转发。
不巧的是,里面所有的插件,都是直传对象存储服务的,适配我这个场景的完全没有。
自己写一个?我立刻浮起这种想法。抱着试一试的心态,我找到了 picgo-plugin-s3 插件的仓库,拉来下看了下。
好家伙,居然是用 ts 写的,代码完全看得懂。
于是为了让 Picgo 支持我的服务器,照着官网文档,开始开发一个 Picgo 插件。
参考:
- 插件开发 | PicGo-Core
- 在Node里使用picgo | PicGo-Core
- PicGo 插件开发入门 | 怠惰のコエ - imba久期 BLOG
- GitHub - wayjam/picgo-plugin-s3: PicGo S3 插件
- GitHub - PicGo/picgo-template-plugin: Official plugin template for PicGo-Core
- Obsidian中图床自动上传设置-使用PicGo - 知乎
2 开发前准备
开发之前,需要安装 picgo 官方的项目模板创建工具,不需要直接从 0 搭建。
随便找个目录打开 CMD,输入命令:
shellpnpm add -g picgo
由于我使用了 nvm,没有全局目录,我需要先运行
pnpm setup创建一个全局目录
安装完成后,输入 picgo -h 看看是不是安装成功了
然后,在你的项目目录上,打开 CMD,输入命令
shellpicgo init plugin <你的插件名称>
我经常创建不了项目,老是提示下载超时,我挂魔法也要试好多次才行,真的令人血压升高。
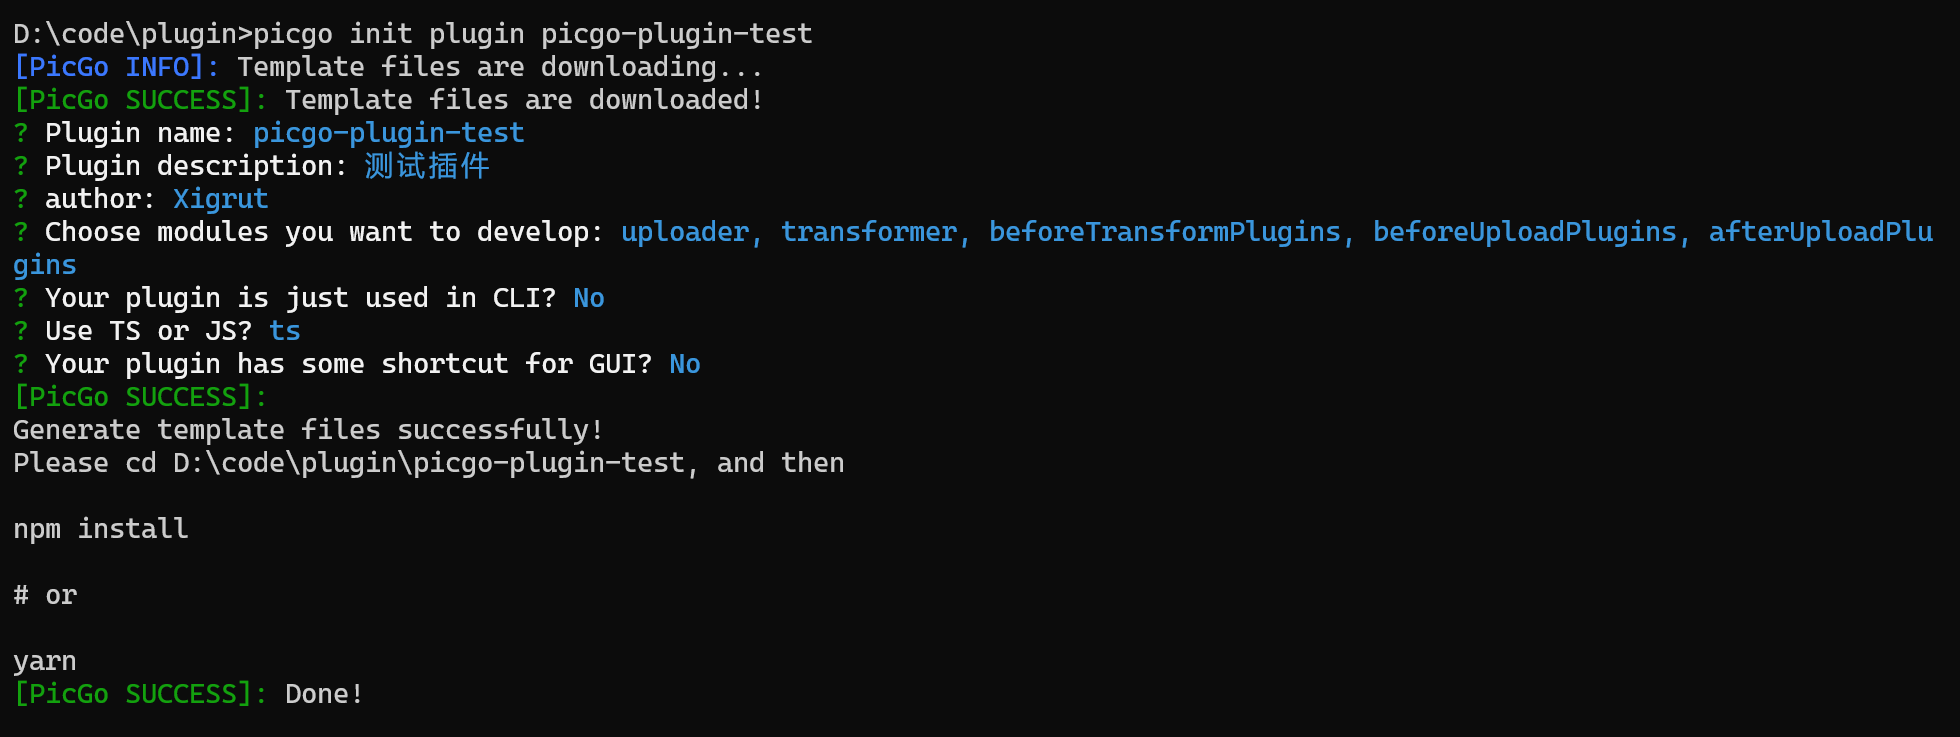
Choose modules you want to develop:指你要开发的模块,这里有五个模块,如果你选择某一个,创建出的项目的 index.ts 就会注册这个模块。当然,不选择的话,后面也可以自己在代码添加,添加也很简单。 Your plugin is just used in CLI?:指你开发的插件要用在命令行吗,我这里选 NO,因为我主要开发的是 GUI。 Your plugin has some shortcut for GUI?:指你的插件需要为 GUI 界面提供快捷键吗?我选的 NO。 项目名称一定要是 picgo-plugin-xxx 这种格式,不然后面安装的时候,PicGo 识别不了。
创建完成后,先不着急执行 npm install,我们先看看目录结构。
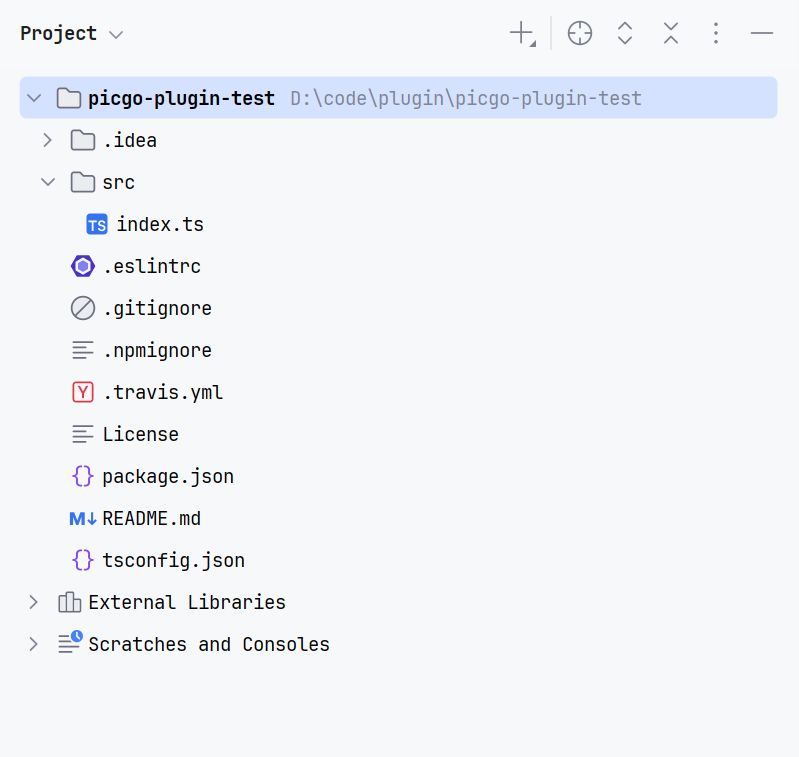
相当简单的目录结构。
点开 package.json, 默认配置
json{
  "name": "picgo-plugin-picgo-plugin-test",
  "version": "1.0.0",
  "description": "测试插件",
  "main": "dist/index.js",
  "publishConfig": {
    "access": "public"
  },
  "homepage": "",
  "scripts": {
    "test": "echo \"Error: no test specified\" && exit 1",
    "build": "tsc -p .",
    "dev": "tsc -w -p .",
    "patch": "npm version patch && git push origin master && git push origin --tags",
    "minor": "npm version minor && git push origin master && git push origin --tags",
    "major": "npm version major && git push origin master && git push origin --tags"
  },
  "keywords": [
    "picgo",
    "picgo-gui-plugin",
    "picgo-plugin"
  ],
  "author": "Xigrut",
  "license": "MIT",
  "devDependencies": {
    "@types/node": "16.9.1",
    "@typescript-eslint/eslint-plugin": "^5.40.0",
    "@typescript-eslint/parser": "^5.40.0",
    "eslint-config-standard-with-typescript": "^23.0.0",
    "eslint-plugin-node": "^11.1.0",
    "eslint-plugin-standard": "^3.1.0",
    "picgo": "^1.5.0-alpha.13",
    "typescript": "^4.8.4",
    "eslint": "^8.25.0",
    "eslint-config-standard": "^17.0.0",
    "eslint-plugin-import": "^2.26.0",
    "eslint-plugin-n": "^15.3.0",
    "eslint-plugin-promise": "^6.1.0"
  }
}
可以看到,配置的各种依赖,版本都很老,甚至连自己的 picgo 库都不是最新版的。我们来简单升级一下。
把依赖改成这样:
json"devDependencies": {
  "@eslint/js": "^9.39.2",
  "@types/node": "22.19.3",
  "eslint": "^9.39.2",
  "eslint-config-prettier": "^10.1.8",
  "eslint-plugin-prettier": "^5.5.4",
  "picgo": "1.6.0",
  "prettier": "^3.7.4",
  "typescript": "^5.9.3",
  "typescript-eslint": "^8.50.0"
},
"dependencies": {
  "file-type": "^21.1.1",
  "mime": "^4.1.0"
}
@types/node的版本可以根据自己的 node 版本调整,我的是 22 版。file-type和mime主要是用来判断文件类型的。
然后直接执行 pnpm install 安装。执行完成后,删除项目目录中的 .eslintrc 文件。创建一个 eslint.config.mjs 文件。然后把下面的内容粘进去。
ts// @ts-check

import eslint from '@eslint/js'
import { defineConfig } from 'eslint/config'
import tseslint from 'typescript-eslint'
import eslintPluginPrettier from 'eslint-plugin-prettier/recommended'

export default defineConfig(
    {
        ignores: ['**/build/**', '**/dist/**'],
    },
    eslint.configs.recommended,
    tseslint.configs.recommended,
    eslintPluginPrettier,
    {
        rules: {
            'prettier/prettier': [
                'error',
                {
                    semi: false,          // 不使用分号结尾
                    singleQuote: true,    // 使用单引号而非双引号
                    printWidth: 80,       // 代码行最大宽度为80个字符
                    tabWidth: 2,          // 缩进使用2个空格
                    trailingComma: 'all', // 对象/数组末尾保留逗号
                    arrowParens: 'always',// 箭头函数参数始终使用括号
                    endOfLine: 'auto',    // 自动选择换行符类型
                }
            ],
        },
    },
)
'prettier/prettier':部分,可以根据自己的习惯更改,上面是我自己的习惯。
粘完以后,你的编译器可能会报一堆错,那是因为 eslint 配置生效了,但是没有自动帮你纠正,我们得设置一下保存后自动纠正的功能。
我使用的是 WebStorm 的免费版,先点开 eslint 的设置
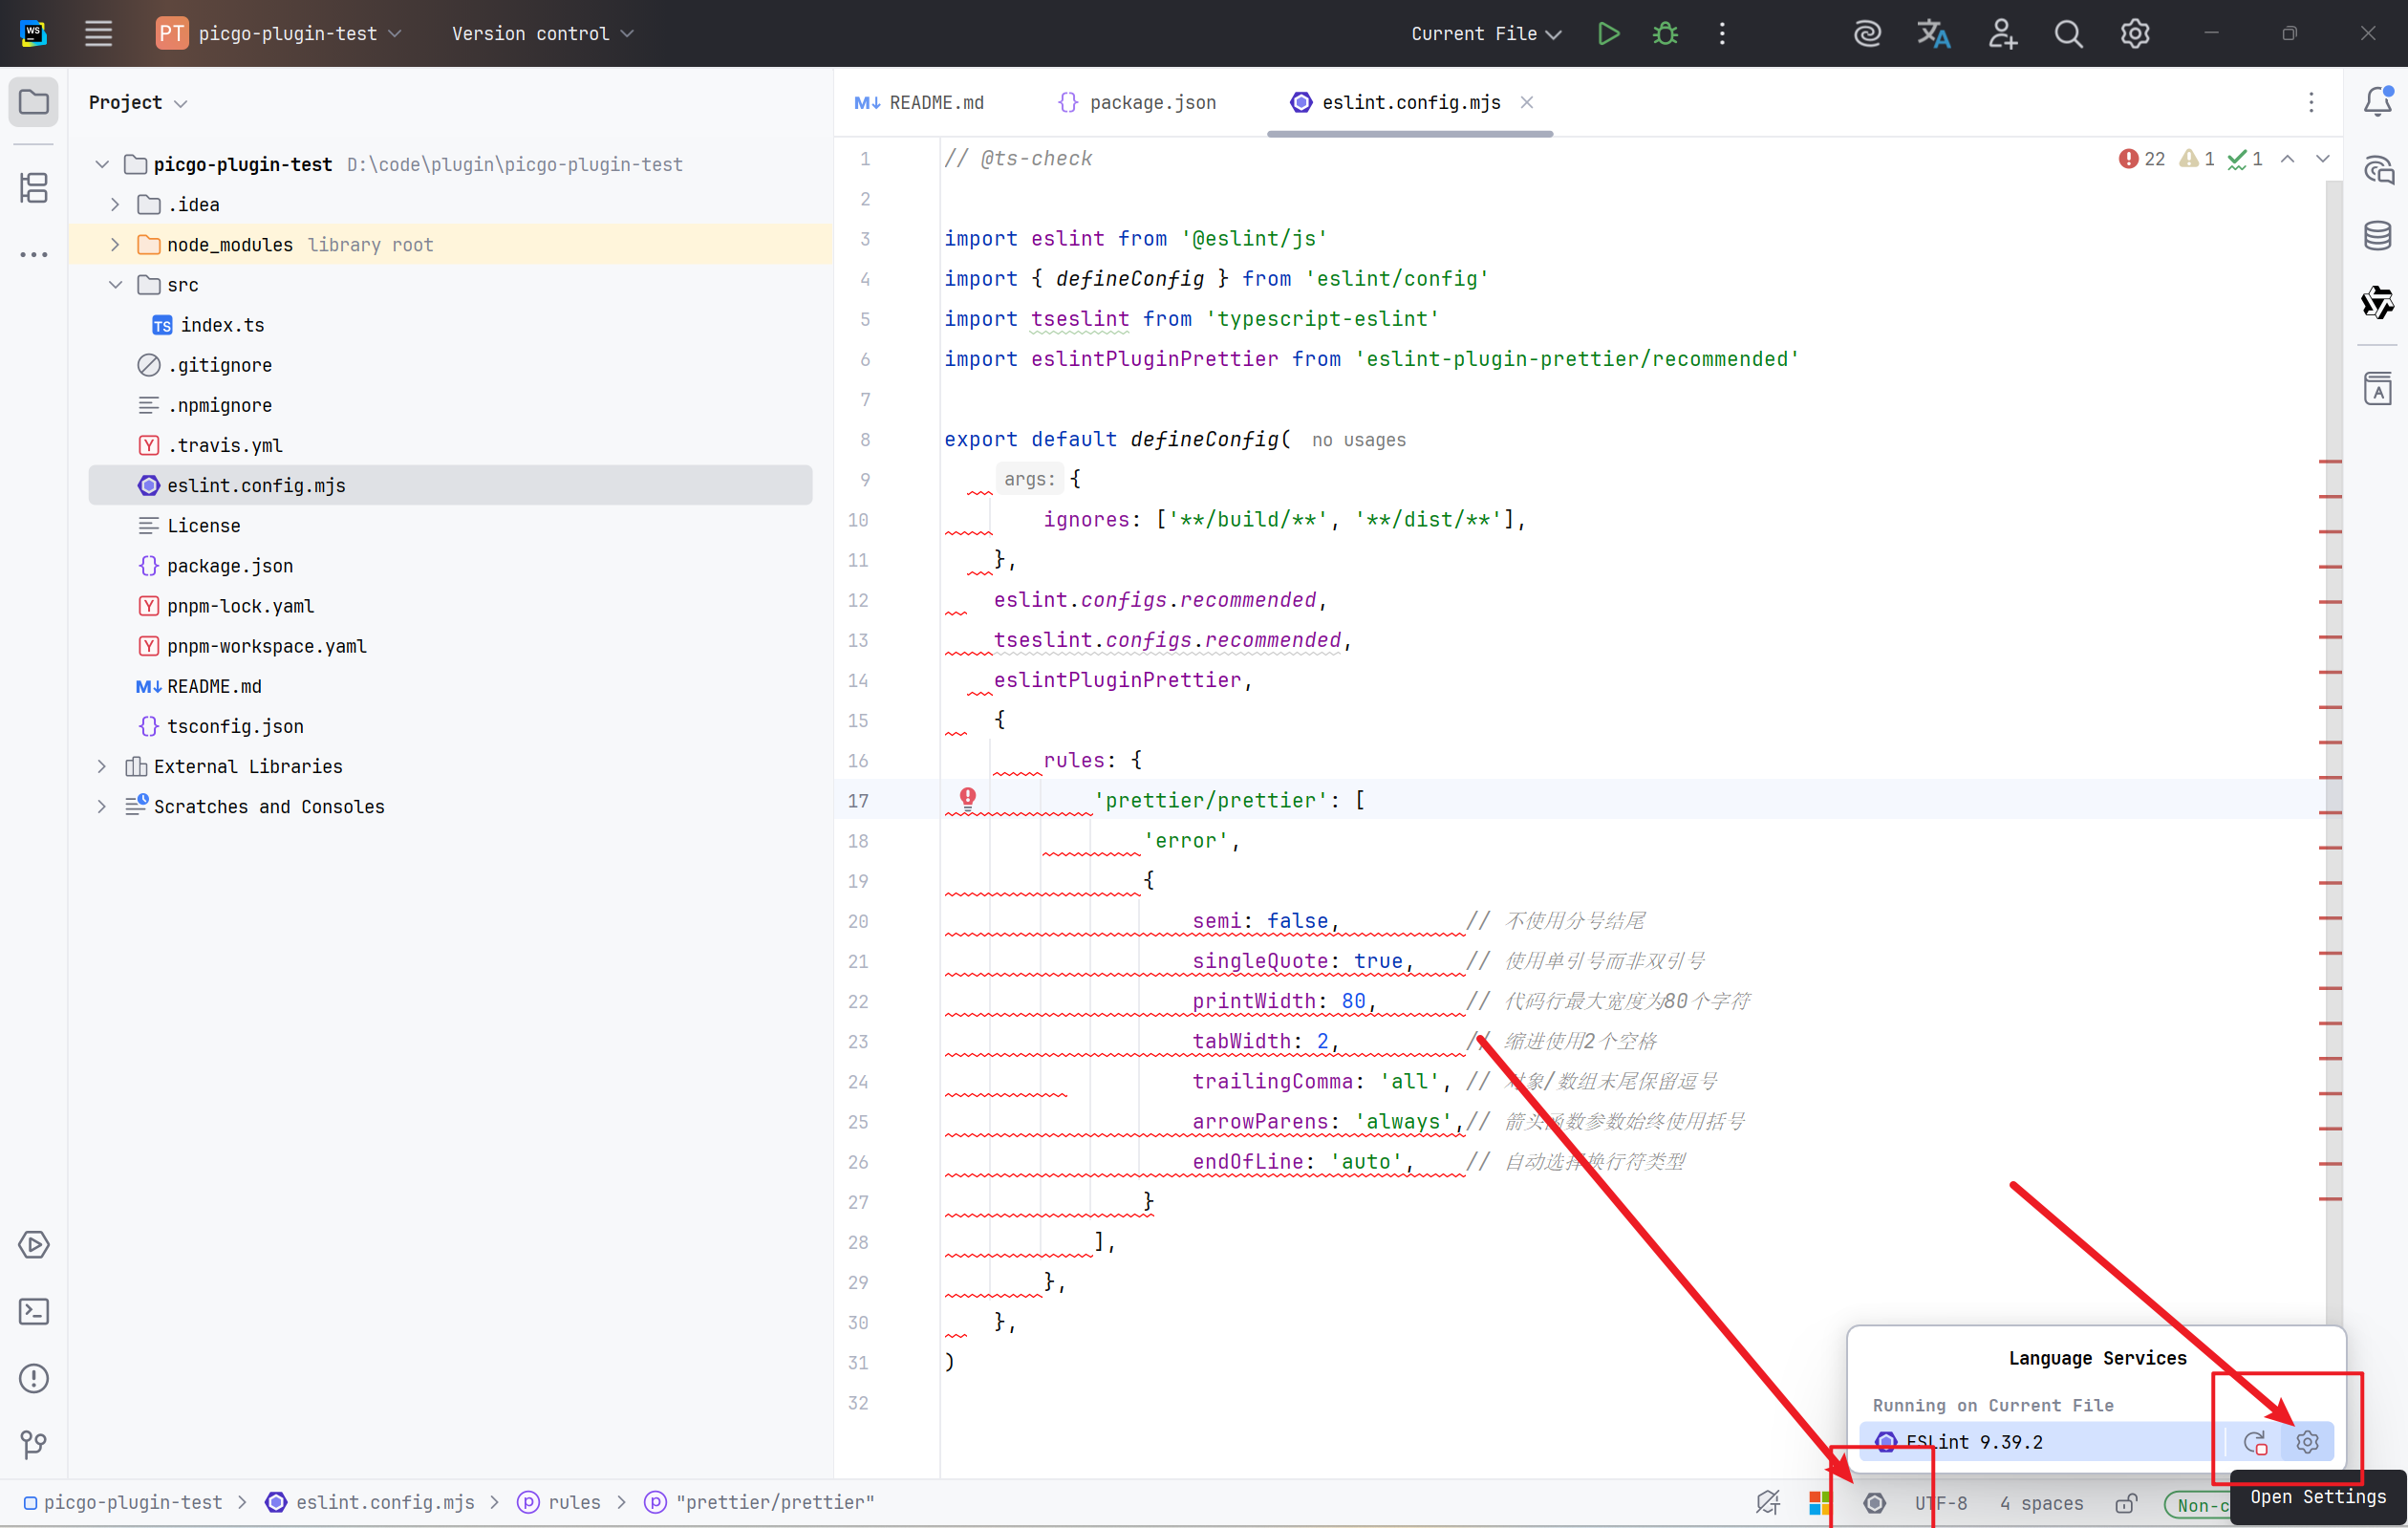
点击 All actions on save
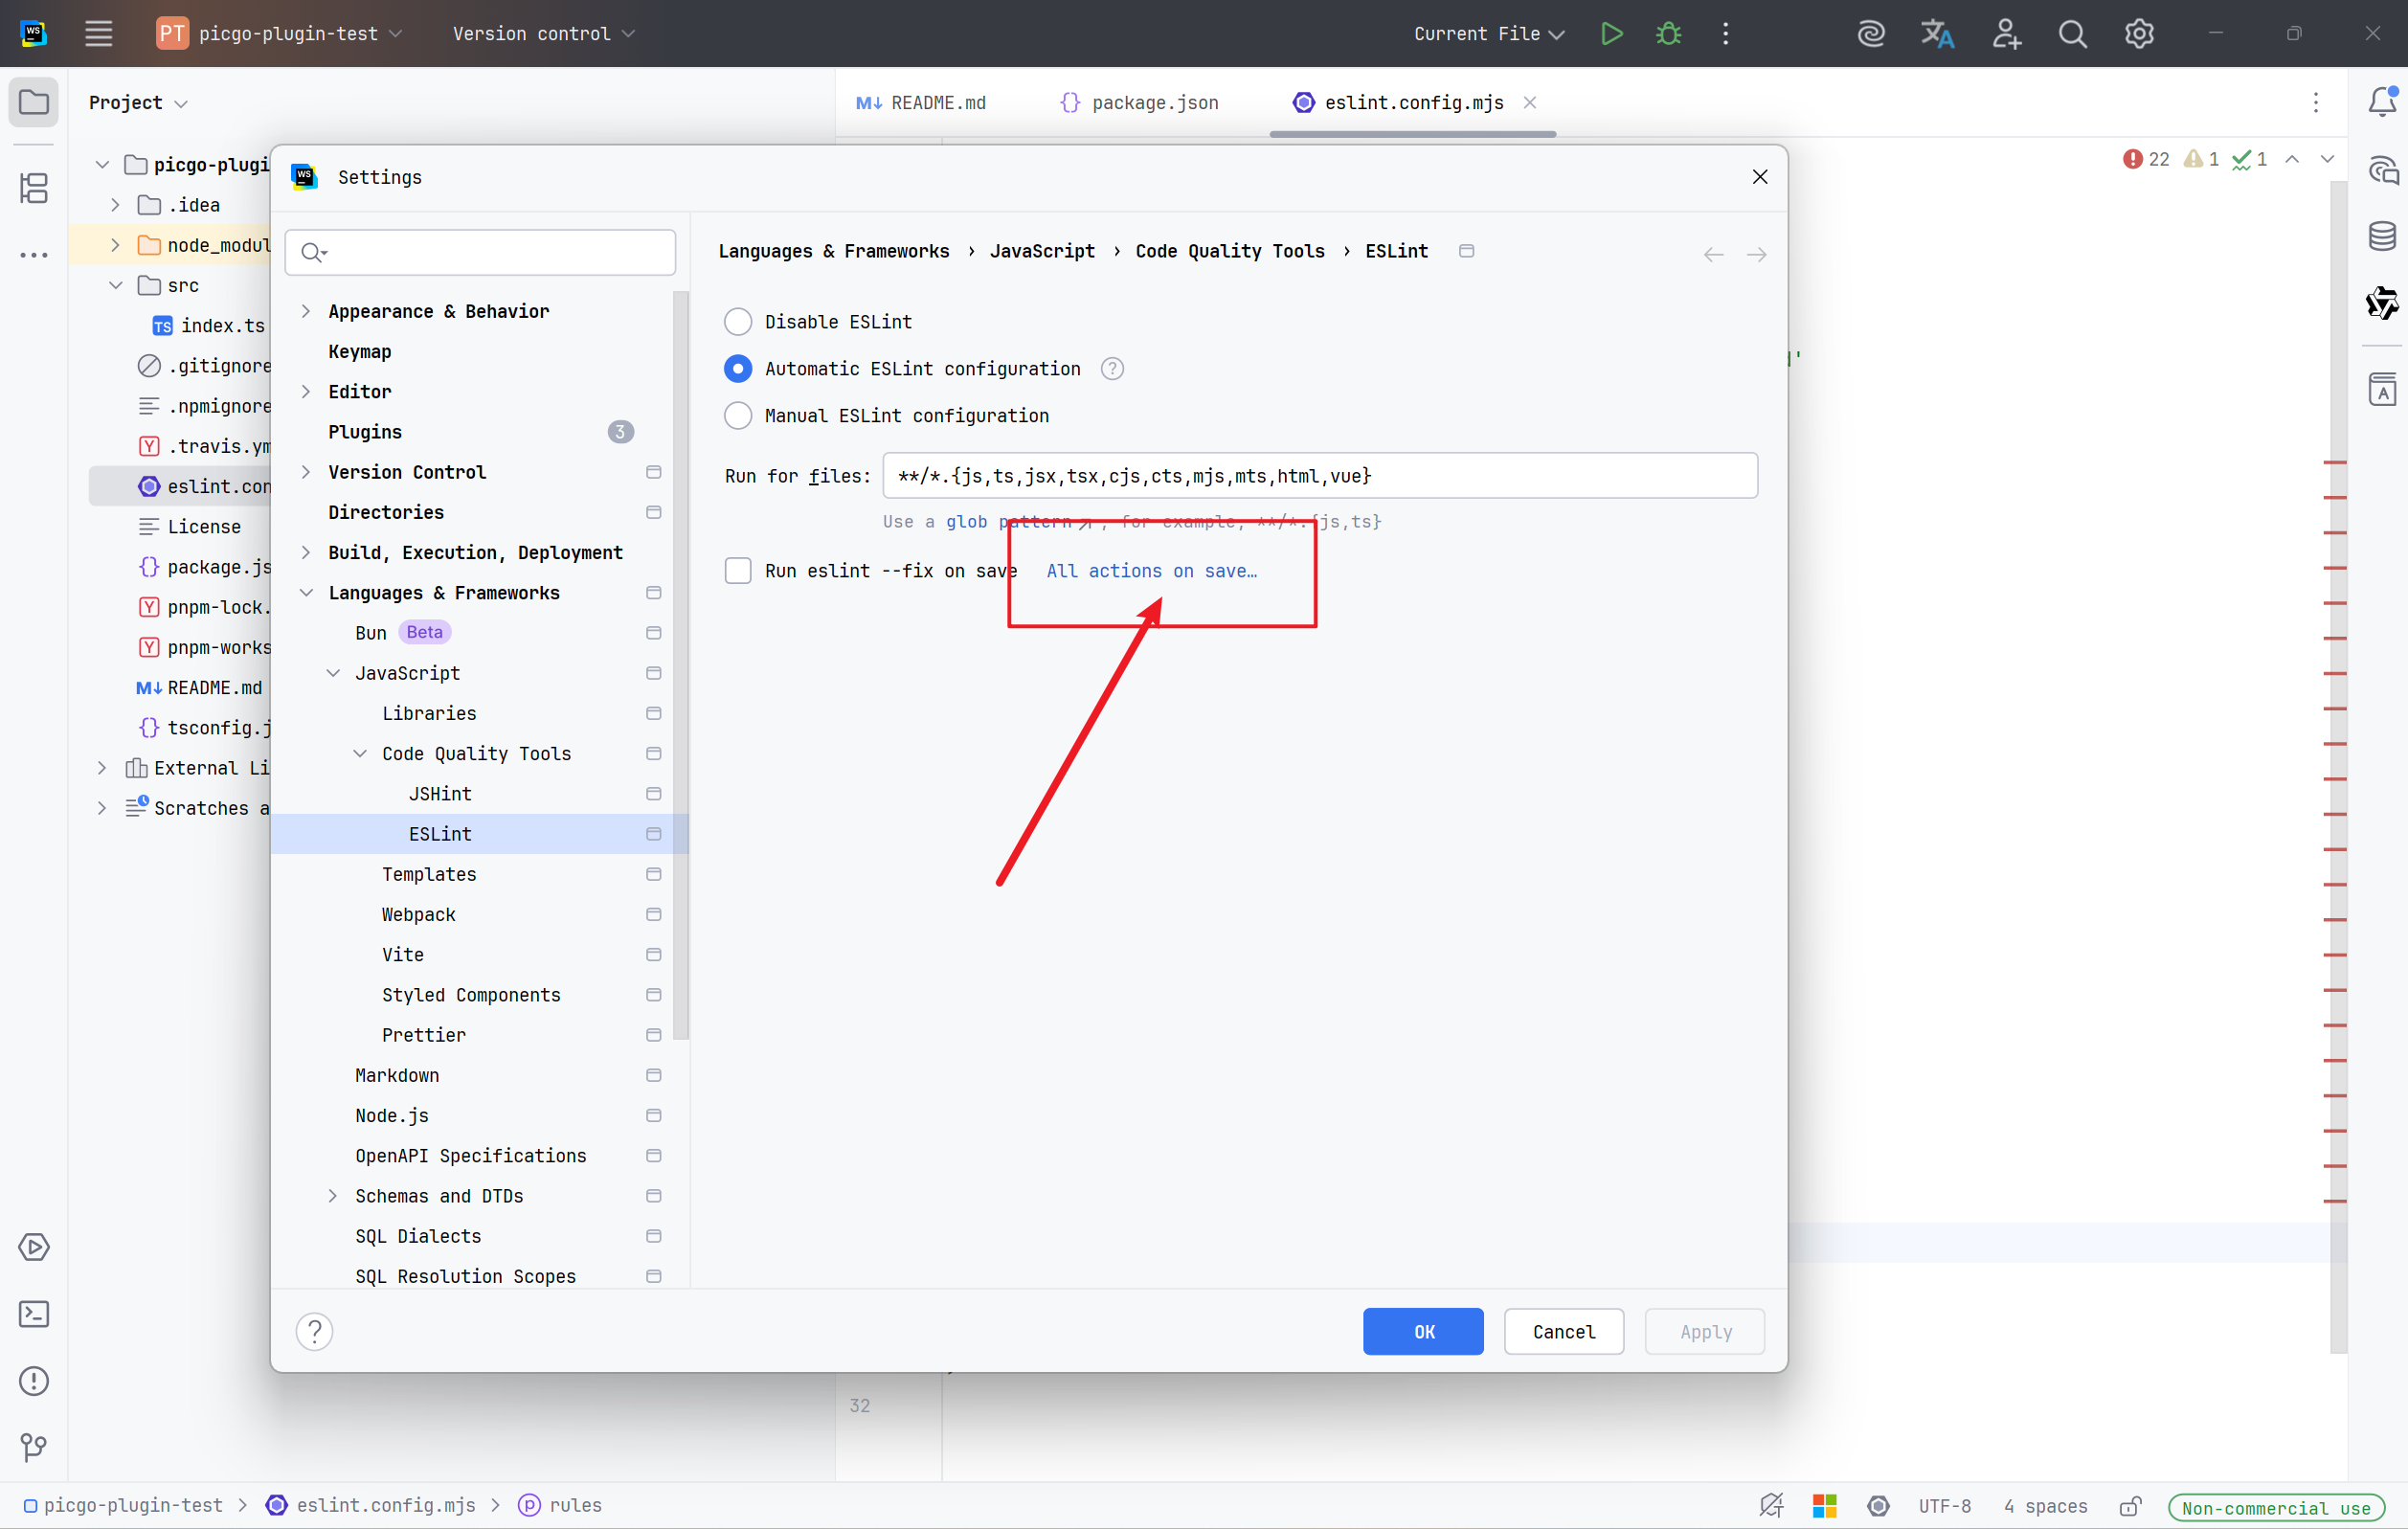
勾选 Run eslint --fix,Run Prettier 好像勾选不了,如果可以勾选的话就勾选一下。
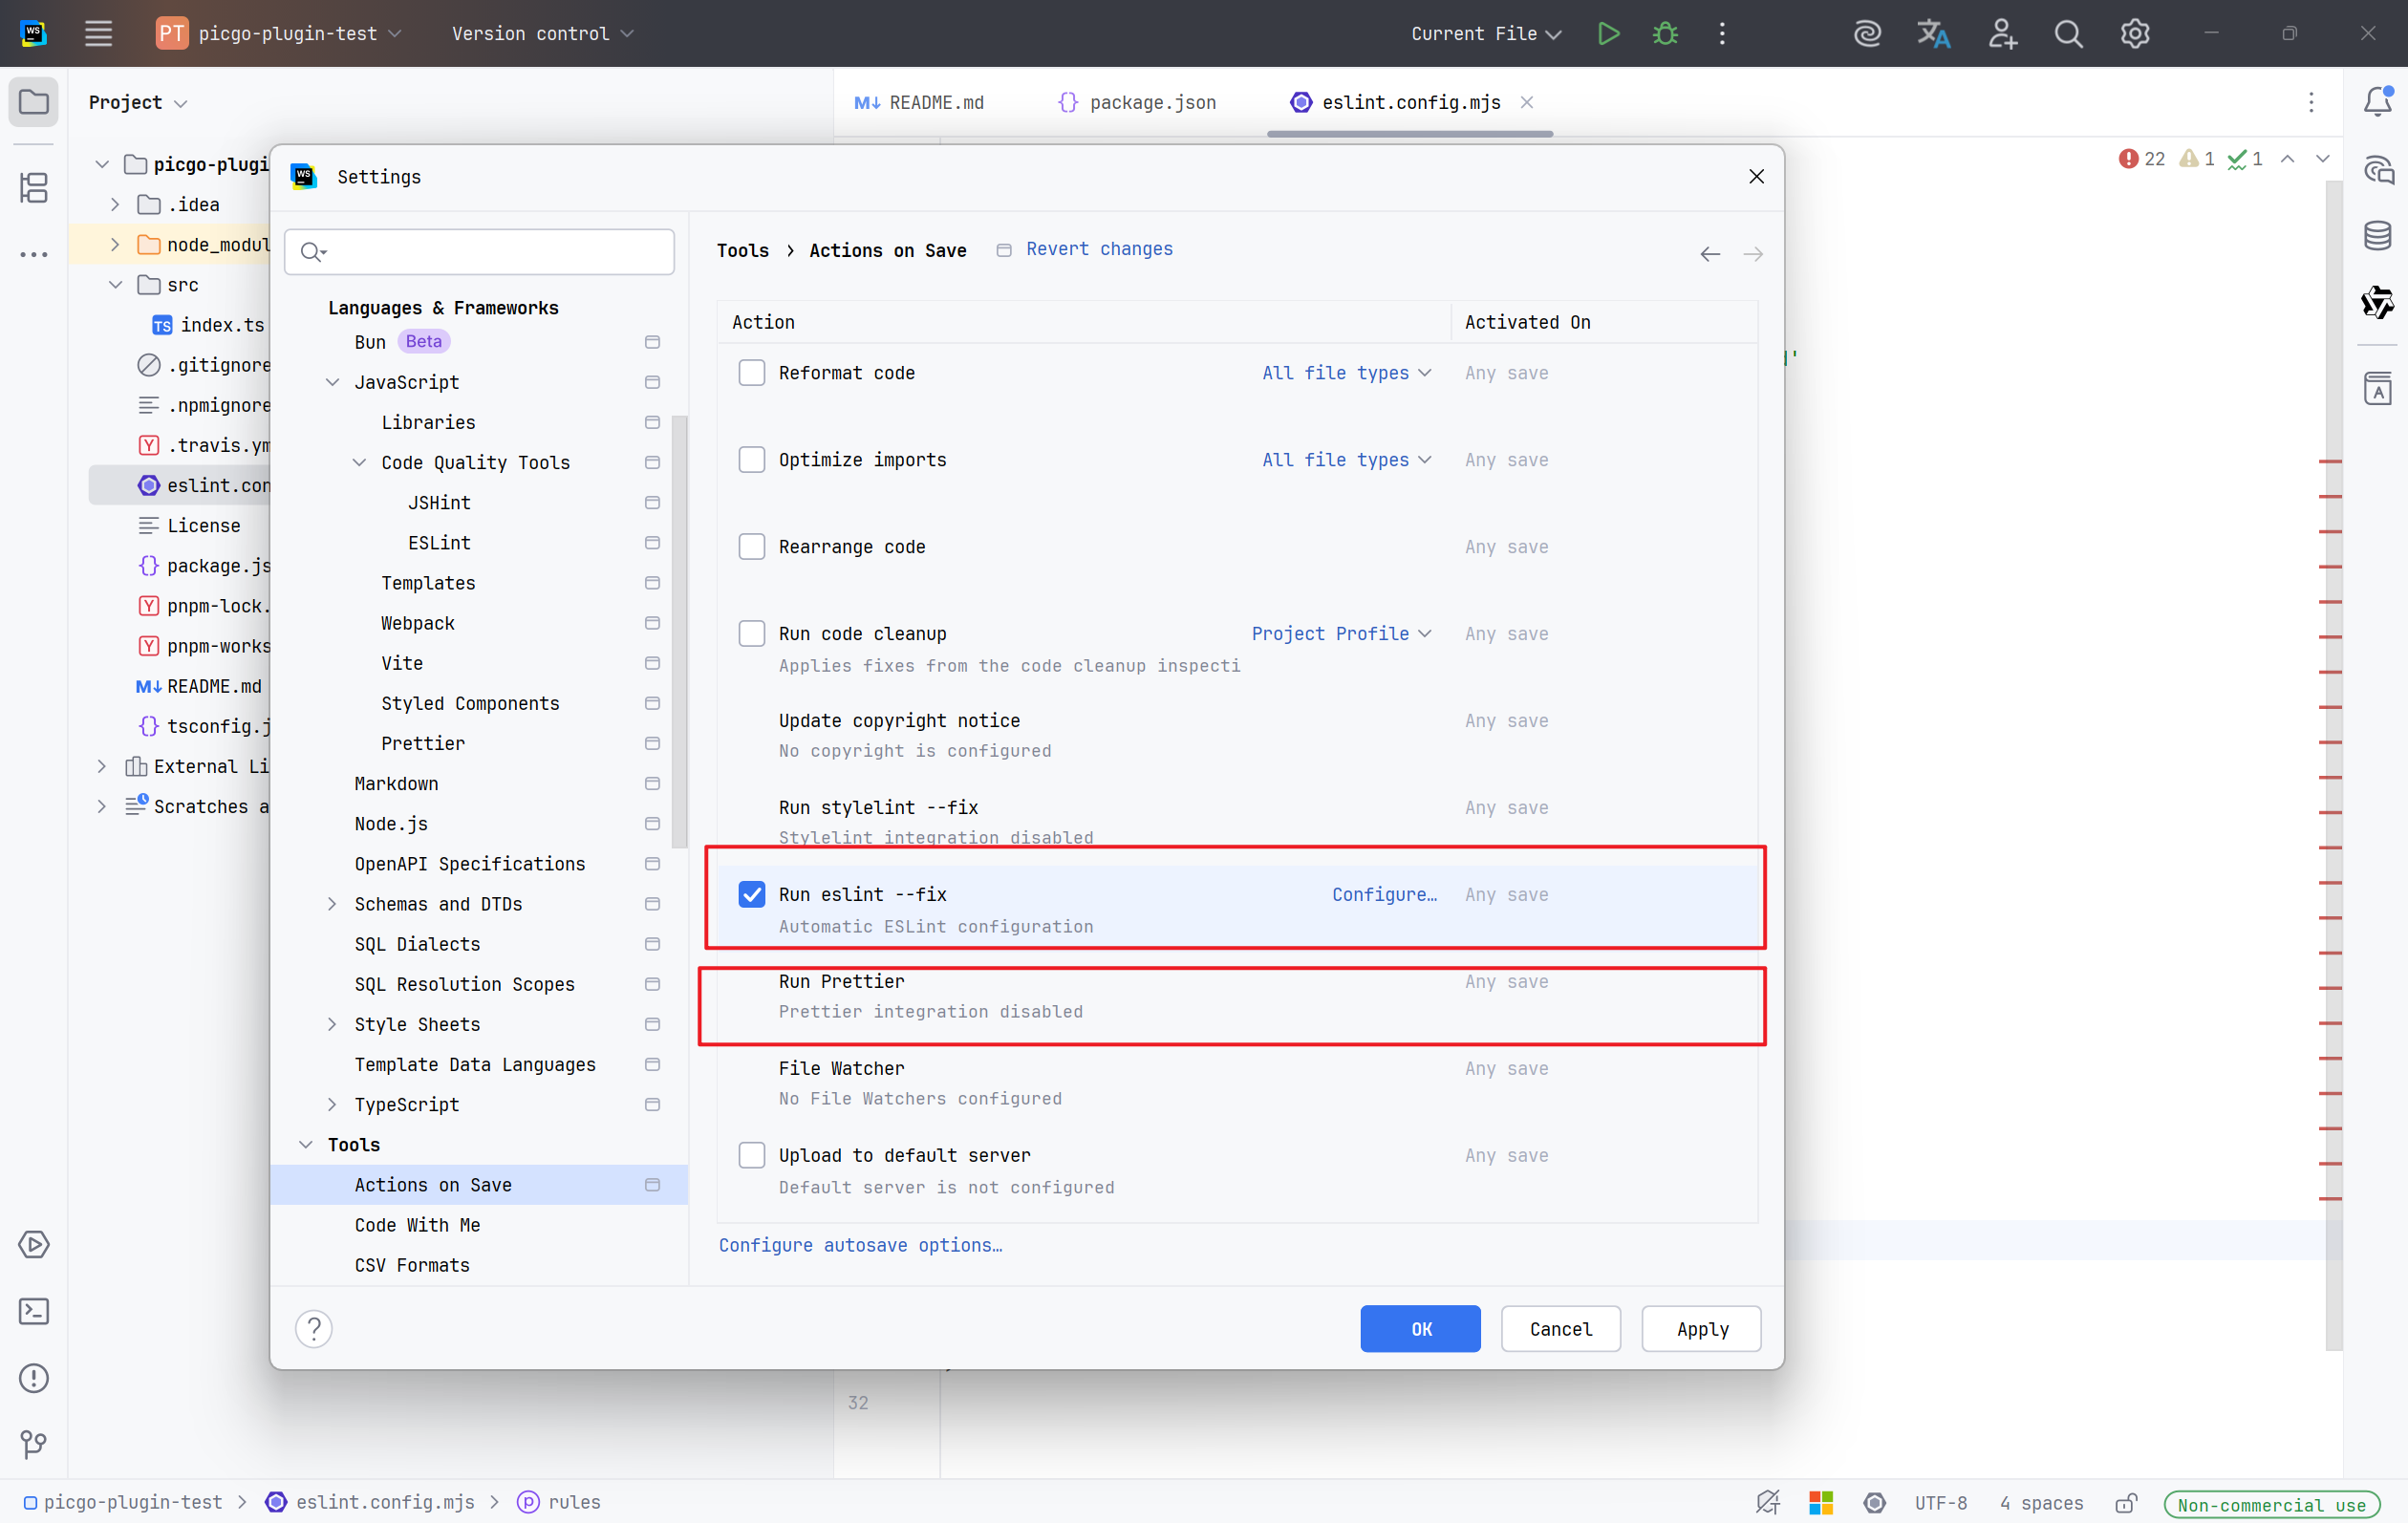
点击 OK,然后随便打个回车,按下快捷键 ctrl + s 保存, eslint 就会自动纠正了。
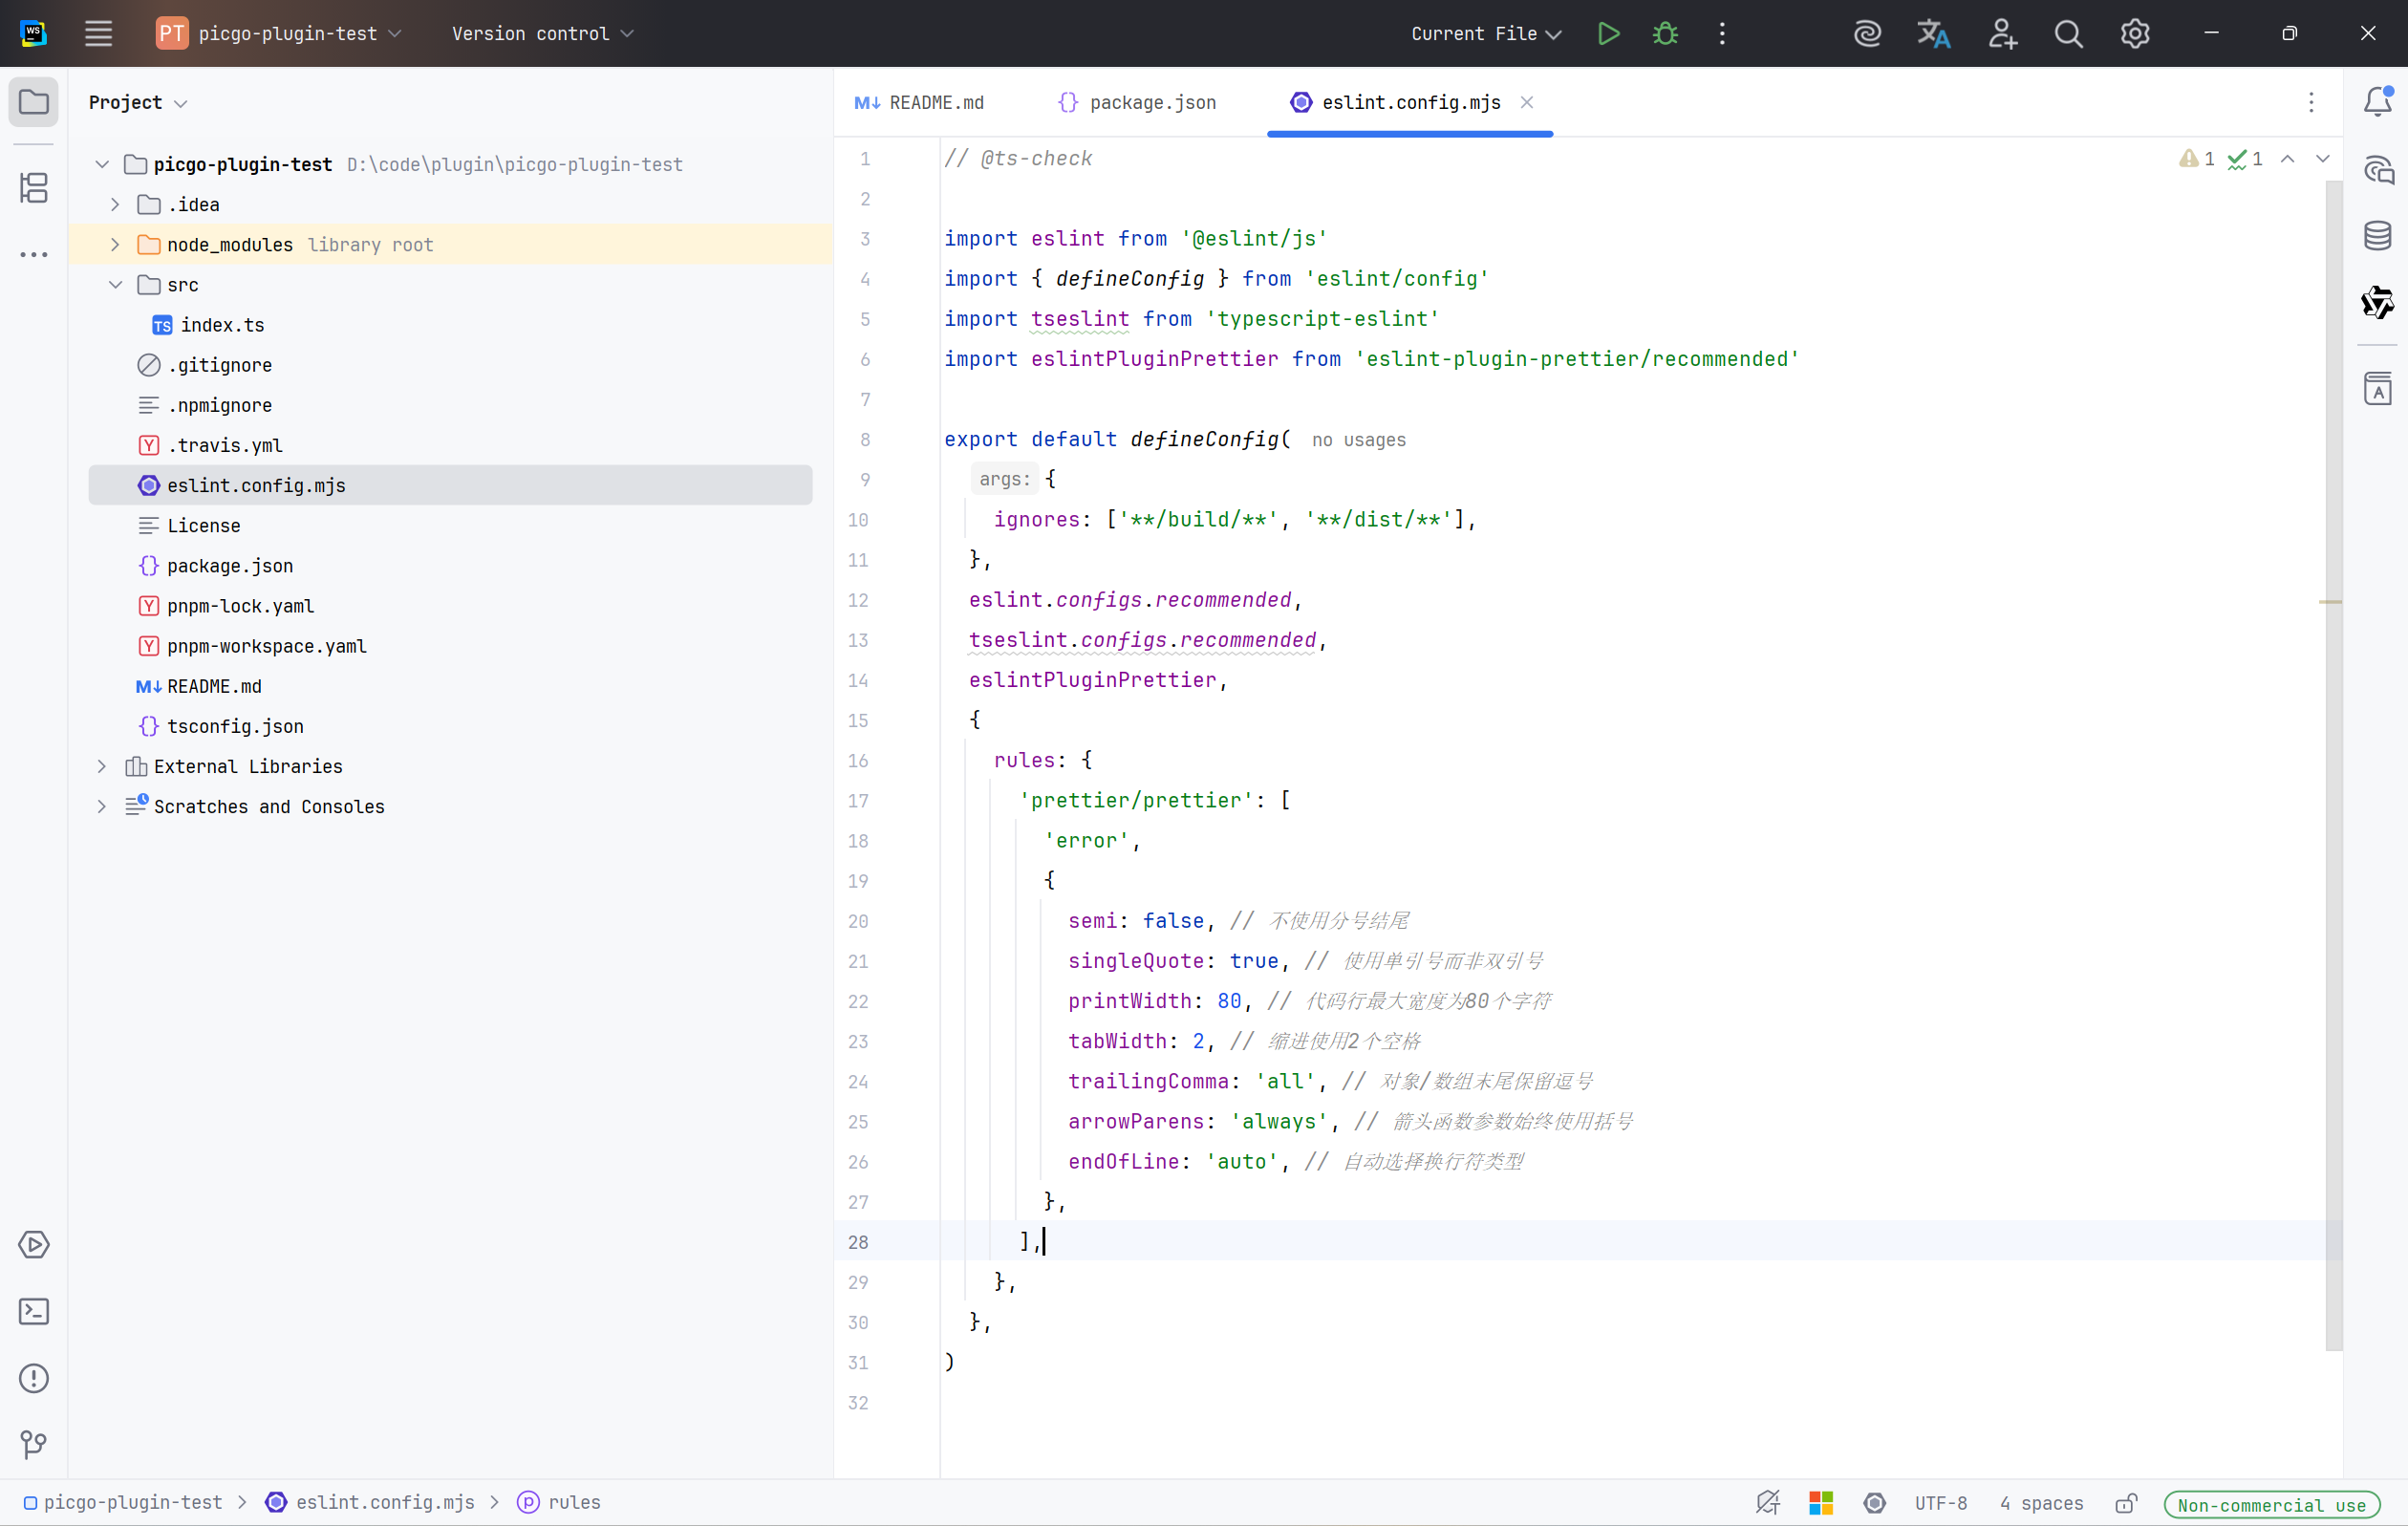
其他地方的代码也是,如果有很多报错的话,可以打回车,然后保存一下就行。觉得麻烦的话,就可以像 vue 项目一样,在 package.json 添加一个 format 命令,然后直接执行 pnpm format 就行。
然后点开 tsconfig.json,需要的话,也可以简单更新一下,这个文件主要关于 ts 的编译行为的配置,我直接贴代码了,改的不多。
json{
  "compilerOptions": {
    "target": "es2020",
    "module": "commonjs",
    "moduleResolution": "node",
    "resolveJsonModule": true,
    "esModuleInterop": true,
    "allowSyntheticDefaultImports": true,
    "sourceMap": true,
    "declaration": true,
    "outDir": "dist",
    "strict": true,
    "skipLibCheck": true,
    "forceConsistentCasingInFileNames": true,
    "baseUrl": "src",
    "lib": [
      "es2020"
    ]
  },
  "include": [
    "./src/**/*"
  ]
}
做到这,项目就更新好了。
3 开发
3.1 各个模块的功能
首先点开 index.ts ,可以看到如下内容:
tsimport { PicGo } from 'picgo'

export = (ctx: PicGo) => {
  const register = (): void => {
    ctx.helper.uploader.register('picgo-plugin-test', {
      handle(ctx) {
        console.log(ctx)
      },
    })
    ctx.helper.transformer.register('picgo-plugin-test', {
      handle(ctx) {
        console.log(ctx)
      },
    })
    ctx.helper.beforeTransformPlugins.register('picgo-plugin-test', {
      handle(ctx) {
        console.log(ctx)
      },
    })
    ctx.helper.beforeUploadPlugins.register('picgo-plugin-test', {
      handle(ctx) {
        console.log(ctx)
      },
    })
    ctx.helper.afterUploadPlugins.register('picgo-plugin-test', {
      handle(ctx) {
        console.log(ctx)
      },
    })
  }
  return {
    uploader: 'picgo-plugin-test',
    transformer: 'picgo-plugin-test',
    register,
  }
}
命令行创建项目时,选择的模块会在这里被注册。
每个模块的执行流程,可以参照官网的流程图:

每个模块的作用,可以去官网上看,我自己只开发 uploader,其他不太熟悉,就不多说了。 插件开发 | PicGo-Core
我们主要编写的,就是其中的 handle 方法,可以看到,handle 方法是一个接收 PicGo 类型的 ctx 参数,返回的是 void,那我们定义方法的时候,就可以这么定义。
3.2 输入配置编写
了解完每个模块的作用后,就可以开始开发了,由于我只需要开发 uploader,所以其他模块我就直接删了。
tsimport { PicGo } from 'picgo'

export = (ctx: PicGo) => {
  const register = (): void => {
    ctx.helper.uploader.register('picgo-plugin-test', {
      handle(ctx) {
        console.log(ctx)
      },
    })
  }
  return {
    uploader: 'picgo-plugin-test',
    transformer: 'picgo-plugin-test',
    register,
  }
}
然后,我们来捋一下开发的最终目标。我的博客的上传图片的流程是:请求预签名 -> 拿到预签名 -> 使用预签名上传文件。
非常简单吧?不需要任何库,仅仅使用原生的 fetch API 就行。
但由于我博客网站有鉴权,请求预签名需要登录 token,但是我没有开放登录功能,所以我这就不用博客的来演示了,我使用我之前的 RustFS + Springboot 的 Demo 项目来作为需要上传的目标。 rustfs_demo: RustFS Learning Demo
以上只是上传的流程,其实还有前置的流程没有说,我一边说一边给代码。
首先, PicGo 上传一般需要用户填写相应的信息,例如目标地址、Access Key、Secret Key 等等。所以我们得写一个配置信息,主要是配置用户需要填写什么信息,程序怎么获取。
在 src 目录下,创建 core 目录,在 core 目录下创建 types 目录,然后在 types 目录创建一个 config.d.ts 文件,定义一下我们需要填写的信息类型。
说明一下,这些目录没有规定一定要这么创建,这么创建纯粹只是我的编程习惯。
tsinterface ICustomConfig {
  // 后端服务地址
  backendEndpoint: string
  // 预签名接口地址
  presignedAPIPath: string
}

export type { ICustomConfig }
然后在 core 目录下, 创建 config.ts 文件,添加一个 buildPluginConfig 方法。
tsimport { ICustomConfig } from './types/config'
import { IPluginConfig } from 'picgo'

function buildPluginConfig(customConfig: ICustomConfig): IPluginConfig[] {
  return [
    {
      name: 'backendEndpoint',
      type: 'input',
      default: customConfig.backendEndpoint,
      required: true,
      message: '请输入后端服务地址',
      alias: '后端服务地址',
    },
    {
      name: 'presignedAPIPath',
      type: 'input',
      default: customConfig.presignedAPIPath,
      required: true,
      message: '请输入预签名获取接口地址',
      alias: '预签名获取接口地址',
    },
  ]
}
type 有 input、password、confirm 三种类型,对应不同的输入组件。
然后,我们再添加和导出两个方法,也就是 get 和 set 方法。get 就是获取当前的配置信息,set 就是设置用户输入的值,可以在这里添加默认值。
忘记了一件事,由于有很多地方需要用到插件名称,如果每次都要手打,后面要改的话,一个个改很麻烦,所以我们在 core 目录下创建一个 constants.ts 文件,导出一个 PLUGIN_NAME 常量,在需要用到 Plugin其他地方直接调用就行。
tsexport const PLUGIN_NAME = 'picgo-plugin-test'
添加 set 和 get 方法,我直接给完整的 config.ts 代码。
tsimport { ICustomConfig } from './types/config'
import { IPicGo, IPluginConfig } from 'picgo'
import { PLUGIN_NAME } from './constants'

function buildPluginConfig(customConfig: ICustomConfig): IPluginConfig[] {
  return [
    {
      name: 'backendEndpoint',
      type: 'input',
      default: customConfig.backendEndpoint,
      required: true,
      message: '请输入后端服务地址',
      alias: '后端服务地址',
    },
    {
      name: 'presignedAPIPath',
      type: 'input',
      default: customConfig.presignedAPIPath,
      required: true,
      message: '请输入预签名获取接口地址',
      alias: '预签名获取接口地址',
    },
  ]
}

export function setConfig(ctx: IPicGo): IPluginConfig[] {
  const defaultConfig: ICustomConfig = {
    backendEndpoint: 'http://127.0.0.1:8080',
    presignedAPIPath: '/api/presigned',
  }

  let userConfig = ctx.getConfig<ICustomConfig>(`picBed.${PLUGIN_NAME}`)
  userConfig = { ...defaultConfig, ...(userConfig || {}) }

  return buildPluginConfig(userConfig)
}

export function getConfig(ctx: IPicGo): ICustomConfig {
  const userConfig = ctx.getConfig<ICustomConfig>(`picBed.${PLUGIN_NAME}`)
  if (!userConfig) {
    ctx.log.error('[uploader]无法找到用户配置')
    throw new Error('[uploader]无法找到用户配置')
  }

  return userConfig
}
ctx.log是 PicGo 的日志方法,使用该方法输出的日志,能够在 PicGo 的日志文件里看到,方便调试。 当然,日志的内容格式没有规定,这么写是我自己的习惯。
3.3 文件前置处理
官网介绍对 PicGo 能获取的文件信息有如下介绍:
json[
  {
    buffer: 'xxx', // 图片的buffer值,buffer和base64值二选一即可
    base64Image: 'xxxx', // 图片的base64值,buffer和base64值二选一即可
    fileName: 'xxxx', // 图片的文件名
    width: 'xxxx', // 图片宽度
    height: 'xxxx', // 图片高度
    extname: '.xxx' // 图片格式的扩展名 比如.jpg | .png
  },
  {
    ...
  },
  ...
]
其中buffer和base64值二选一即可,如果传入的是path数组,PicGo 默认输出是buffer值 。
但是预签名上传的话,是用 put 方法,然后在 body 设置 File 类型的文件来上传的,所以我们得写一个转化方法,将 buffer 或者 base64,转化为 File。
除此之外,File 文件需要知道图片的类型,而且预签名也对文件类型敏感,也需要传递文件的 Mime 类型,所以我们还得获取文件的 Mime 类型,以此设置 contentType。目标就是这两个。
在 core/types 目录下,创建 convert.d.ts 文件,添加如下类型
tsinterface IImageFile {
  imageFile: File
  contentType: string
}

export type { IImageFile }
在 core 目录下,创建 convert.ts 文件
tsimport { IImgInfo } from 'picgo'
import { IImageFile } from './types/convert'
import mime from 'mime'
import { fileTypeFromBuffer } from 'file-type'

export async function convertImageFile(
  imageItem: IImgInfo,
): Promise<IImageFile> {
  if (!imageItem) {
    throw new Error('[uploader]未获取到文件项')
  }

  let contentType = ''
  let imageBuffer: Buffer

  // 统一使用 buffer 来创建 File,base64 也转为 buffer  if (imageItem.buffer) {
    imageBuffer = imageItem.buffer
  } else if (imageItem.base64Image) {
    imageBuffer = Buffer.from(imageItem.base64Image, 'base64')
  } else {
    throw new Error('[uploader]未获取到文件的 buffer 或 base64')
  }

  // 从 base64Image 中获取 contentType  if (imageItem.base64Image) {
    const match = imageItem.base64Image.match(/[^:]\w+\/[\w-+\d.]+(?=;|,)/)
    if (match?.[0]) {
      contentType = match[0]
    }
  }
  // 从 extname 扩展名中获取 contentType  if (!contentType && imageItem.extname) {
    contentType = mime.getType(imageItem.extname) || ''
  }
  // 如果都获取不到,使用 file-type 库提取 mime 类型
  if (!contentType) {
    const fileType = await fileTypeFromBuffer(imageBuffer)
    contentType = fileType?.mime || ''
  }
  // 如果都找不到,抛出错误
  if (!contentType) {
    throw new Error('[uploader]无法确定文件类型')
  }
  // 获取文件扩展名(为了设置文件名)
  let fileExtension = ''
  if (imageItem.extname) {
    // 从 extname 获取扩展名
    fileExtension = imageItem.extname.startsWith('.')
      ? imageItem.extname.slice(1)
      : imageItem.extname
  } else if (contentType) {
    // 使用 mime 库获取扩展名
    fileExtension = mime.getExtension(contentType) || ''
  }
  const fileName = fileExtension ? `file.${fileExtension}` : 'file'

  // 返回创建结果
  return {
    imageFile: new File([imageBuffer], fileName, {
      type: contentType,
    }),
    contentType,
  }
}
3.4 API 与 工具
为了方便 API 的调用,我们需要手动定义一下我们需要使用的API。
在 core 包下,创建 apis.ts 文件。
tsimport { ICustomConfig } from './types/config'

export const Apis = (userConfig: ICustomConfig) => {
  const backendBaseUrl: string = userConfig.backendEndpoint

  async function fetchPresignedUrl(mimeType: string, ext: string) {
    return fetch(backendBaseUrl + userConfig.presignedAPIPath, {
      method: 'POST',
      headers: {
        'Content-Type': 'application/json',
      },
      body: JSON.stringify({
        mimeType: mimeType,
        ext: ext,
      }),
    })
  }

  async function uploadFileByPresignedUrl(
    presignedUrl: string,
    imageFile: File,
  ) {
    return fetch(presignedUrl, {
      method: 'PUT',
      body: imageFile,
      headers: {
        'Content-Type': imageFile.type,
      },
    })
  }

  return {
    fetchPresignedUrl,
    uploadFileByPresignedUrl,
  }
}
另外,预签名是直传 OSS 服务,但是 OSS 服务是不返回 URL 的,我们可以从预签名中直接获取,所以得写个工具方法,从预签名中获取文件访问的 URL。
在 core 目录下,创建 utils.ts 文件,添加如下方法:
tsexport function extractObjectUrlFromPresignedUrl(presignedUrl: string) {
  const urlObject = new URL(presignedUrl)
  urlObject.search = ''

  return urlObject.href
}
到这,前置步骤就完了,接下来就是核心上传方法。
3.5 上传文件
从官网的介绍:
json[
  {
    buffer: 'xxx', // 图片的buffer值,buffer和base64值二选一即可
    base64Image: 'xxxx', // 图片的base64值,buffer和base64值二选一即可
    fileName: 'xxxx', // 图片的文件名
    width: 'xxxx', // 图片宽度
    height: 'xxxx', // 图片高度
    extname: '.xxx' // 图片格式的扩展名 比如.jpg | .png
  },
  {
    ...
  },
  ...
]
可以看到,输入的是一个列表,也就是说,可能会传入多个文件,所以我们得写一个任务方法,将每个上传任务包装起来。
从上面的前置操作可以看到,我们的完整流程大概是:获取配置 -> 初始化 API -> 将文件转化为 File,提取 mime 类型和扩展名 -> 获取预签名 -> 解析访问路径 URL -> 使用预签名上传文件。
我们的每个任务的执行都是这样的,所以只需要将其包装成异步方法,返回 Promise 就行。这样, uploader 就只需要根据文件列表,创建任务,然后 Promise.all() 等待所有任务完成,再解析结果就行。
现在思考一下,任务方法怎么创建?
传入参数需要什么?当然是 PicGo 的 IImgInfo 了。
返回结果需要什么?当然是上传的 url 了。
所以在 core/types 下,创建 task.d.ts 文件。
tsimport { IImgInfo } from 'picgo'

interface ITaskOption {
  index: number
  imageItem: IImgInfo
}

interface ITaskResult {
  index: number
  url?: string
  error?: Error
}

export type { ITaskOption, ITaskResult }
添加索引的目的是方便 task 列表和 input 的文件列表做对应。
在 core 目录下,创建 task.ts 文件
tsimport { ITaskOption, ITaskResult } from './types/task'
import { ICustomConfig } from './types/config'
import { IPicGo } from 'picgo'
import { Apis } from './apis'
import { IImageFile } from './types/convert'
import { convertImageFile } from './convert'
import { extractObjectUrlFromPresignedUrl } from './utils'

export async function createTask(
  option: ITaskOption,
  userConfig: ICustomConfig,
  ctx: IPicGo,
): Promise<ITaskResult> {
  // 初始化结果
  const result: ITaskResult = {
    index: option.index,
  }
  // 初始化 api 接口
  const apis = Apis(userConfig)
  // 初始化图片文件
  let imageFile: IImageFile = {} as IImageFile

  try {
    // 转化为 File    imageFile = await convertImageFile(option.imageItem)
    ctx.log.debug('[uploader]转换图片文件成功')
  } catch (err) {
    result.error = new Error(
      `[uploader]转换图片文件失败,原因: ${err instanceof Error ? err.message : String(err)}`,
    )
    return result
  }

  // 获取预签名
  await apis
    .fetchPresignedUrl(imageFile.contentType)
    .then((value) => {
      if (!value.ok) {
        result.error = buildErrorLog(
          `[uploader]获取预签名地址失败, 原因:${value.status} --- ${value.statusText}`,
          ctx,
        )
      }

      return value.json() as Promise<string>
    })
    .then(async (value: string) => {
      const presignedUrl = value
      // 提取预签名
      const realUrl = extractObjectUrlFromPresignedUrl(presignedUrl)
      // 使用预签名上传文件
      await apis
        .uploadFileByPresignedUrl(presignedUrl, imageFile.imageFile)
        .then((value) => {
          if (!value.ok) {
            result.error = buildErrorLog(
              `[uploader]上传文件失败, 状态码:${value.status} --- ${value.statusText}`,
              ctx,
            )
          }
          // 返回文件访问地址
          result.url = realUrl
        })
        .catch((err) => {
          result.error = buildErrorLog(
            `[uploader]上传文件失败, 原因:${err instanceof Error ? err.message : String(err)}`,
            ctx,
          )
        })
    })
    .catch((err) => {
      result.error = buildErrorLog(
        `[uploader]获取预签名地址失败, 原因:${err instanceof Error ? err.message : String(err)}`,
        ctx,
      )
    })
  // 返回结果
  return result
}

// 构建错误日志
function buildErrorLog(msg: string, ctx: IPicGo): Error {
  ctx.log.error(msg)
  return new Error(msg)
}
接下来,就可以实现上传器了。在 src 目录,创建 uploader.ts 文件
tsimport { IImgInfo, IPicGo } from 'picgo'
import { getConfig } from './core/config'
import { createTask } from './core/task'
import { ITaskResult } from './core/types/task'

export async function uploaderHandler(ctx: IPicGo): Promise<IPicGo> {
  // 获取配置
  const userConfig = getConfig(ctx)
  const output = ctx.output
  ctx.log.info('[uploader]开始上传')
  // 创建下载任务
  const tasks = output.map((item: IImgInfo, index: number) => {
    ctx.log.debug('[uploader]开始处理图片: ' + item.fileName)

    return createTask(
      {
        index,
        imageItem: item,
      },
      userConfig,
      ctx,
    )
  })
  // 上传任务
  let results: ITaskResult[] = []
  try {
    results = await Promise.all(tasks)
  } catch (err) {
    throw buildErrorLog(
      `[uploader]上传失败,原因: ${err instanceof Error ? err.message : String(err)}`,
      ctx,
    )
  }
  // 处理结果
  for (const result of results) {
    // 释放文件内存
    delete output[result.index].buffer
    delete output[result.index].base64Image
    // 处理错误
    if (result.error) {
      output[result.index].error = result.error
    } else {
      // 处理成功的 url      ctx.log.debug(`[uploader]文件上传成功,url: ${result.url}`)
      output[result.index].url = result.url
      output[result.index].imgUrl = result.url
    }
  }
  // 更新输出
  ctx.output = output
  return ctx
}

function buildErrorLog(msg: string, ctx: IPicGo): Error {
  ctx.log.error(msg)
  return new Error(msg)
}
更新一下 index.ts 的信息
tsimport { IPicGo, IPluginConfig, PicGo } from 'picgo'
import { PLUGIN_NAME } from './core/constants'
import { uploaderHandler } from './uploader'
import { setConfig } from './core/config'

function getConfig(ctx: IPicGo): IPluginConfig[] {
  return setConfig(ctx)
}

export = (ctx: PicGo) => {
  const register = (): void => {
    ctx.helper.uploader.register(PLUGIN_NAME, {
      handle: uploaderHandler,
      config: getConfig,
    })
  }
  return {
    uploader: PLUGIN_NAME,
    transformer: PLUGIN_NAME,
    register,
  }
}
大功告成了。
4 安装与测试
安装插件的流程,可以参考官网: 插件测试与发布 | PicGo-Core
首先, 在目录下,使用 pnpm build 命令,打包文件。
如果你像我一样,使用 PicGo 的 GUI 版本(Windows),可以直接使用 GUI 的导入功能。
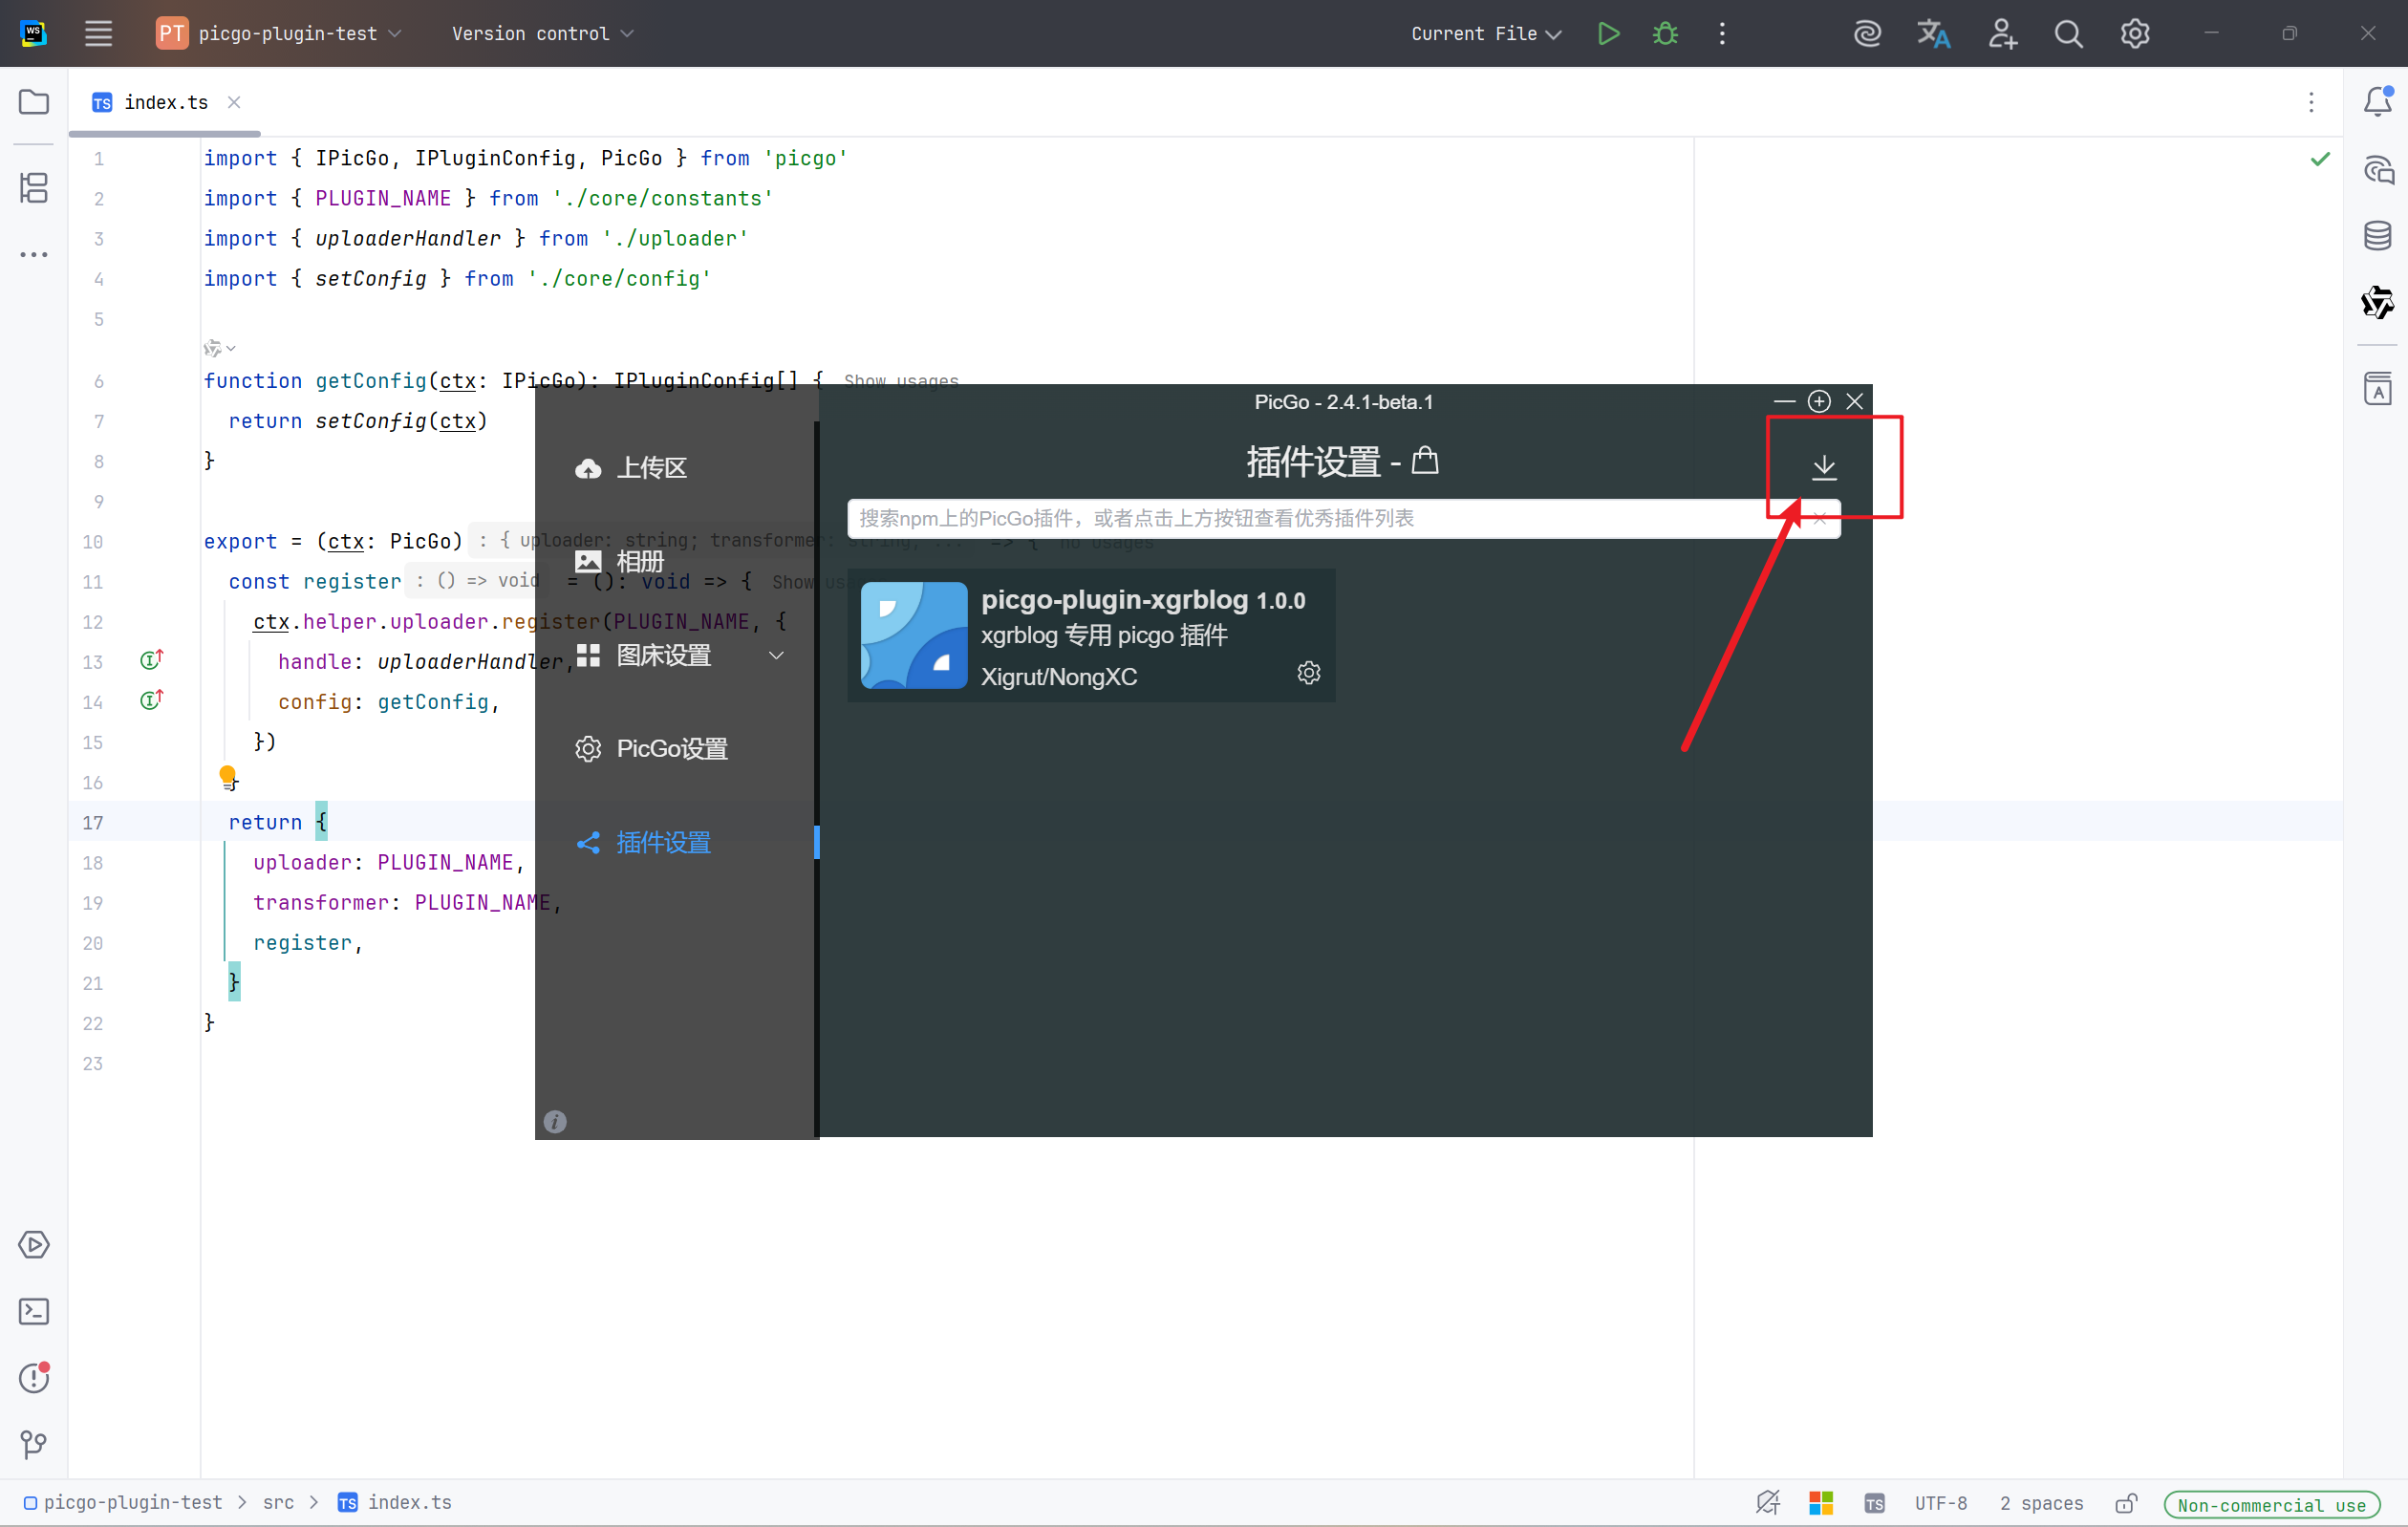
在弹出的文件选择器中,选择 picgo-plugin-test 这个项目文件,点击确定,就能导入了。
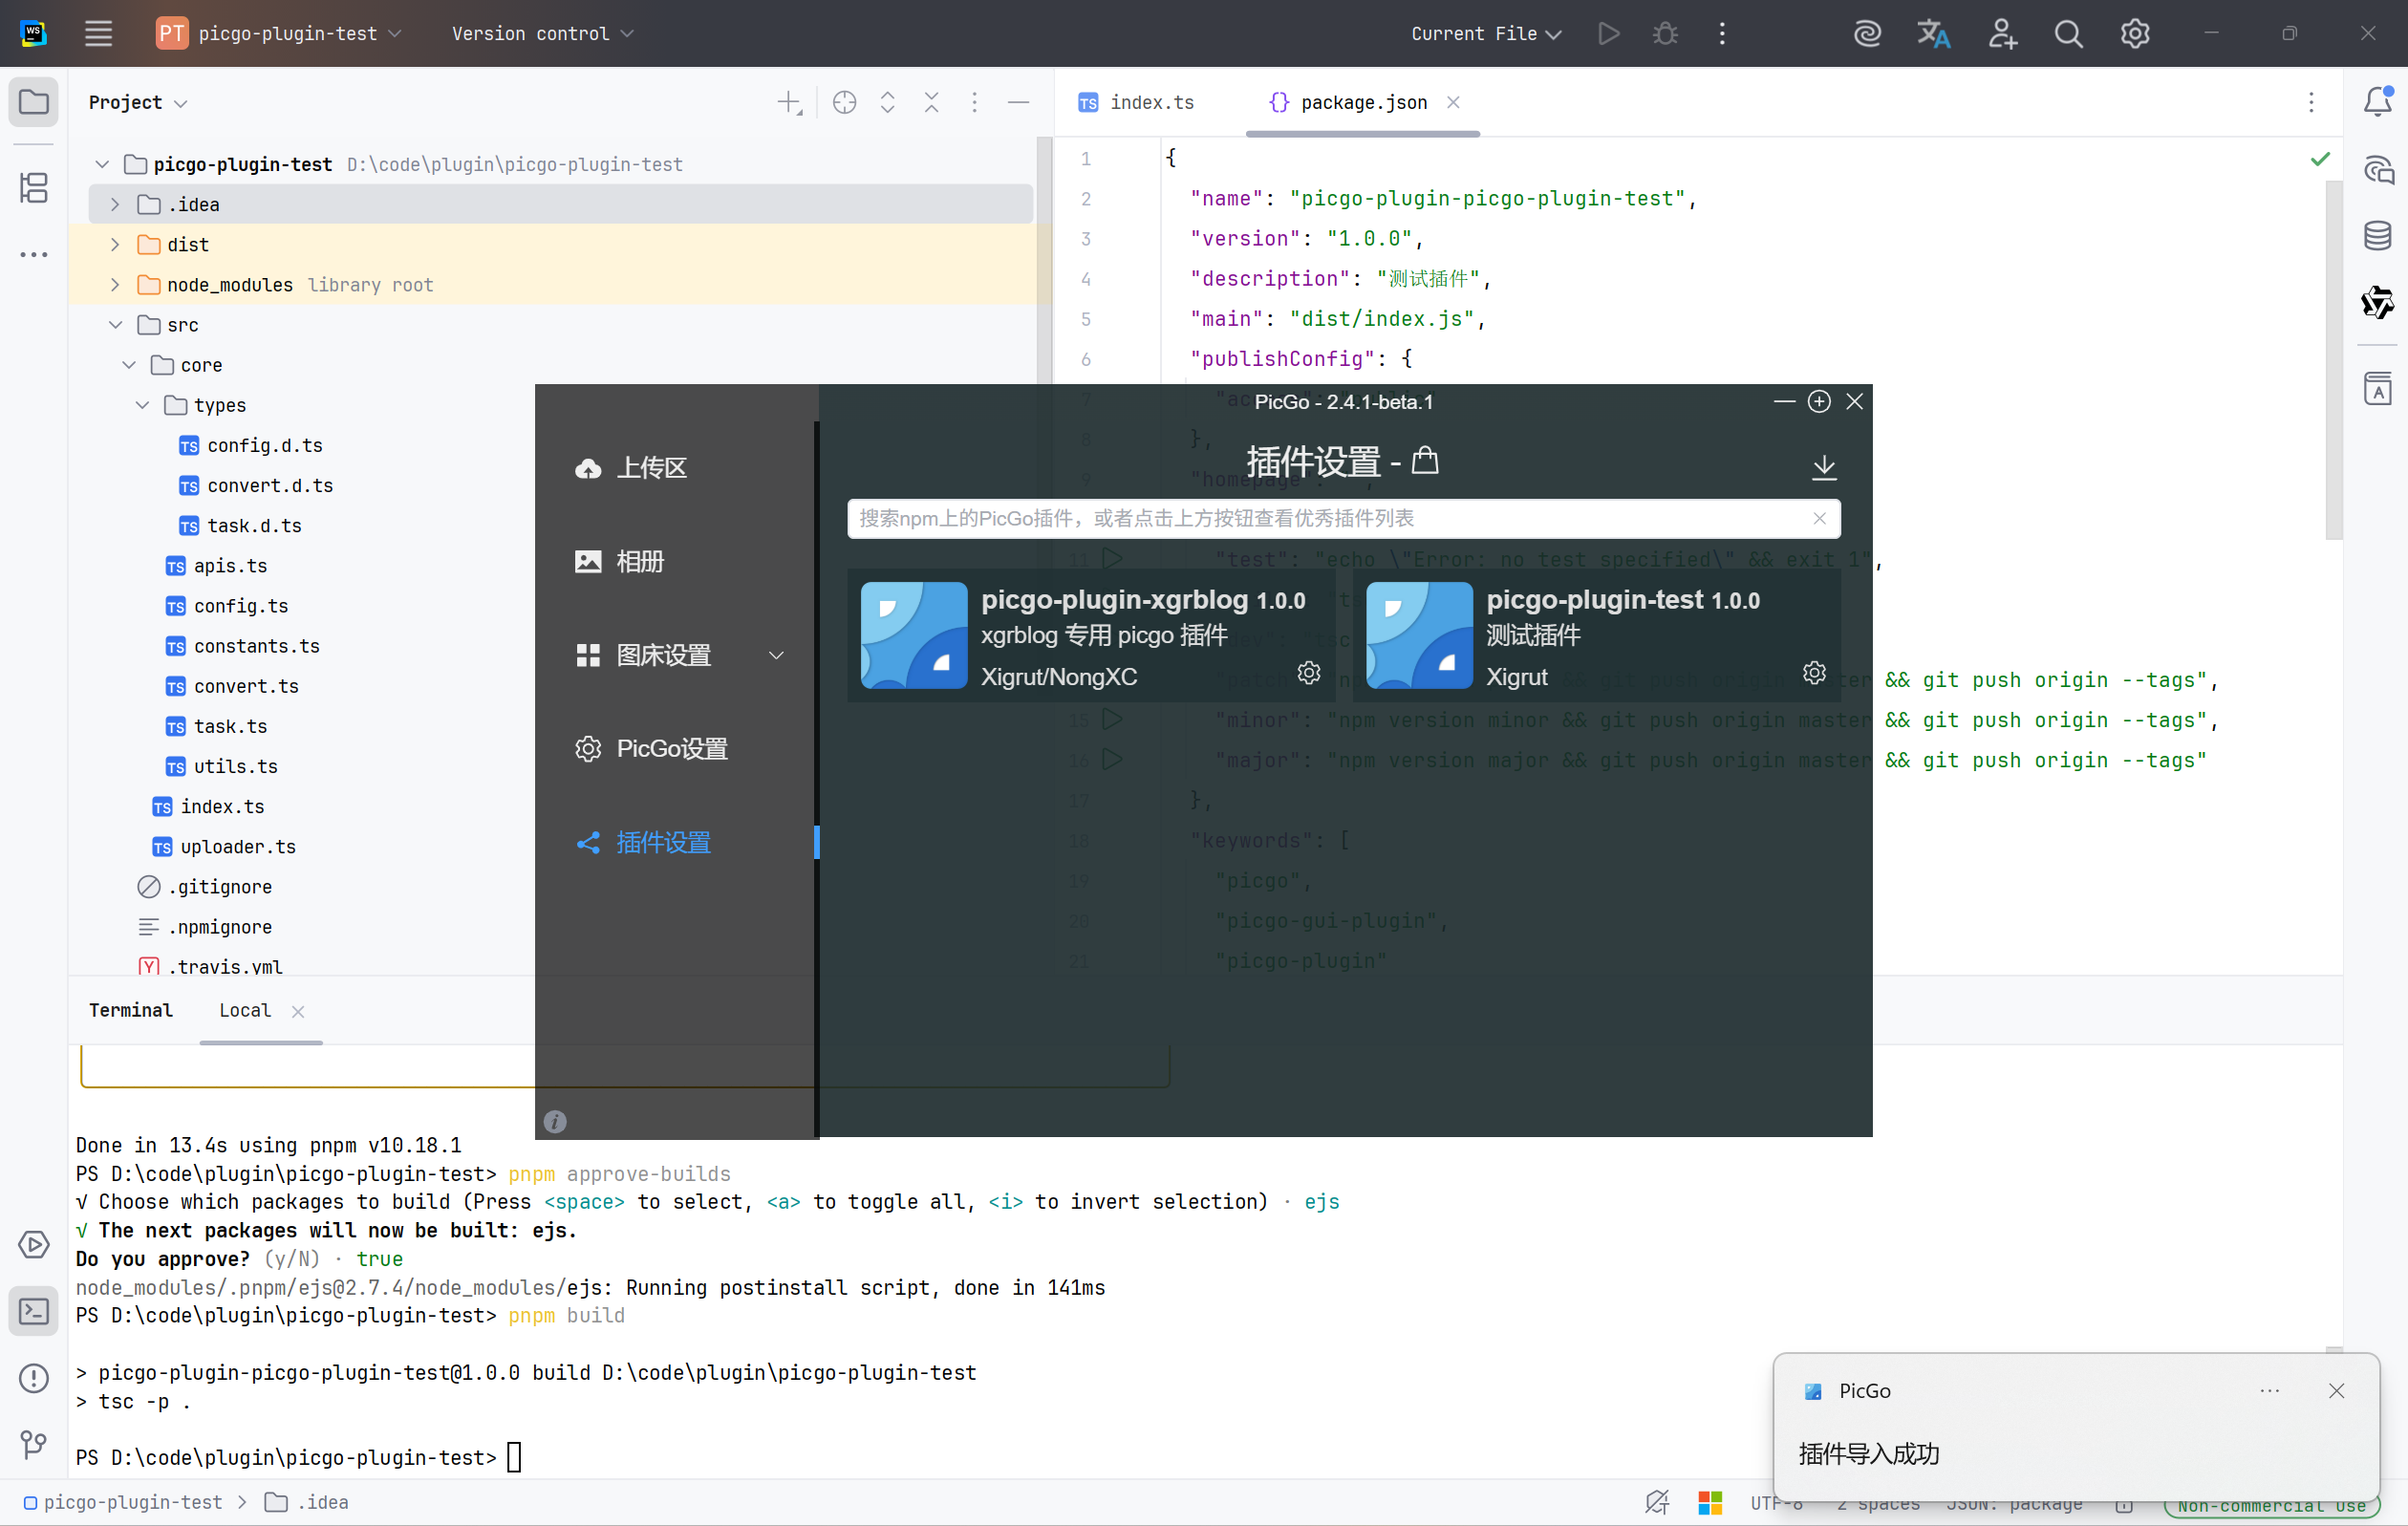
如果导入失败的话,就去 PicGo 设置、设置日志文件、点击【设置文件】按钮、弹出窗口、点击【点击打开】按钮,就能打开 PicGo 的日志文件,可以在那里看是什么原因出错了。
现在测试一下插件能不能上传文件。
在图床设置里,找到刚刚导入的插件,新建一个 test 配置。
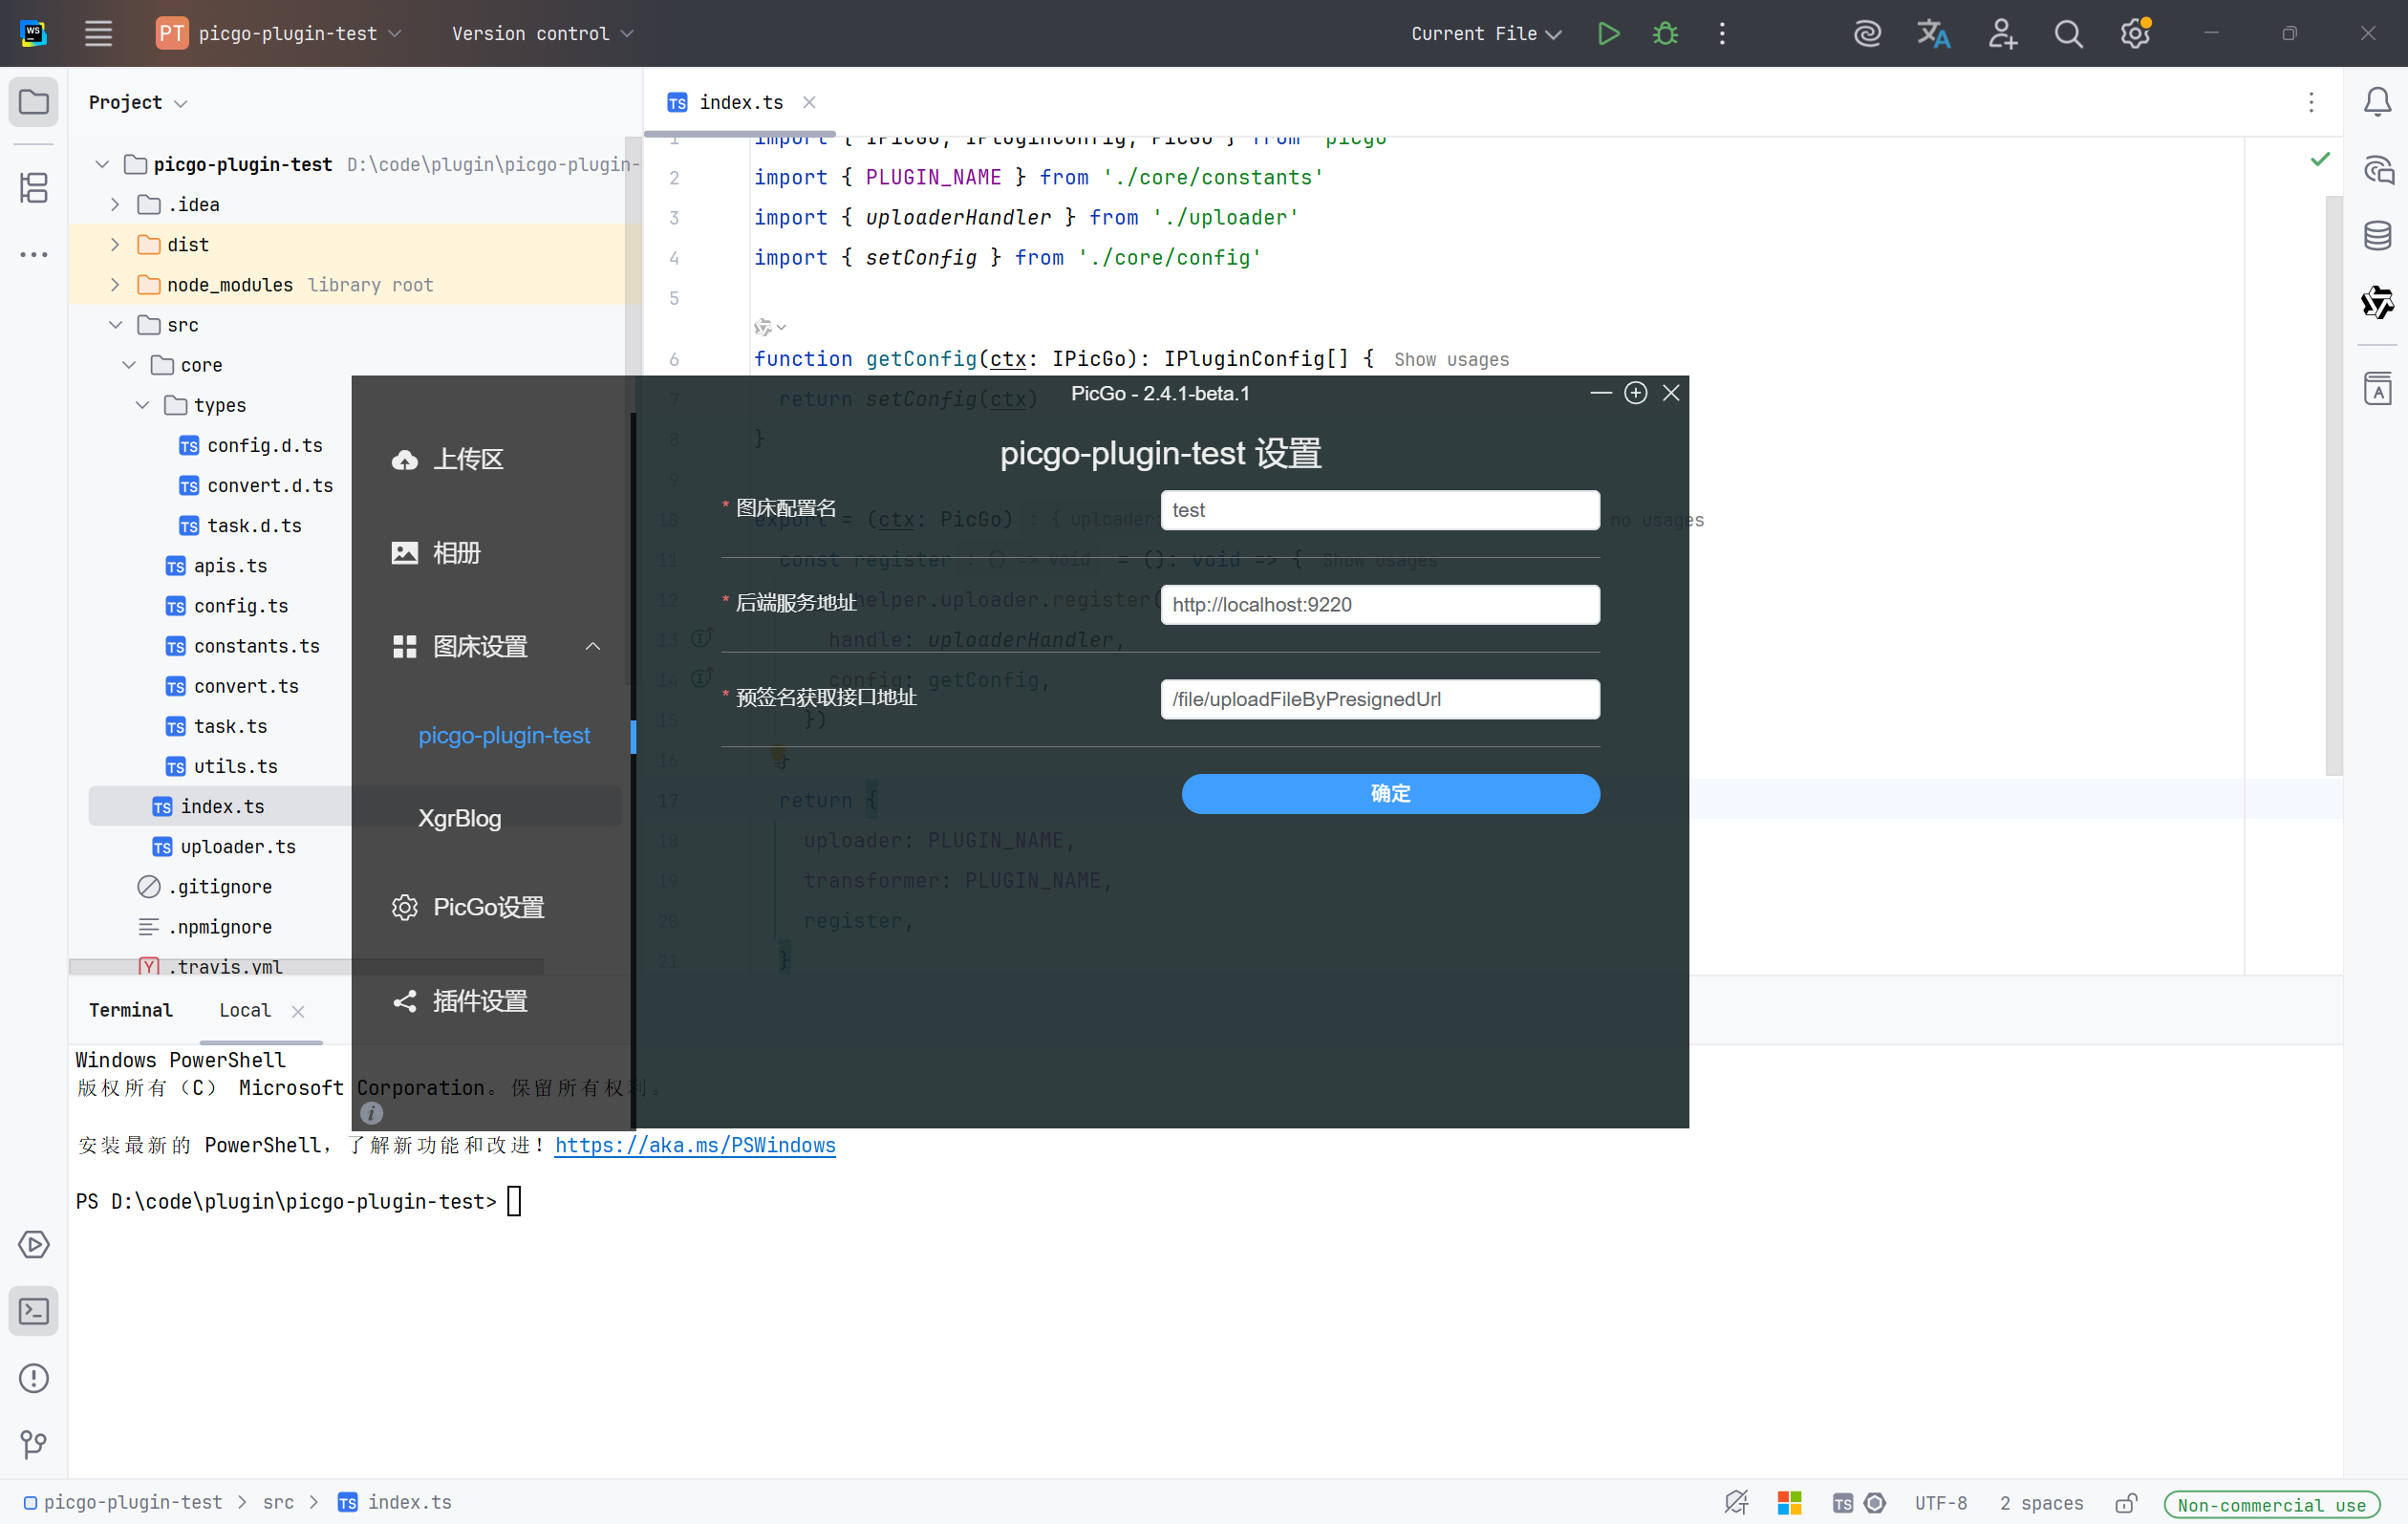
然后在上传区,上传一个图片。
我这边上传失败了,打开日志,看到下面的信息
txt2025-12-31 14:10:42 [PicGo INFO] Uploading... Current uploader is [picgo-plugin-test]
2025-12-31 14:10:42 [PicGo INFO] [uploader]开始上传
2025-12-31 14:10:43 [PicGo ERROR] [uploader]获取预签名地址失败, 原因:405 ---
2025-12-31 14:10:43 [PicGo ERROR] [uploader]获取预签名地址失败, 原因:Invalid URL
2025-12-31 14:10:43 [PicGo INFO] afterUploadPlugins: picgo-plugin-xgrblog running
2025-12-31 14:10:43 [PicGo INFO] xgrblog: after upload...
2025-12-31 14:10:43 [PicGo SUCCESS]
我看了一眼,是我后端接口参数有问题,多了一个参数,另外,task.ts 也有问题
ts// 获取预签名
await apis
  .fetchPresignedUrl(imageFile.contentType)
  .then((value) => {
    if (!value.ok) {
      result.error = buildErrorLog(
        `[uploader]获取预签名地址失败, 原因:${value.status} --- ${value.statusText}`,
        ctx,
      )
    }
    // 我的接口返回的直接就是 url,不需要转化为 Json。
    return value.text() as Promise<string>
  })
如果需要联调测试的话,就在项目的命令行,运行 pnpm dev,运行后会自动监听你项目的变化,然后自动打包。
你在项目里改好代码后,保存一下,然后重启一下 PicGo 就行了,不需要重新安装插件。
修改完以后,就上传成功了。
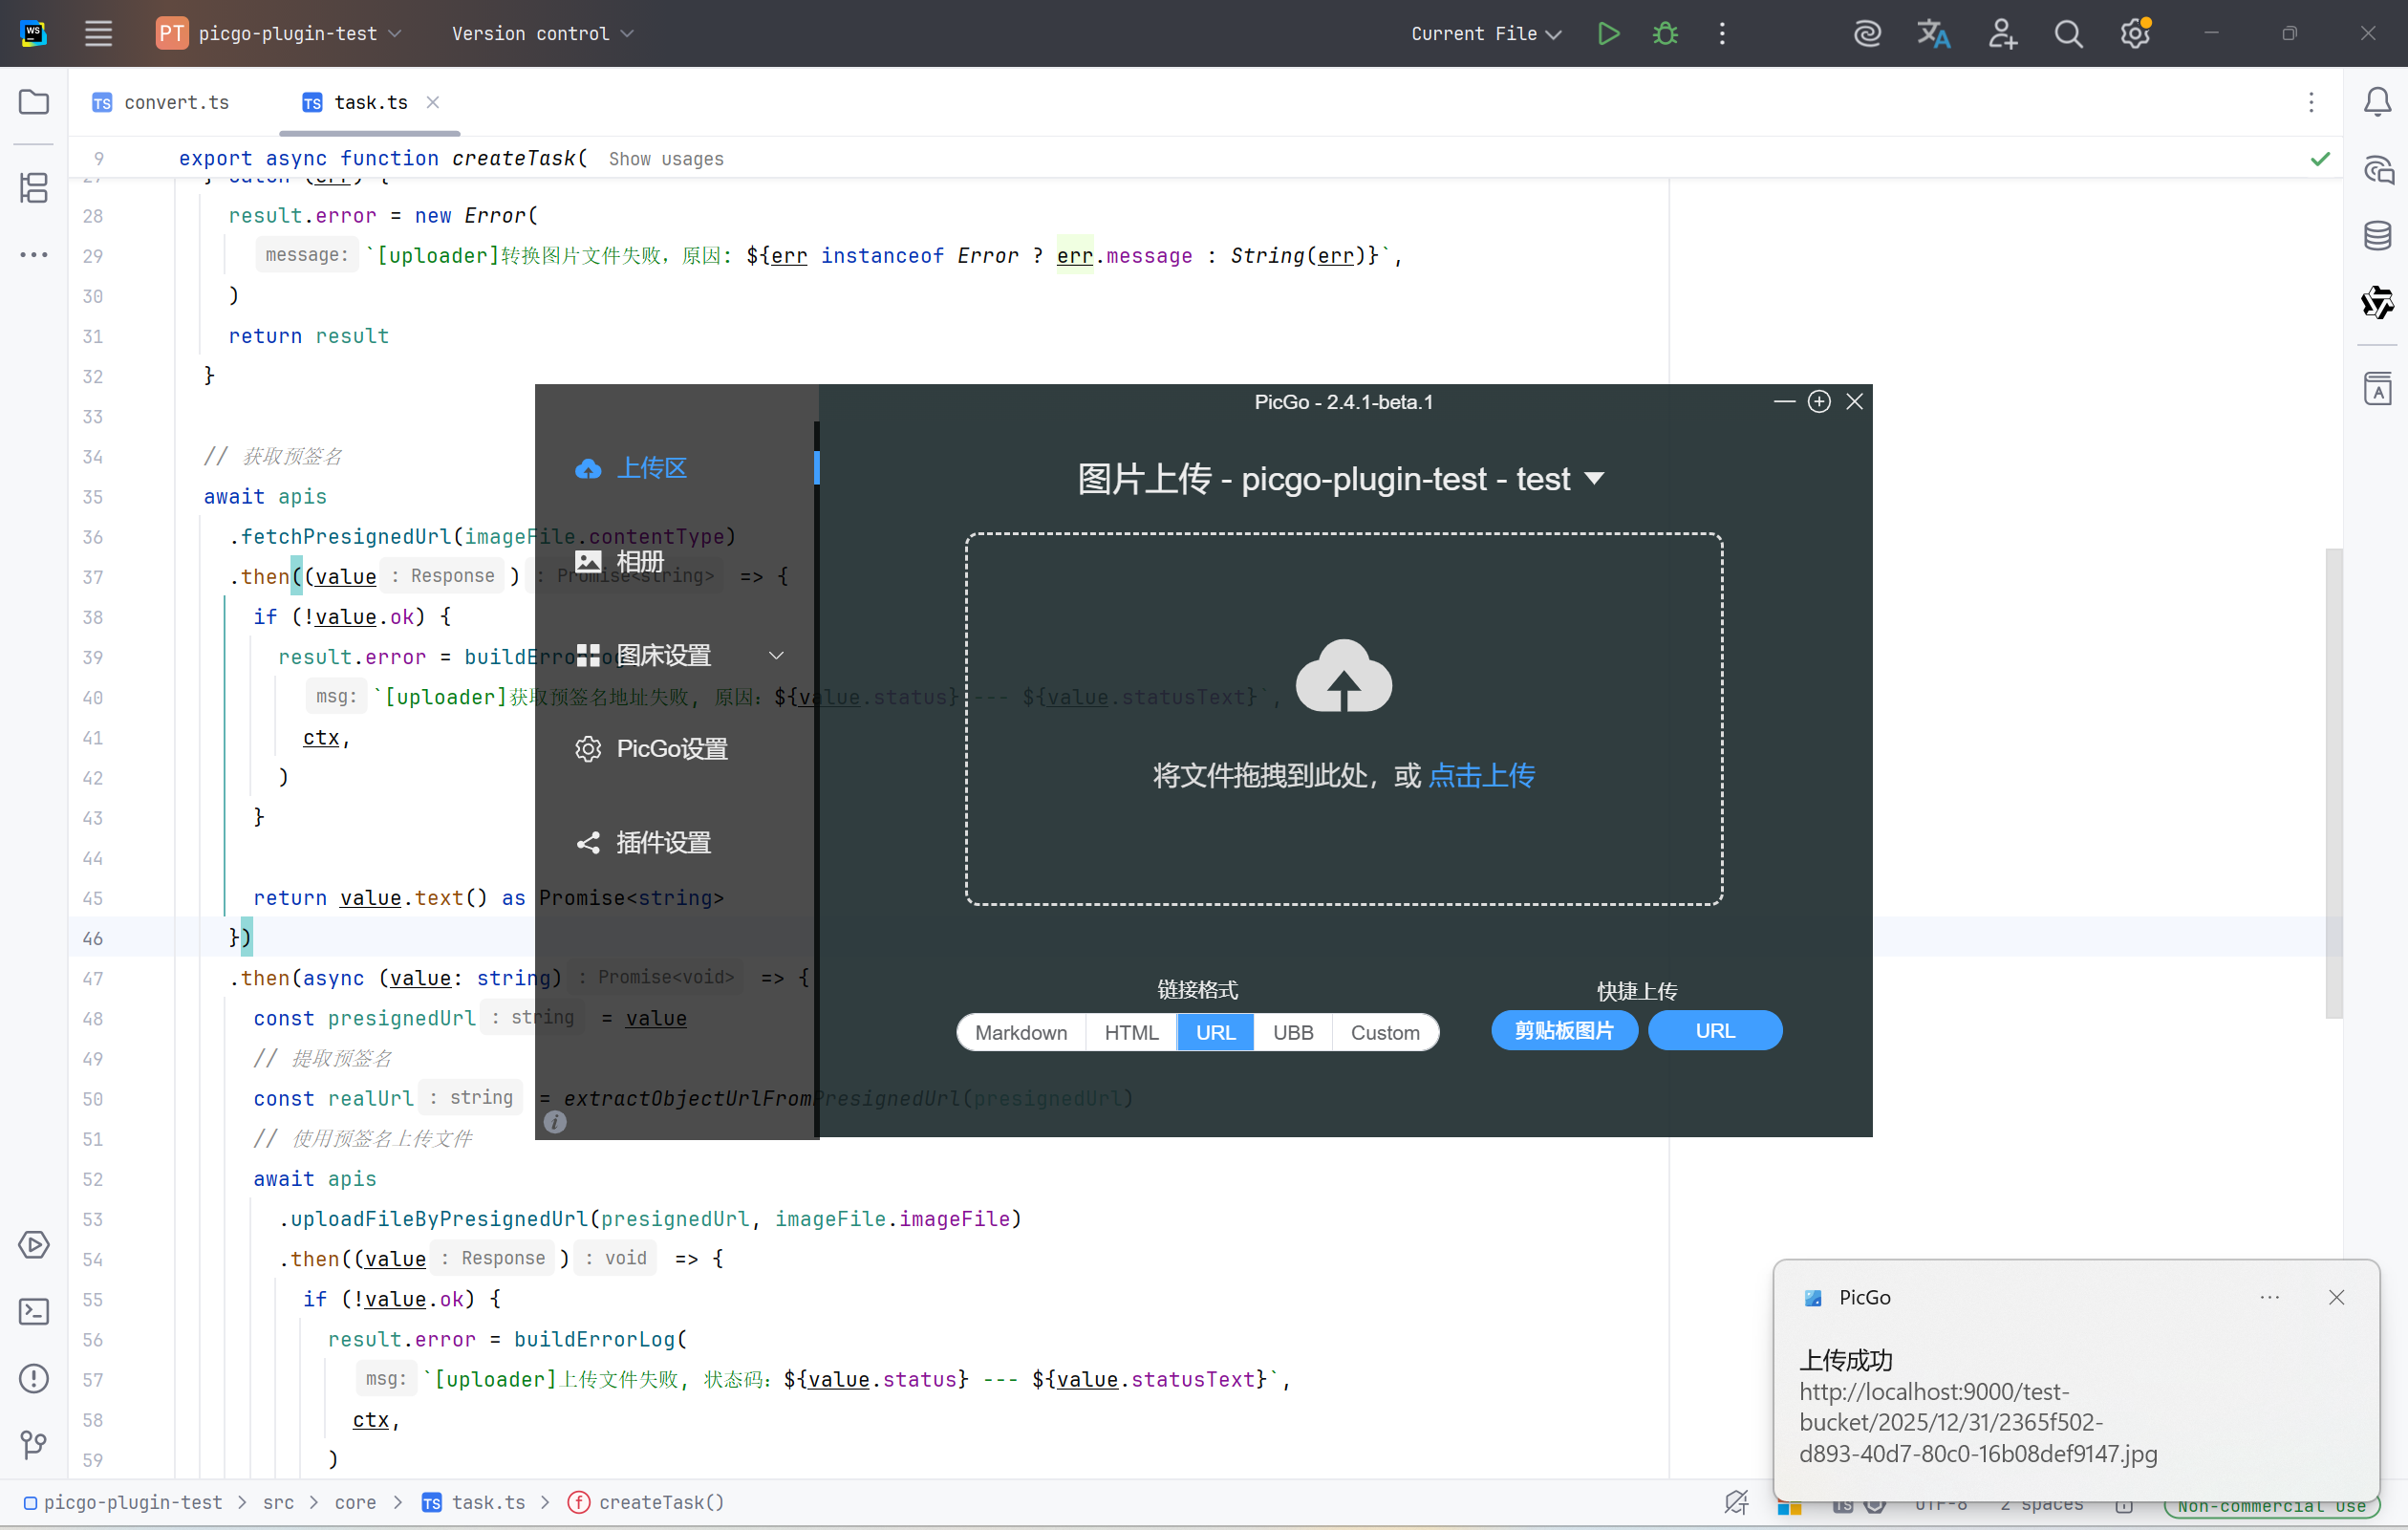
访问一下

完成了。
测试代码 Demo 的仓库:picgo-plugin-test: PicGo 插件开发 Demo
5 总结
- 学习了 PicGo 插件的开发流程。
- 学会了如何开发 PicGo 插件的 Uploader 模块。
- 学会了如何在 PicGo GUI 客户端安装插件。
- 学会了如何联调测试插件。